When your customers use Detrack’s Tap To Track custom tracking link, they will be able to see visuals of the driver icon moving live on the map toward their delivery address and a dynamic ETA; this will be visible as soon as drivers start their trip. If you aren’t using Detrack to help manage your last-mile deliveries then sign up now and try it today.
Learn how Tap to Track works and find out which settings are required for live tracking.
- Set up text and/or email notifications to customers with the Tap To Track custom link
- Activate Tap To Track according to the required settings
- Brief drivers on their new workflow for their next location
- How your customers can Tap To Track
Step 1: Set up text and/or email notifications to customers with the Tap To Track custom URL
First, set up a heading-to email/text notification that is triggered when your drivers click “heading to”. Your customers will then get an email/text with the unique URL to track their deliveries.
Here’s how:
Set up your email settings and SMS / text notifications by following these guides for Twilio and Vonage(Nexmo). You may skip this step if you have already set up your email notification.
a. Settings > Notifications
b. Click on Events > Heading-to
c. Scroll down to the Email section and under Send email to job’s, select Notify email.
d. Scroll down to the Email body and ensure that the following codes are in the text body of the email.
{% if tracking_link != blank %}
Track job status: {{tracking_link}}
{% endif %}
e. Should you wish to send the tracking link via text / SMS, scroll down to Text / SMS and select Phone under Send text to job’s field.
f. Check the box: Include tracking widget link.
To find out how to sign up for a text/SMS account, you can refer these guides.
g. Click Save.
Step 2: Activating Tap To Track required settings
a. Go to Settings > Job Settings > Tracking Widget > click on Generate tracking widget
b. Go to Settings > Job Settings > Options > select your country under Country for address geocoding field.
c. Go to Settings > Job Settings > POD > check Prompt for Next Location Upon Job Completion. When this option is checked, the driver’s app will prompt your drivers to select the next location after a delivery is completed.
d. Should you wish to allow your drivers to calculate the Estimated Arrival Time (ETA) when they are heading to the next location, go to Settings > Job Settings > POD > check Prompt for ETA.
e. Should you wish to allow your customers to rate and leave their feedback on your goods, service or driver after your driver has completed the job,
- Activate the option to provide feedback feature on our tracking widget by going to Settings > Job Settings > Fields
- Scroll down to check the box for Goods Service Rating, Drivers Ratings and Feedback Remarks.
f. Should you wish to use your own longitude and latitude for the destination address, you can refer to this tutorial guide.
Step 3: Brief your drivers on their new workflow for their next location
Your drivers will need to indicate the delivery address they are heading to next. Those using the app on Android smartphones will have ‘heading to next location’ auto prompted.
- On the driver’s app, the driver will tap on Job > Camera icon > Head To Location and the email notification will be sent to the customer to inform them that the driver is on his way to the customer. Alternatively, the driver can tap on Menu > Head To Location to send the email or text notification with the tracking link.
- After the driver completes his first job, the driver will tap on the green button to submit the POD. A pop up “Select Next Location” will appear to prompt the driver for his next job location.
- The customer will receive an email notification informing them that the driver is on his way!
Step 4: How your customers can Tap To Track
Upon receiving the text/email notification, the customer will be able to tap on the tracking link within the message to start live-tracking their deliveries immediately.
Here is a sample of the email notification.
Here’s a sample of the tracking link received in Text/SMS.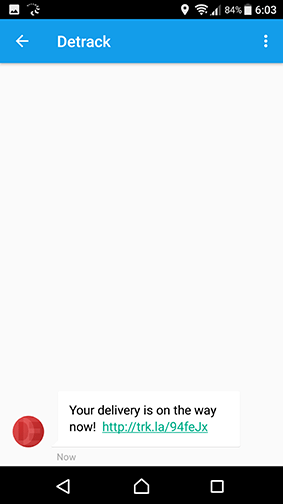
When your customers click or tap on the tracking link, they will be able to see the live map with the driver’s icon moving toward them.
Should you wish to set up and customize your tracking widget, you can refer to this tutorial guide.
If you require any further assistance, please do not hesitate to open a support ticket with us from your Detrack dashboard. Happy Tracking!