Setting up a delivery management system like Detrack can feel overwhelming—especially when starting. But here’s the good news: Detrack is built with ease of use in mind. With intuitive navigation and powerful customization options, you can tailor the platform to match your unique workflow.
In this beginner-friendly guide, we’ll walk you through Detrack’s custom settings, explain what they do, and how to configure them for smooth, efficient deliveries—right from day one.
Whether you’re a logistics manager, courier company owner, or eCommerce operator, this guide will give you a strong foundation in configuring your Detrack account like a pro.
Why Custom Settings Matter in Delivery Management
No two businesses are exactly alike—and your delivery management software shouldn’t treat them as such. That’s where Detrack’s custom settings shine. They allow you to:
- Set up your own delivery workflows
- Match your branding on customer-facing documents
- Configure automated notifications
- Optimize driver assignments and routes
- Ensure compliance with internal policies (e.g., vehicle checklists, POD requirements)
- Enable seamless integration with third-party tools
The result? A highly efficient, fully customized system that grows with your business.
What You Can Customize with Detrack
When you log in to your Detrack dashboard, you’ll find a tab called Settings in the main menu. This is your control center for all custom configurations.
1. Organization Settings
This is where you define the basic info and branding for your account.
Key Fields to Set Up:
- Company Name and Logo: Your branding will appear on emails, PODs, and tracking pages.
- Time Zone & Currency: Make sure your time zone is accurate—this impacts delivery scheduling and logs.
- Contact Info: Used in notification templates and shared with customers.
Tip: Upload your logo in a high-resolution PNG or JPEG format for a professional look.
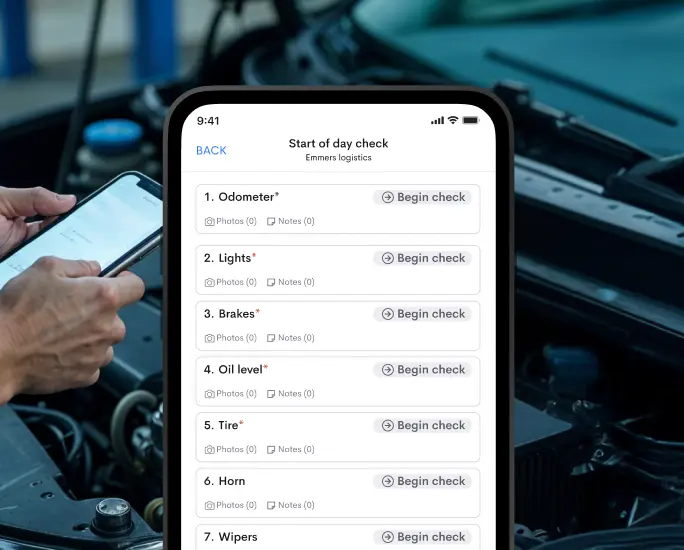
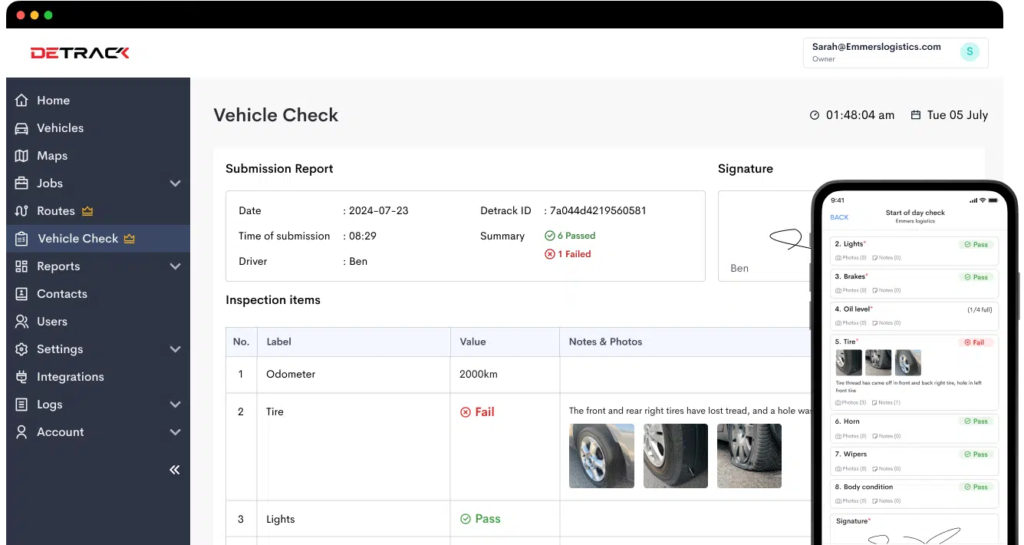
2. Vehicle Settings
This section helps you define the specifications of the vehicles in your fleet.
Key Features:
- Vehicle Type (van, truck, bike, etc.)
- Capacity Metrics: Volume, weight, number of stops
- License Plate Numbers
- Pre-Start Checklist Configuration
Why It Matters: By accurately setting vehicle capacity, you enable smarter route optimization and reduce overloading risks.
3. Driver Settings
Your drivers are the frontline of your delivery operation. Here’s how to set them up correctly:
Customizable Fields:
- Driver Name and Contact Info
- Driver ID (used for app logins)
- Vehicle Assignment
- Default Route Areas
You can also assign driver roles and permissions, allowing or restricting access to certain app functions like manual status changes or POD edits.
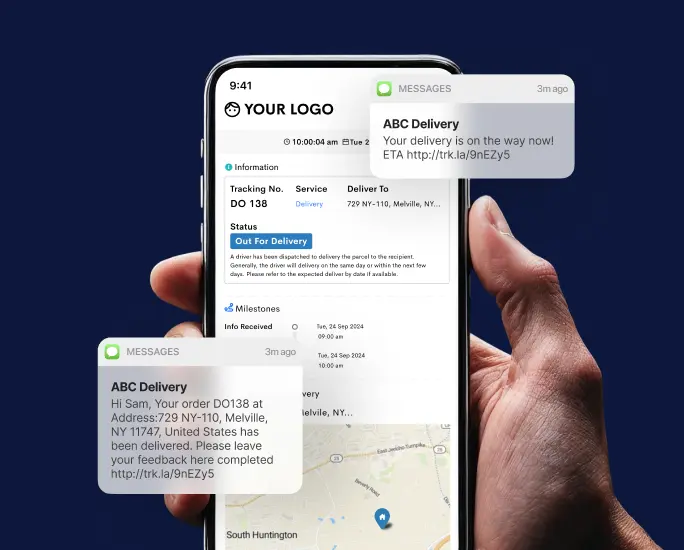
4. Notifications
One of Detrack’s strongest features is its real-time notification system. Customers stay informed at every stage—minimizing “Where’s my order?” queries.
Types of Notifications:
- Job Created
- Out for Delivery
- Delivered
- Failed Delivery
- Custom Statuses
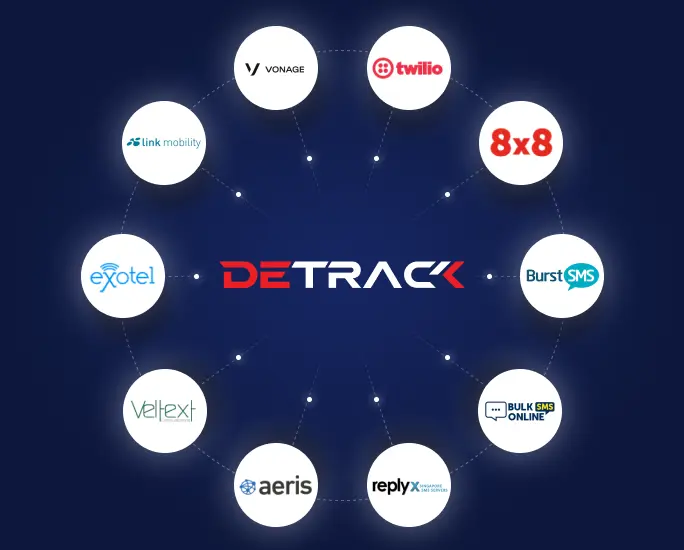
You can enable SMS or email alerts for each type, and fully customize:
- Sender info
- Message subject
- Body text (with dynamic tags like customer name, tracking link, ETA, etc.)
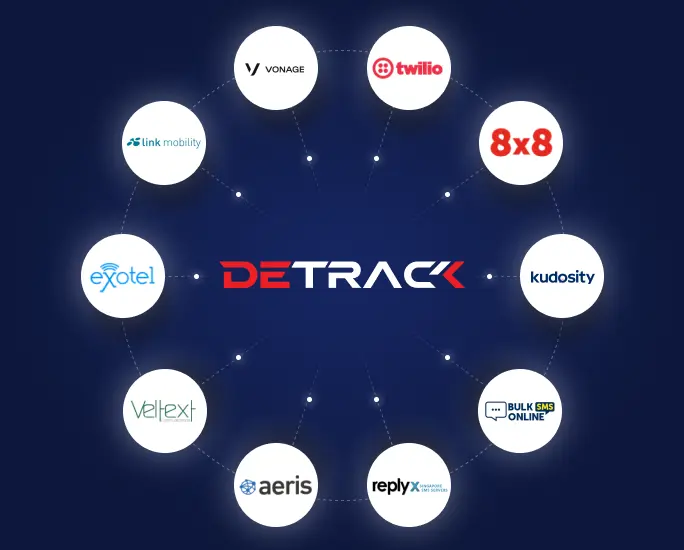
Integrations: Detrack supports third-party SMS gateways like Twilio, Vonage, 8×8, and BurstSMS, giving you flexibility and control.
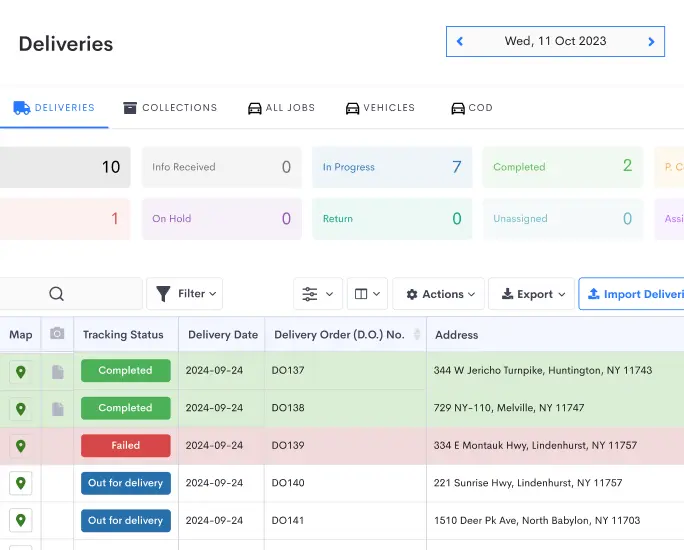
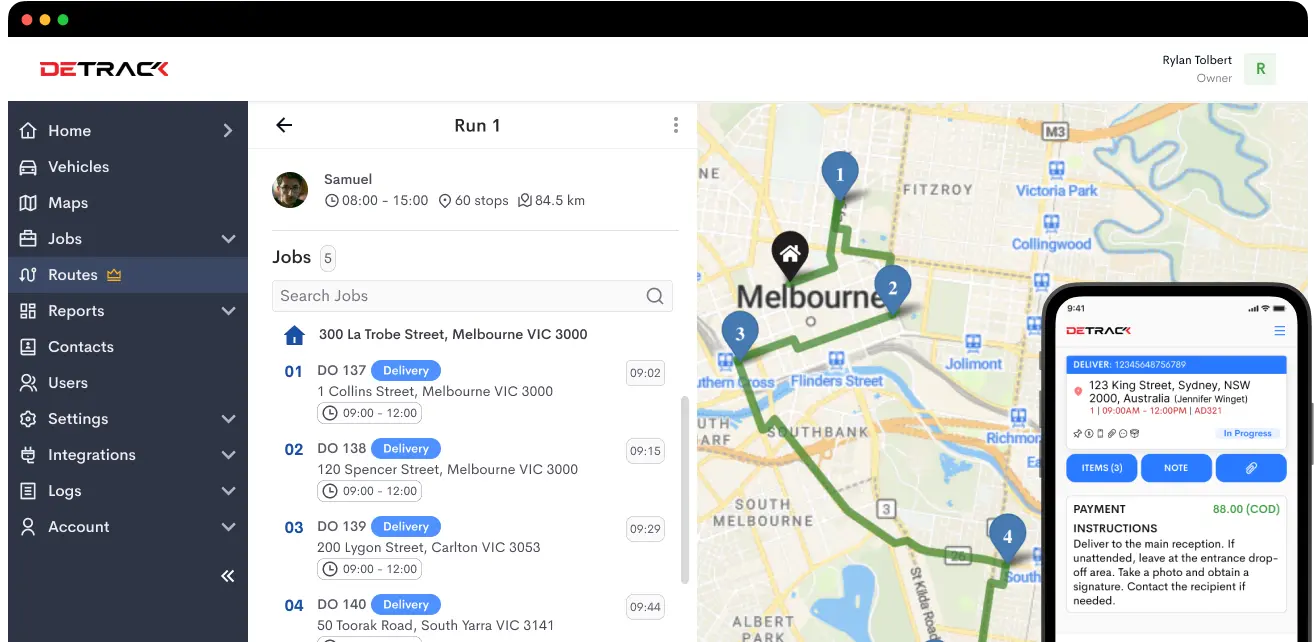
5. Job Settings
The Jobs section is where you define how delivery and collection tasks behave in the system.
Key Options:
- Job Type Labels (e.g., Delivery, Pickup, Return)
- Required Fields for job creation
- Default Job Statuses (Pending, In Progress, Completed, Failed)
- Custom Fields (e.g., Temperature for perishables, Invoice Number)
You can also control auto-assignment rules, time windows, and priority flags.
Example Use Case: If you’re in food delivery, you might create a custom field for “Order Temperature” and mark it as required.
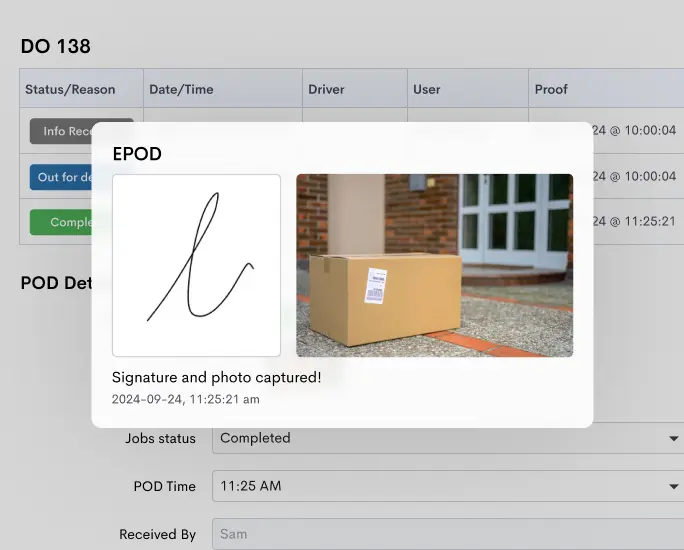
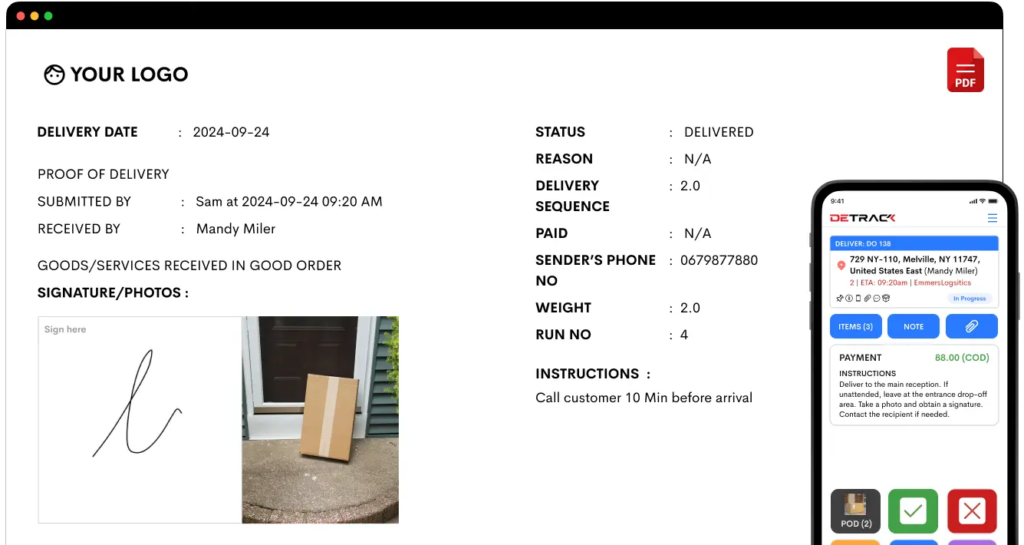
6. Proof of Delivery (POD)
POD is essential for accountability and customer satisfaction.
Configuration Options:
- Photo Requirements (e.g., photo of item, recipient, location)
- Signature Capture (enable/disable)
- Custom POD Notes (e.g., “Left with neighbor,” “Delivered to reception”)
- Watermark Settings (e.g., time, date, driver ID)
You can even customize the layout of the POD PDF and include your brand elements, disclaimers, or order details.
Did You Know? You can enable contactless POD options like photo-only confirmation, which is a must for modern delivery safety.
7. Mobile App Settings
This governs what your drivers see and do in the Detrack mobile app (available on iOS and Android).
Customize:
- Enable Location Tracking
- Allow Driver Notes
- Barcode Scanning
- Status Control (limit which statuses a driver can apply)
By adjusting these options, you streamline the driver’s experience and reduce training time.
Smart Feature: Use “Geofencing” to auto-update delivery status when a driver enters the drop-off zone.
8. Security and User Permissions
Keep your data safe and operations compliant.
Set Up:
- User Roles (Admin, Dispatcher, Viewer, etc.)
- Two-Factor Authentication
- Login Activity Logs
- IP Restrictions (optional)
Best Practice: Assign the least privilege necessary—especially for temp or part-time users.
9. Integrations
Want to supercharge Detrack’s functionality? The Integrations tab lets you connect to other tools in your tech stack.
Supported Integrations Include:
- Order Management: WooCommerce, Shopify, AfterShip, MachShip
- Communication: Twilio, Vonage, BurstSMS, 8×8
- Routing & Mapping: Google Maps, Route Optimization engines
- Analytics: Export data to Excel or Google Sheets
You can also use webhooks or API keys to create custom integrations.
Need Help? Detrack has excellent API documentation and a responsive support team for integration help.
How to Test Your Configuration
Before going live, run a test delivery cycle using the following steps:
- Create a test delivery job in the dashboard
- Assign it to a driver
- Track the job through your own tracking page
- Test SMS/email notifications
- Complete the job using the driver app
- Review the POD PDF and logs
This will help you spot issues early and fine-tune your workflow.
Troubleshooting Tips
Even with a user-friendly interface, you might hit a few bumps. Here’s what to do:
| Issue | Likely Cause | Solution |
| Notifications not sent | Wrong email/SMS gateway setup | Re-check API keys and settings |
| Jobs not showing on driver app | Driver not assigned / incorrect status filter | Assign the job and refresh app |
| Incomplete POD | Photo/signature requirements not set | Update POD settings to reflect needs |
| App lag or crash | Outdated app or large cache | Update the app and clear cache |
Getting the Most Out of Detrack’s Custom Settings
Detrack’s custom settings offer powerful ways to tailor the system to your operational needs. From route planning to POD to automated notifications, each configurable setting saves you time, improves accuracy, and delivers a better customer experience.
The best part? You don’t need to be a tech wizard to get started.
Take it step by step—start with the essentials, test your setup, and build from there. As your delivery volume grows, you’ll be glad you took the time to build a solid foundation.
With Detrack, configuring your delivery process isn’t just easy—it’s empowering. Try Detrack today!