-
Downloading the Detrack App (Driver App)
The Driver App is the medium to receive the jobs from the Detrack dashboard.
Steps to download the Detrack App in your iPhone / Android phone.

iPhone: - Open the App Store app
- Search for: Detrack
- Select the Detrack Proof Of Delivery POD listing in the search results
- Tap on the Install button to download the Detrack App
Android - Open the Google Play app
- Search for: Detrack
- Select the Detrack Proof Of Delivery POD listing in the search results
- Tap on the Install button to download the Detrack App
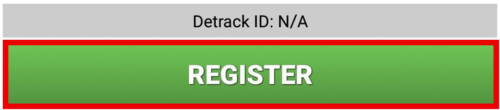
- Open up the Detrack Driver App.
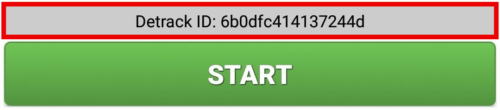
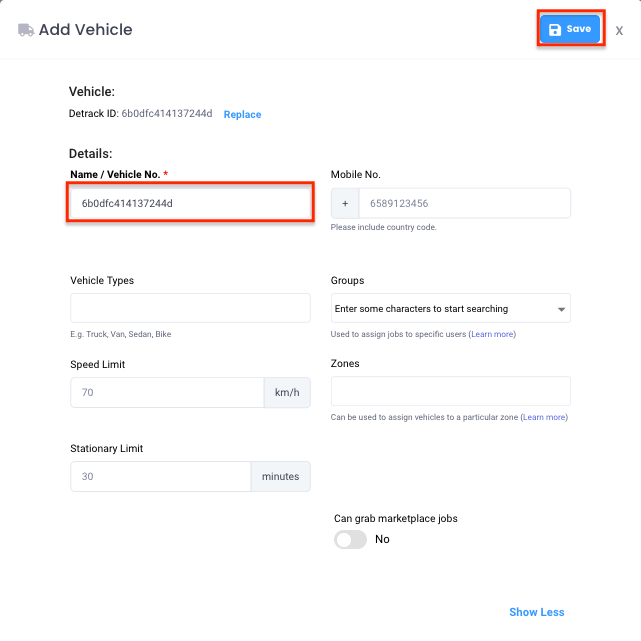
- Click the green Register button (at the bottom of the screen). This Detrack ID is for entering into the Add Vehicle form.

- A unique Detrack ID will be generated.
How To Add A Vehicle
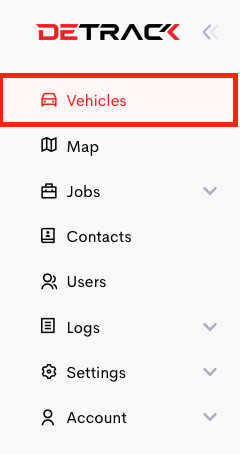
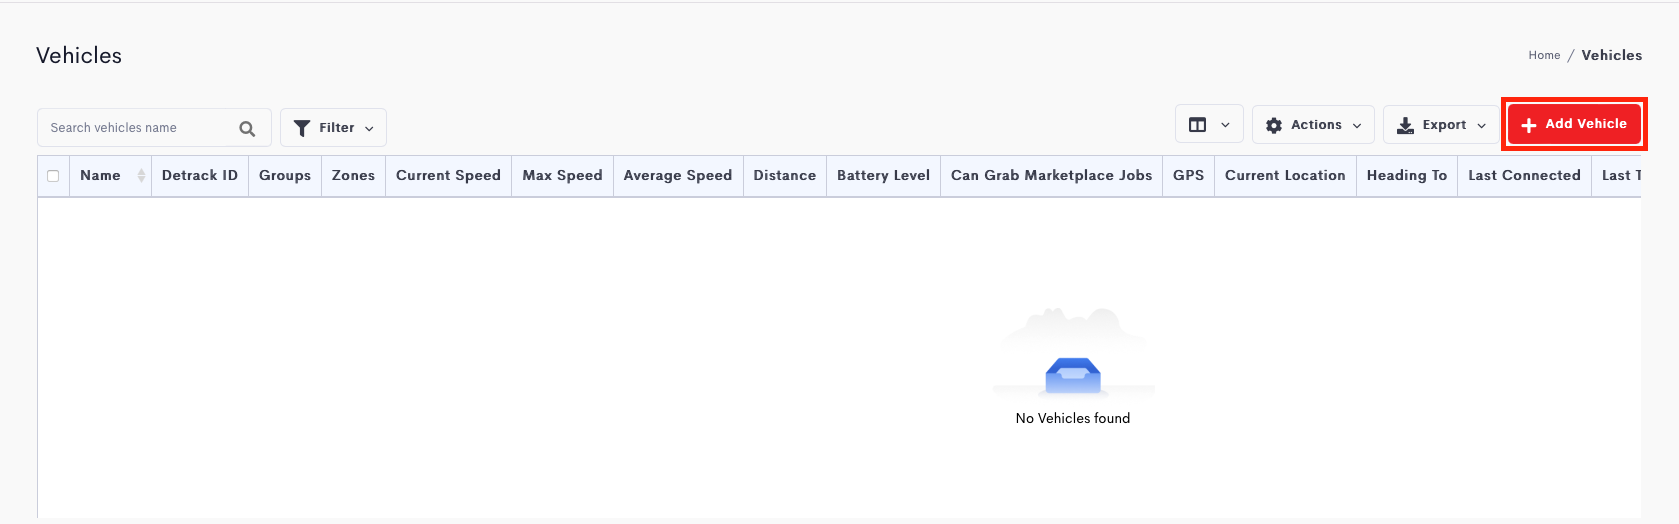
- In your Detrack admin dashboard, click on the Vehicles tab.

- Click Add Vehicle.

- An Add Vehicle form will appear.

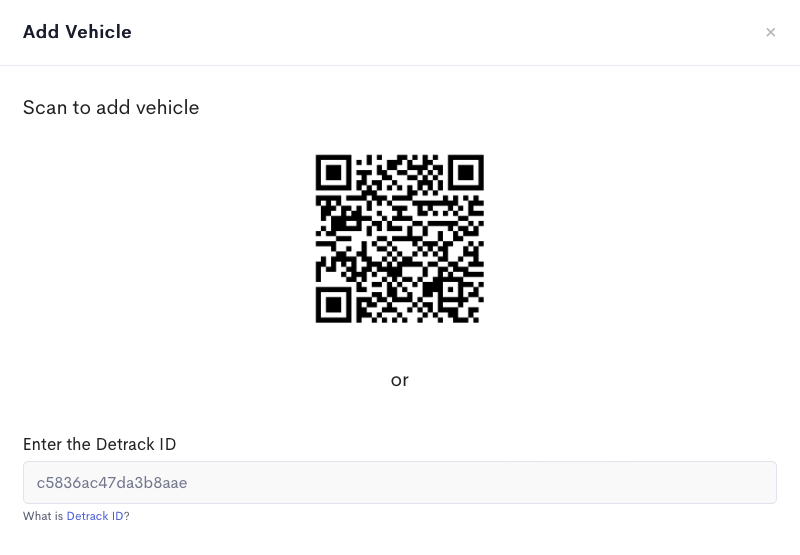
- Perform either of the following:
-
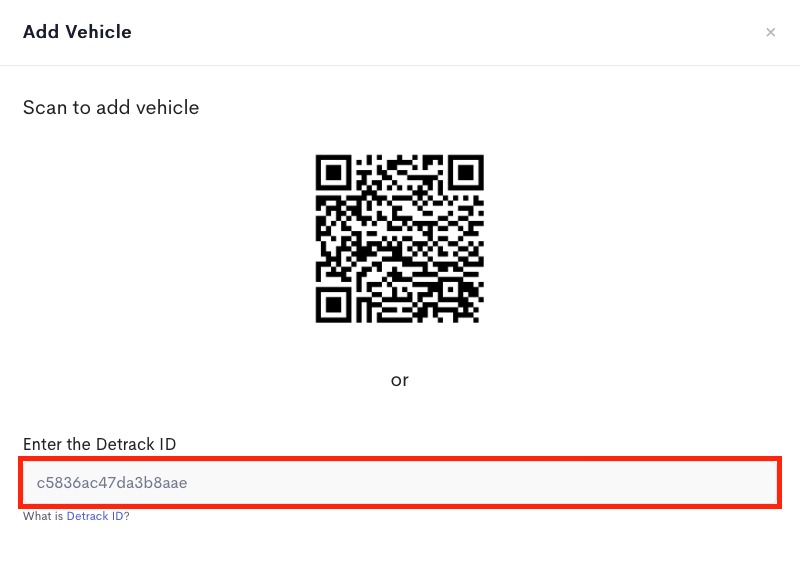
- Enter the Detrack ID (from the Driver App) into the field.

- Enter the Detrack ID (from the Driver App) into the field.
-
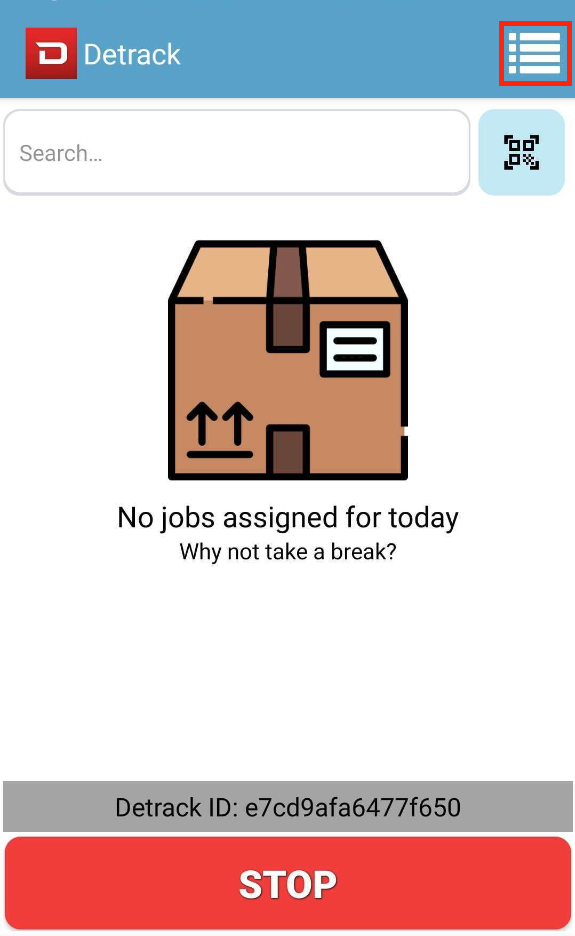
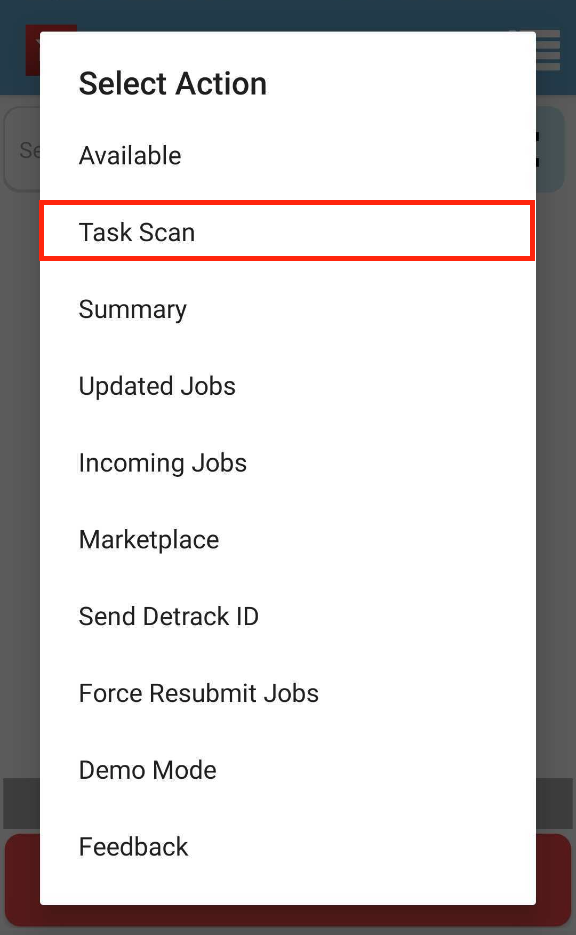
- In the Driver App, tap on the menu at the top right hand corner > Task Scan > Check-in > Scan the QR code.

- Tap Task Scan.

- Tap Check-in.

- Tap Scan the QR Code to scan the QR Code displayed in the Add Vehicle form.
- In the Driver App, tap on the menu at the top right hand corner > Task Scan > Check-in > Scan the QR code.
-
- Edit the Name.

- Click Save to add vehicle into your Detrack account.
Field Description Name / Vehicle No. The name (usually the vehicle plate no.) you wish to assign to the vehicle so that you can easily identify it from the list or on the map. Speed Limit e.g. 70 km/h or 90 km/h is the maximum speed your driver can drive at before we alert you of your driver speeding. Stationary Limit The maximum amount of time (e.g. 20 mins or 30 mins ) your driver can be stationary or not moving before we alert you. Mobile No. The mobile number of the driver that your customers can contact regarding the delivery. Country code is required. Groups Assign the driver to Group.
Refer to How To Use The Group Feature To Restrict The Information Available To Each Sub-UserCan grab marketplace jobs To enable the vehicle to grab jobs from the marketplace. -
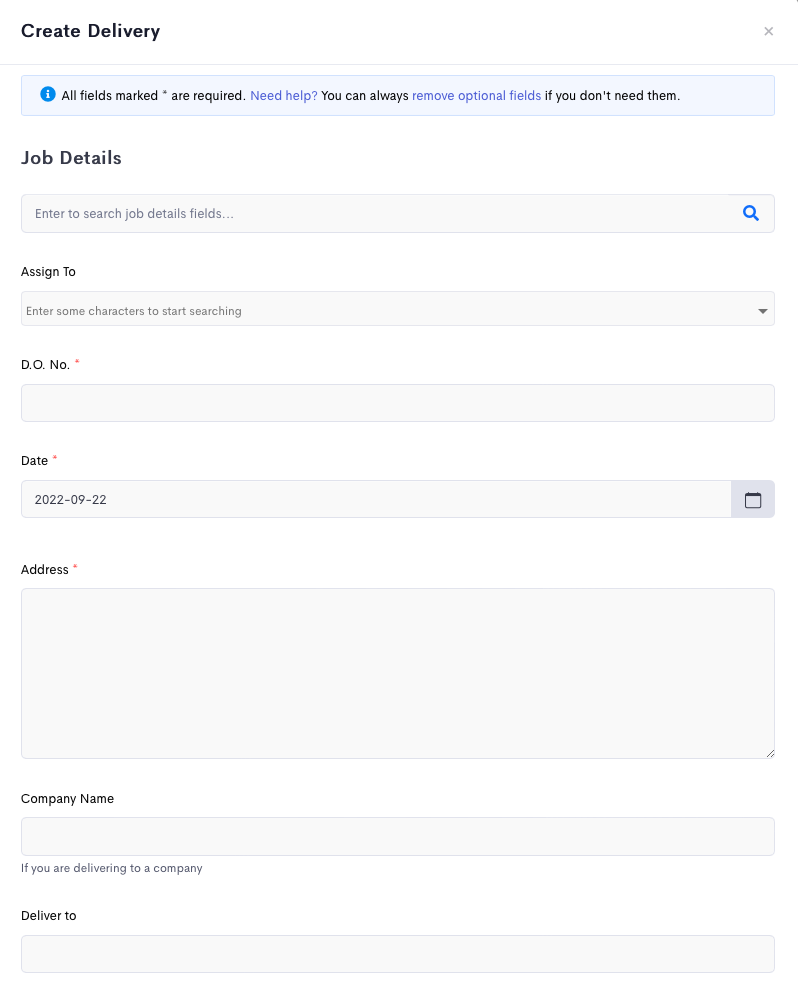
Job Creation
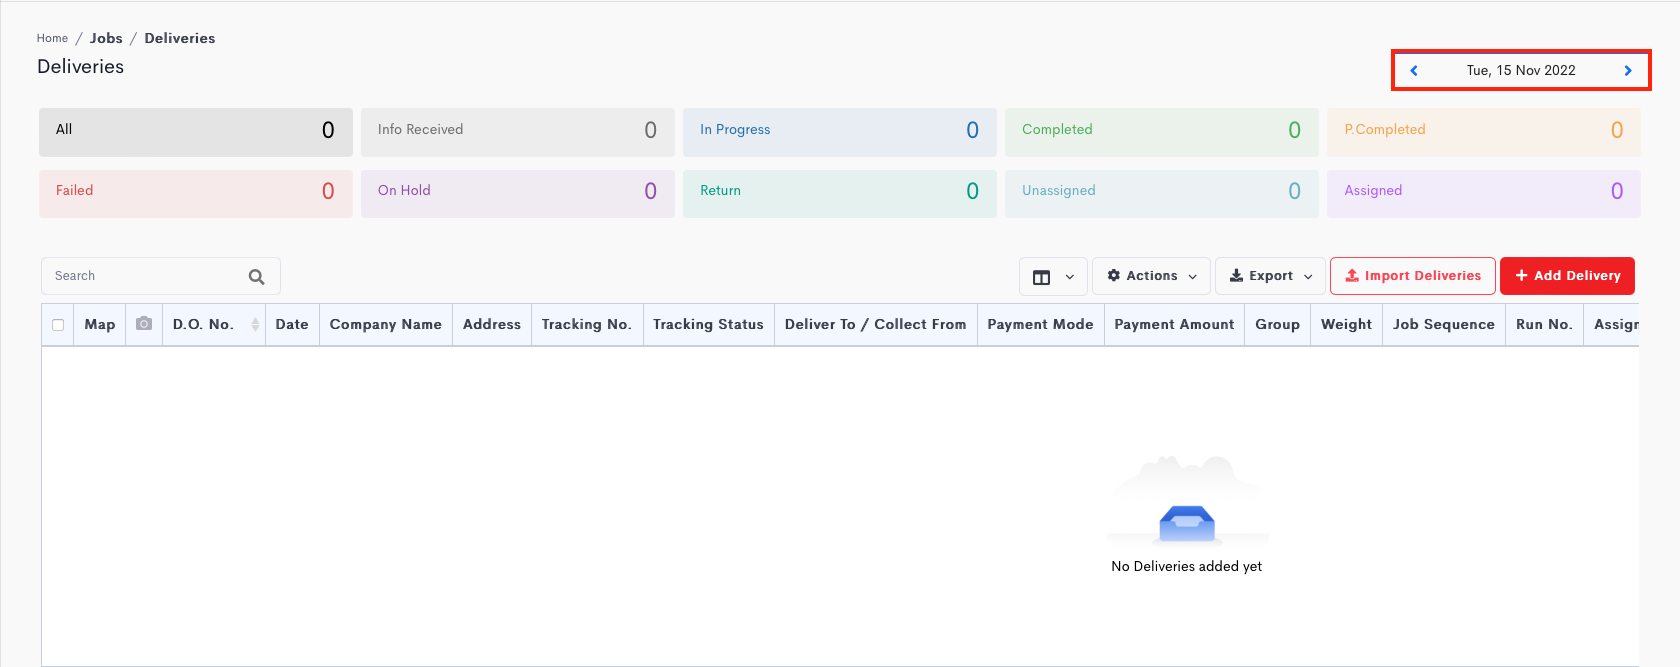
- Click on Jobs > Deliveries.

- Select the date of the delivery.

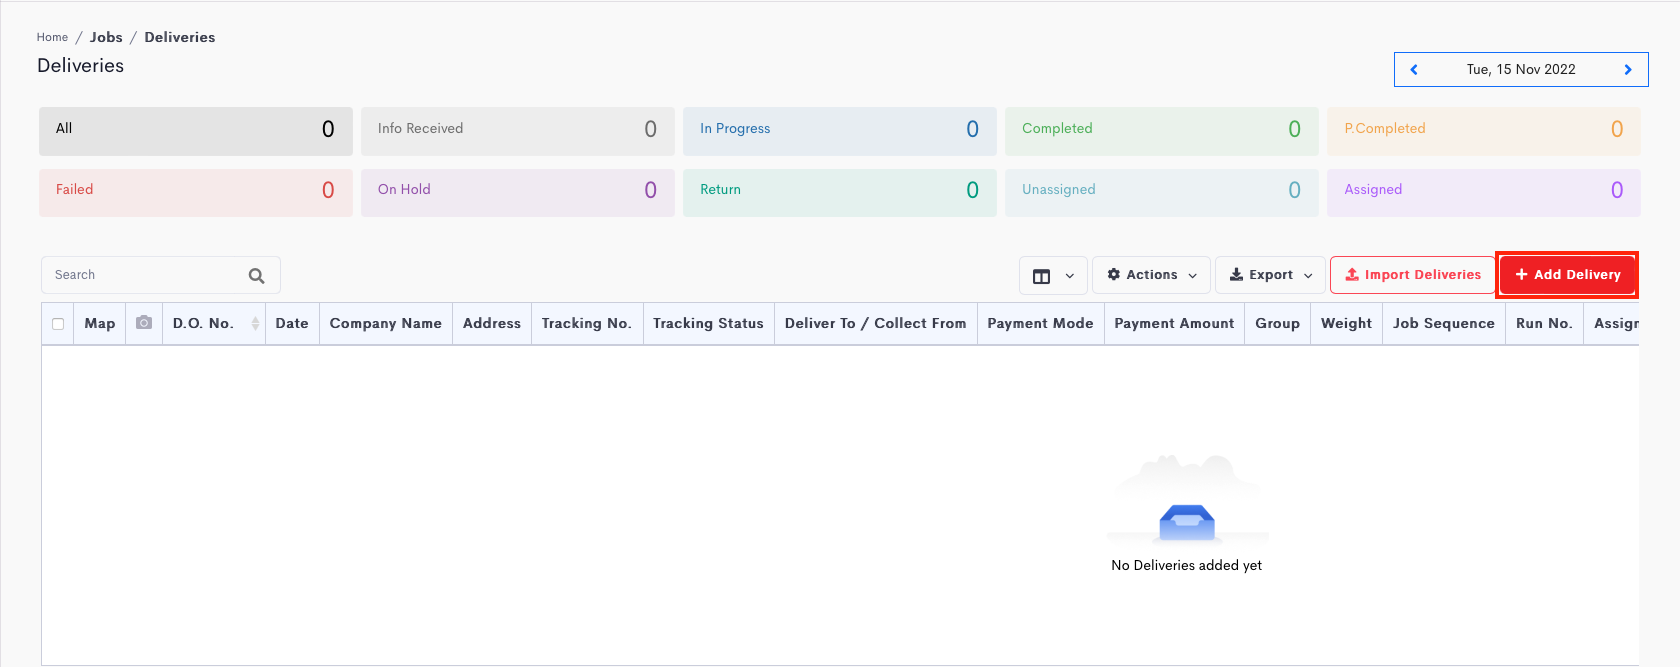
- Click the Add Delivery button to reveal a job form.
- Job Creation

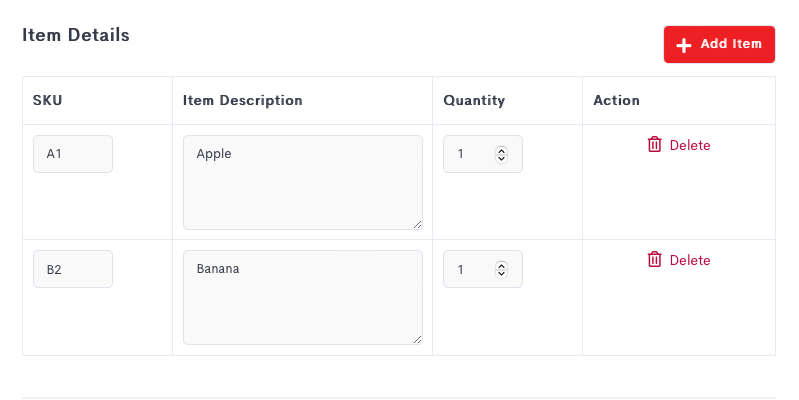
- Click the Add Item button to add entries into the Item Details section.

Field Description Date Date to perform the delivery. D.O. No. The delivery order number or any ID that uniquely identifies the delivery. Deliver To Recipient’s name. This can be an individual name or a company name or both e.g. Dason Goh (Detrack Systems Pte. Ltd.). Address Location of the delivery. Job Time Time when the delivery should be made. Tracking No. Identifier for the delivery. Phone No. Contact number of the recipient. Notify email Email address of recipient. Instructions Information regarding the delivery. Assign To Vehicle for performing the job. Items Field Description SKU Stock keeping unit number. Item Description Information regaring the item. Quantity Number of item. - Click on Jobs > Deliveries.
-
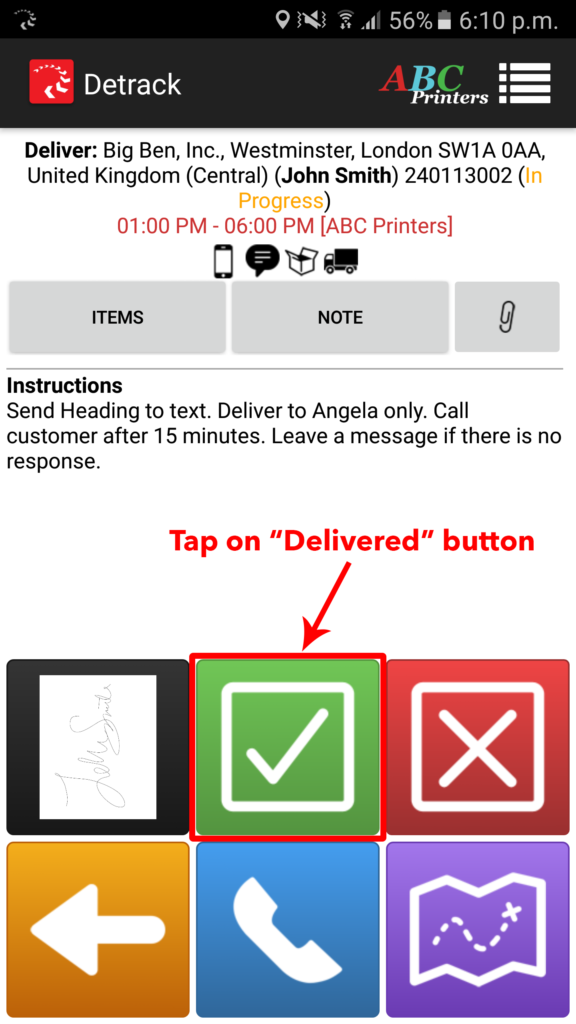
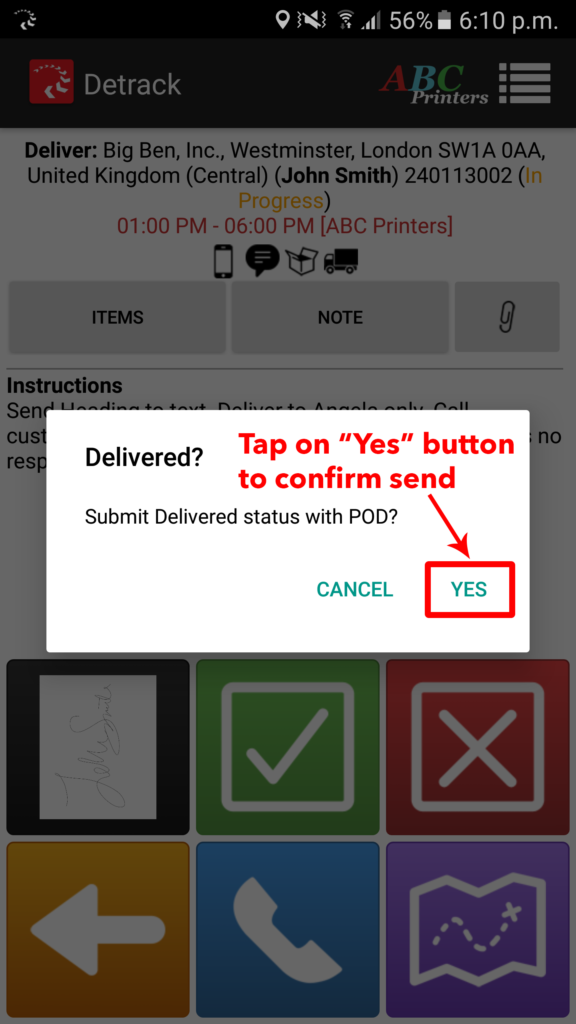
Driver App
- Tap on Delivered button.

- Tap on Yes button to confirm submission.
- Tap on Delivered button.
-
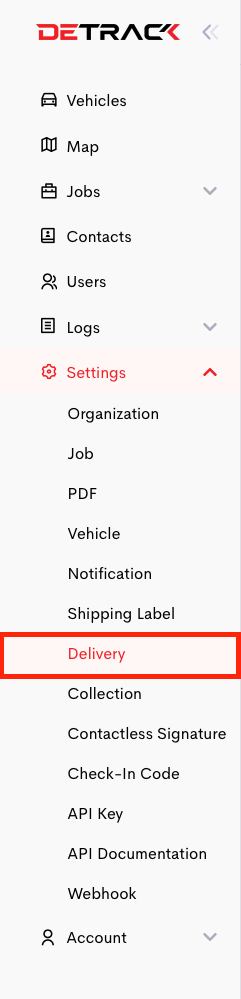
Field Setup
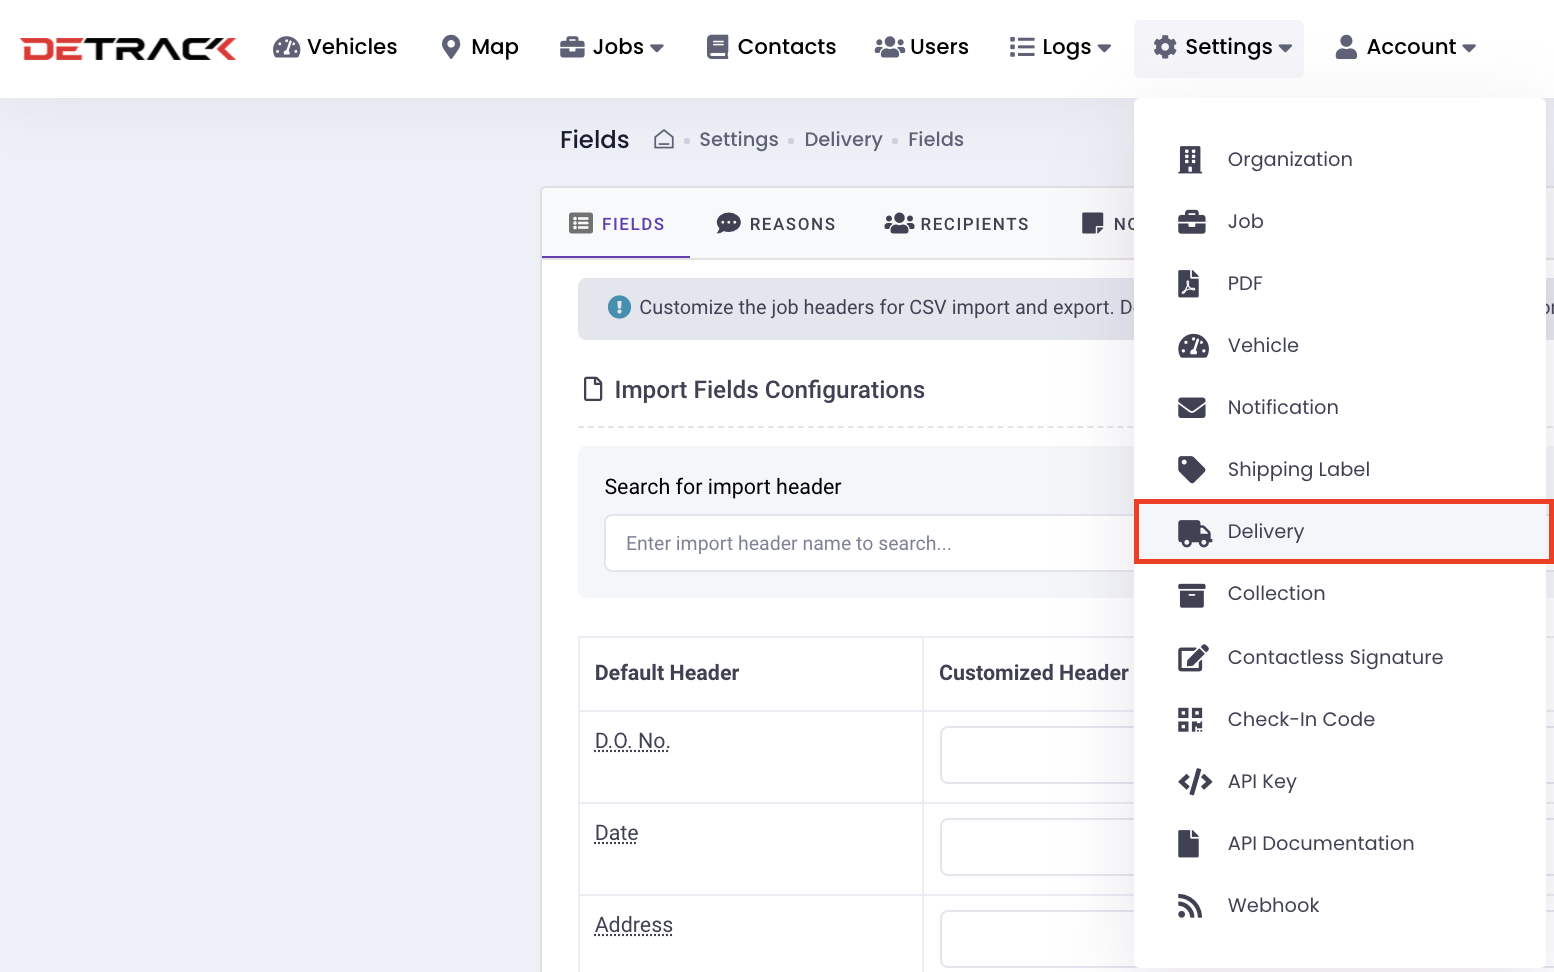
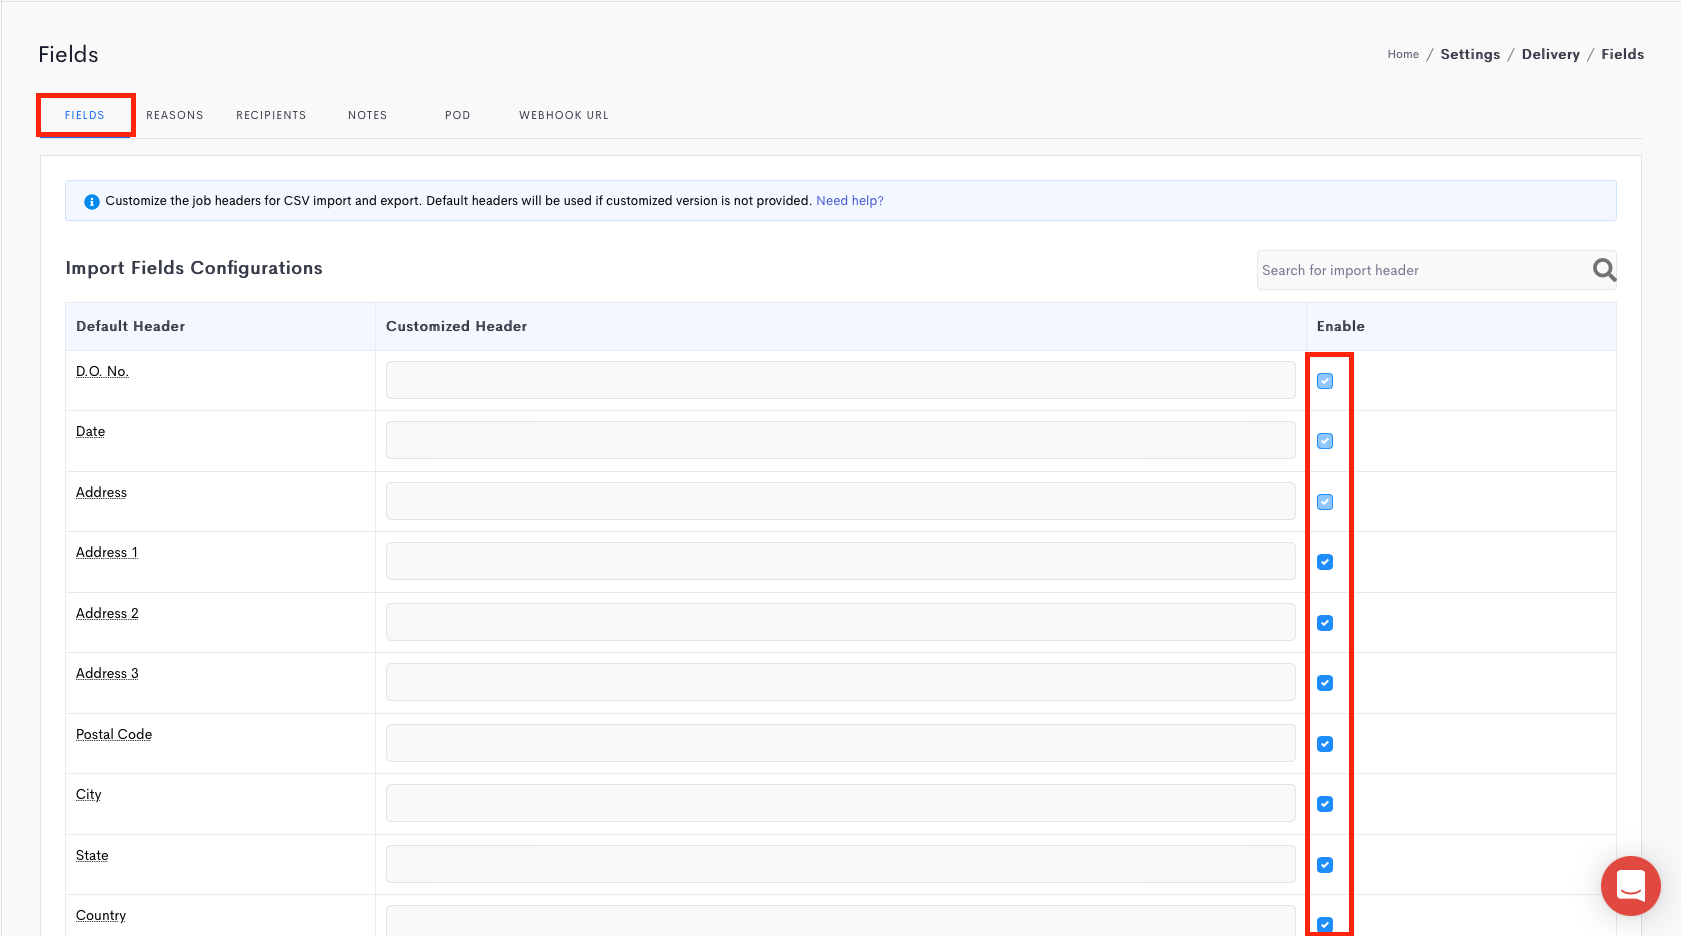
- Click on Settings > Delivery.

- Under the Fields tab. > Save.

- Check/uncheck the checkbox for the field/s that you wish to enable/disable under the Enable field (third column)

- Click Save when done.

- Click on Settings > Delivery.