In light of the COVID-19 outbreak, the need for social distancing and reducing physical contract in business operations have become urgent priorities.
This tutorial will guide you to set up the contactless signing feature for your recipients to sign from their own device instead of the driver’s device.
There are 2 options available to send the contactless signature link to the recipient. You can choose to send the link through an email or SMS / text notification to be triggered automatically when the driver indicates he is already at the recipient’s location.
Alternatively, you can set up a QR code to be attached to the specific delivery for the driver to let the recipient scan on site to be redirected to the link where the recipient can sign on his own mobile device.
Here’s how sending the link to the recipient via email or SMS / email notification works:
Here’s how having the recipient scan the QR code from Drivers’ device to sign works:
Email Or SMS / Text Notification Method
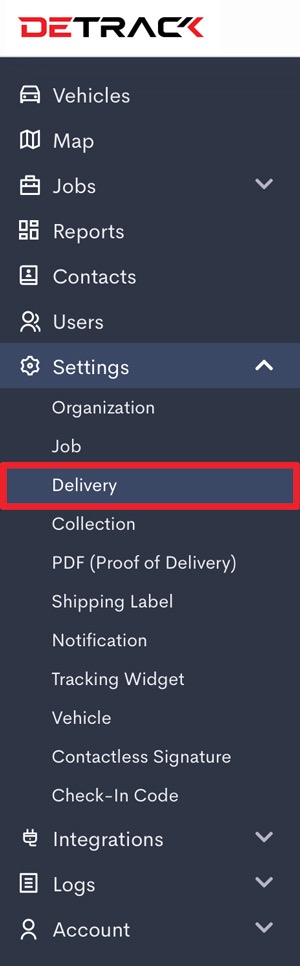
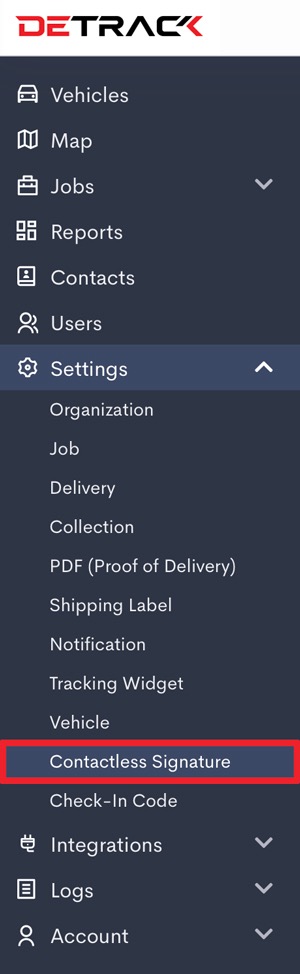
- Navigate to Settings > Contactless Signature.

- Switch on Enable Contactless Signature.

- Click Save when done.
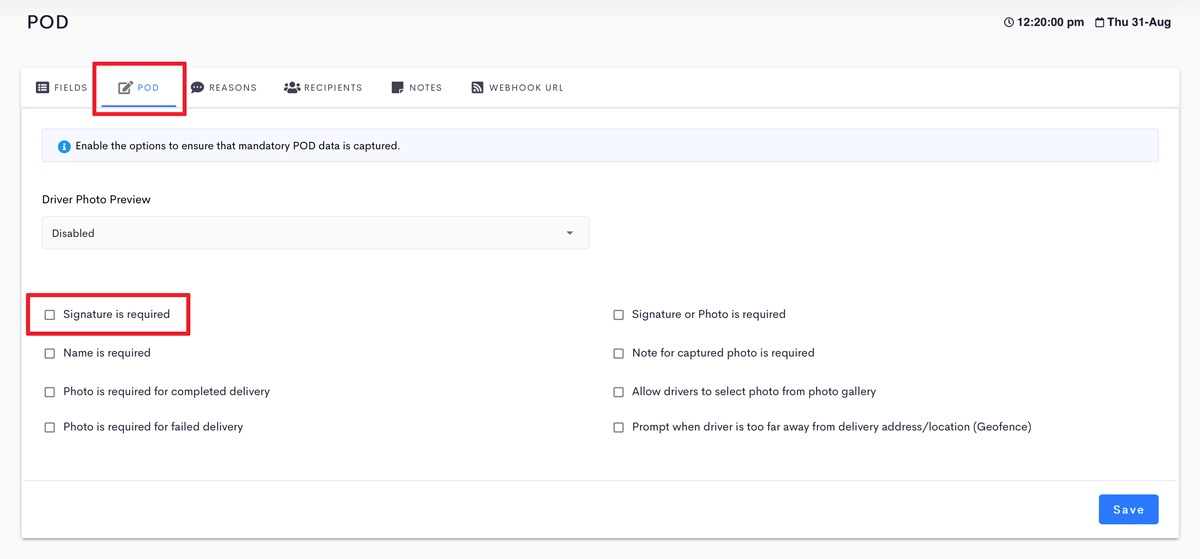
- Navigate to Settings > Delivery / Collection > POD.

- Switch off Signature is required to allow the driver to submit the job without a signature through the Driver App.

- Switch on Signature or Photo is required. (Optional)
- Navigate to Settings > Job > Fields.

- Enable the Arrived At field for the Arrive At Location to appear to the menu of the Driver App.

- Click Save when done. 1
- Next, set up your Email or SMS notifications as per How To Set Up Email And Text SMS Notifications. 1
- Set up your SMS settings for SMS notification if you have not done so.


Follow the steps below to setup notifications:
- Go to Settings > Notifications.
- Go to Text / SMS settings tab and connect to your third party sms provider (optional – required if you wish to send text messages via Detrack).
- Register an account with one of the following list of Text / SMS providers:
- Vonage(Nexmo) – Enter your Vonage(Nexmo) API key and Vonage(Nexmo) API Secret into fields.
- Twilio – Enter your Twilio Account SID and Twilio Auth Code into the fields.
- 8×8 (Wavecell) – Enter your 8×8 (Wavecell) API key into the field.
- BurstSMS – Enter your BurstSMS API key and BurstSMS Secret into the fields.
- BulkSMS – Enter your BulkSMS Username and BulkSMS Password into the fields.
- ReplyX – Enter your ReplyX API key into the field.
- Veltext – Enter your Veltext User ID and Password into the fields.
- Exotel – Enter your Exotel API key into the field.
- Link Mobility – Enter your Username, Password, Platform Id, Platform Partner Id and API URL into the fields.
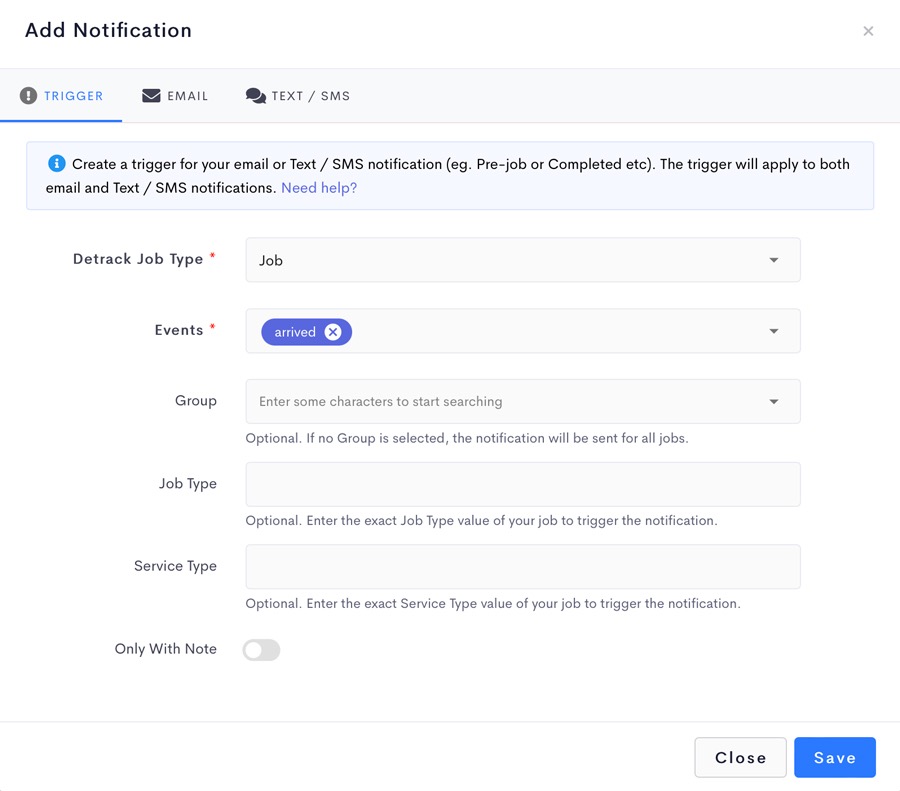
Next, add an Arrived event. This tutorial will be using the Arrived event. 12. Navigate to Settings > Notification > Notification Settings tab and click on Add Notification. Then, click on the Events field and select arrived and Save.
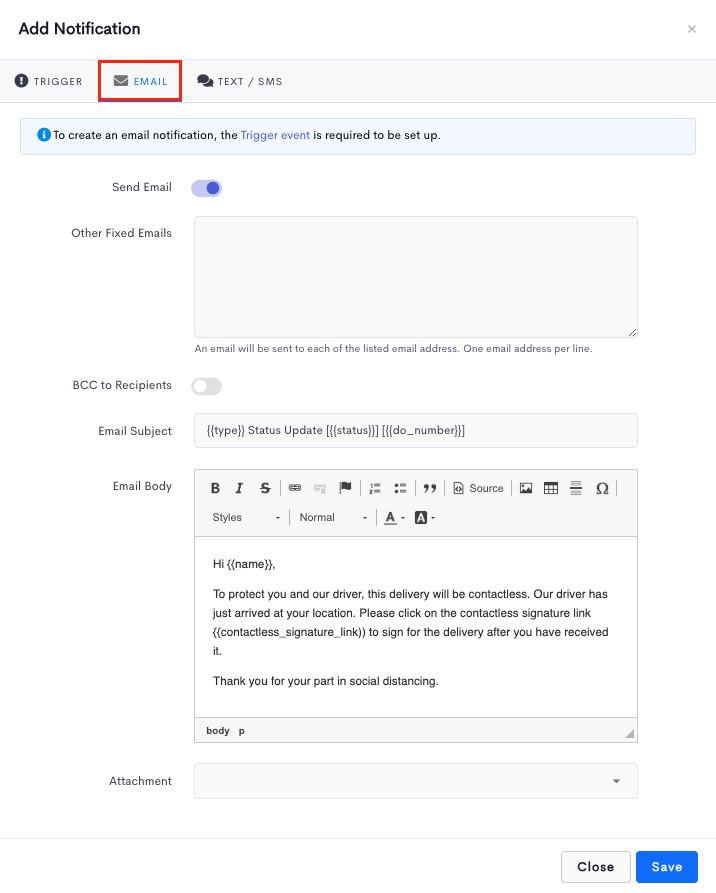
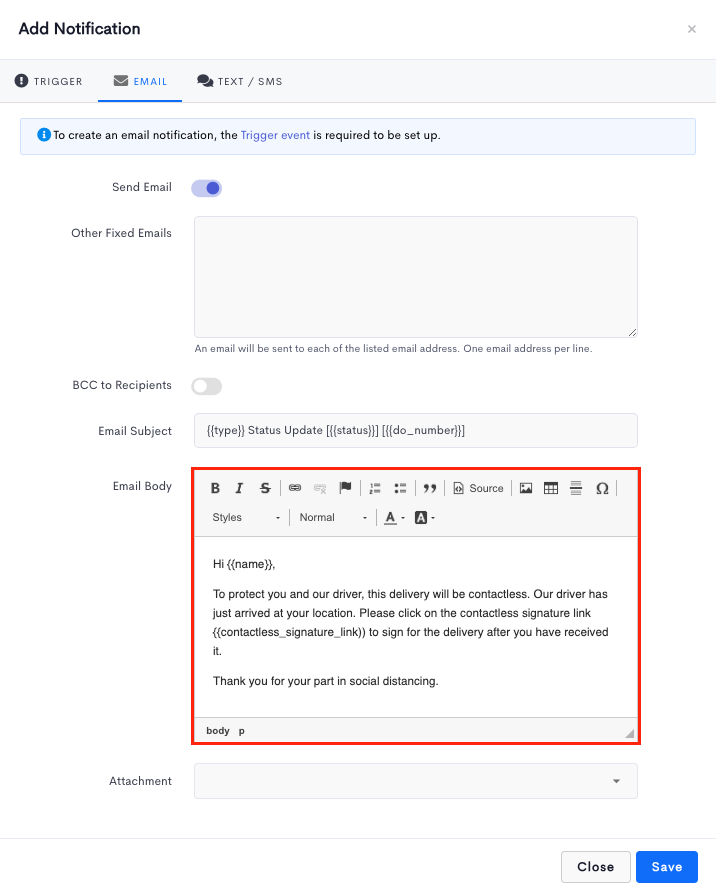
- Click on the Email tab.
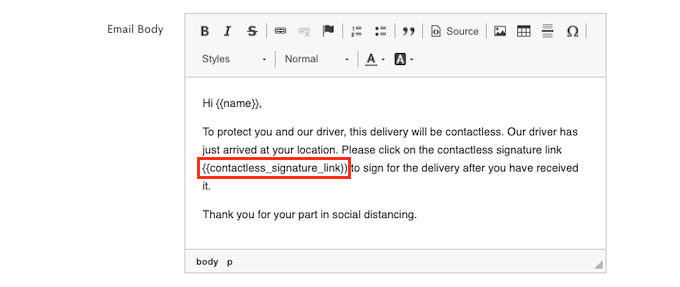
- Scroll down to the Email Body.
- Include the {{contactless_signature_link}} variable tag into your email body. For example:

- Click Save when done.
SMS
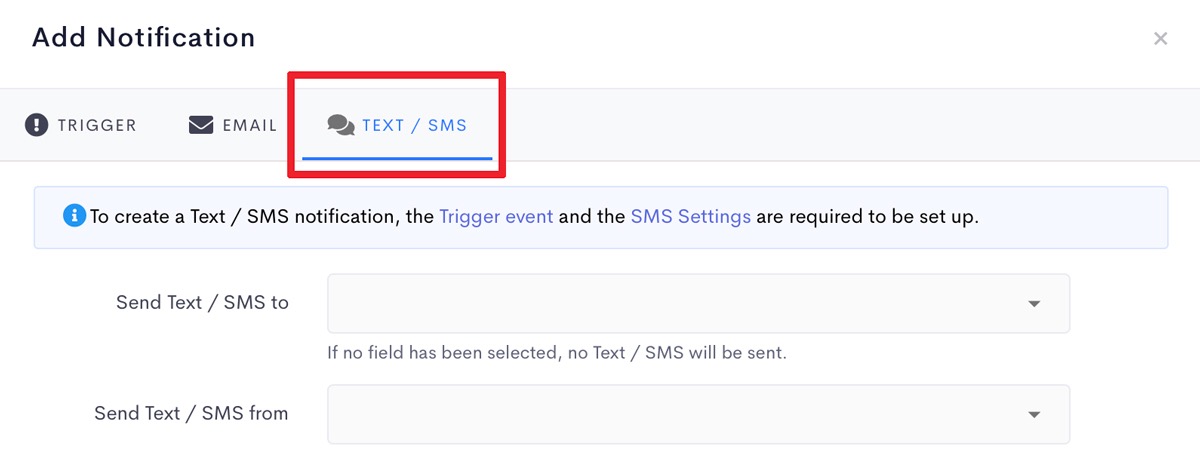
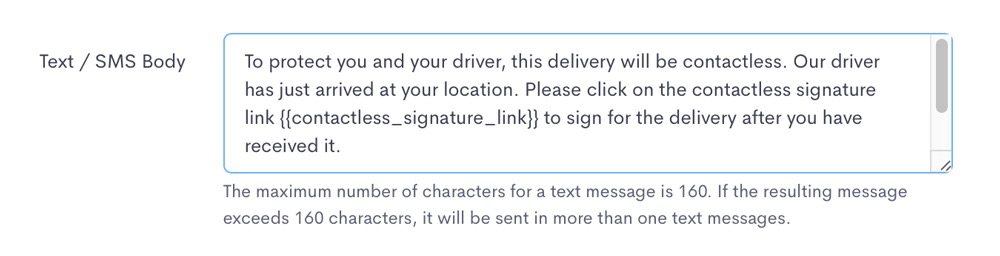
- Click on the Text/SMS tab.
- Scroll down to the Text / SMS Body section, and enter the {{contactless_signature_link}} variable tag into the message body.

- Click Save when done.
- Ensure that when jobs are created or imported, the Email address or Phone No. fields are populated into the Notify Email or Phone No. field. The next section will guide you on how your driver will facilitate the contactless delivery.
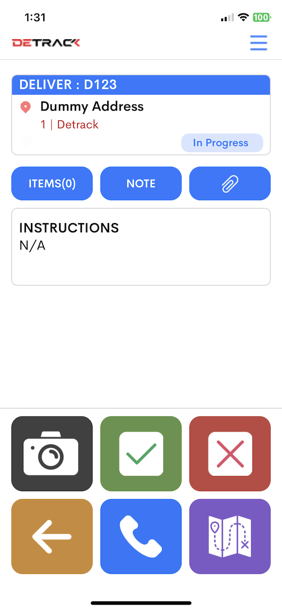
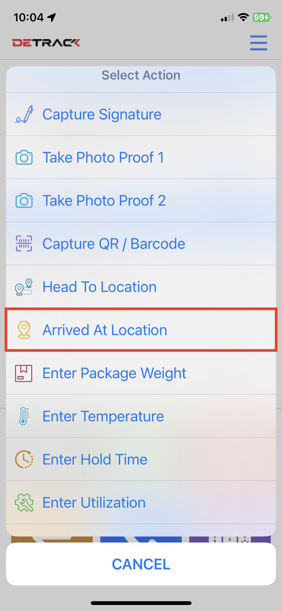
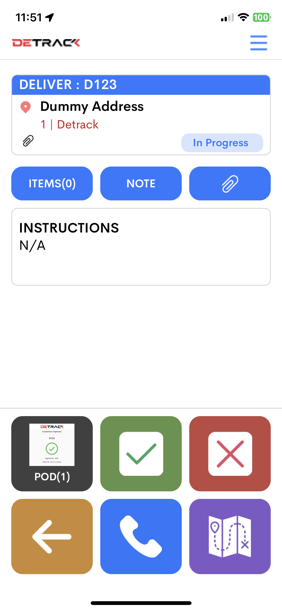
- In the Driver App, tap into the job.

- Tap on the Camera icon to open a menu.
- Scroll down the menu, and tap Arrived At Location.

- A notification will be triggered according to your Email or SMS / Text setup. For example:

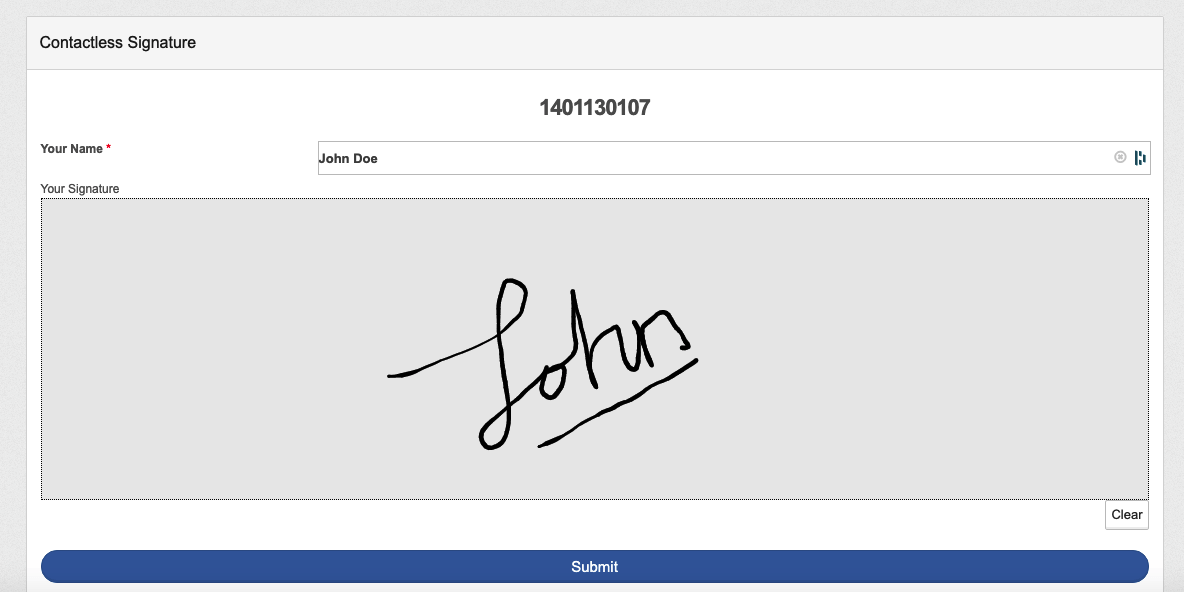
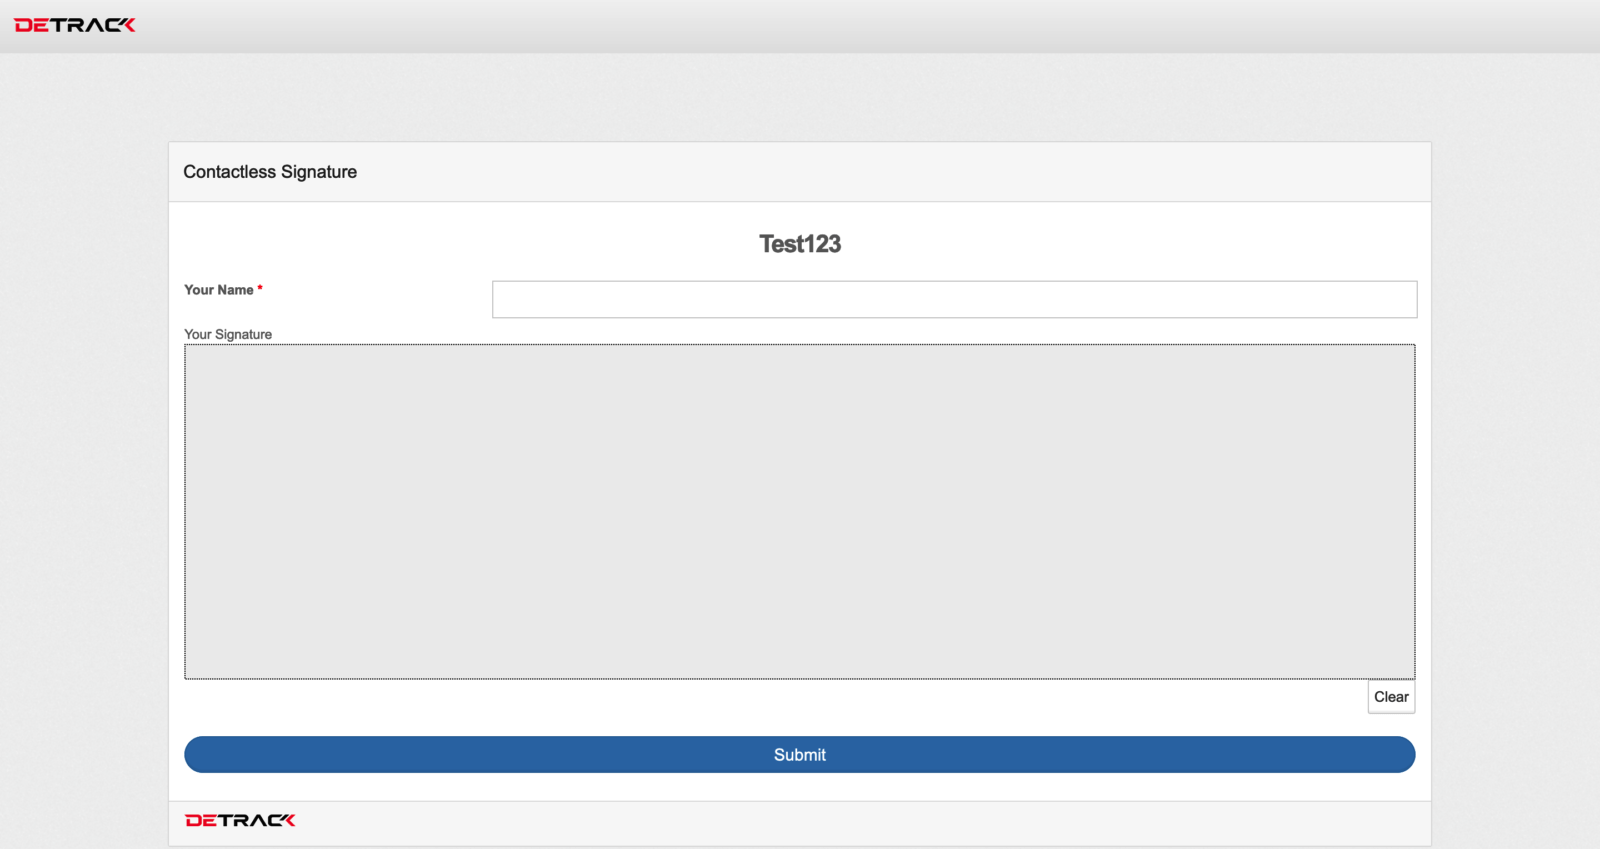
- Your customer/recipient may click on the Contactless Signature Link to access the signature page.
- He / She may then enter their name and sign.
- Click Submit when done.

- If necessary, you may request your driver to capture a photo of it.

- Your driver may then tap on the Green Tick button to complete the job.

Scanning QR Code Method
- Navigate to Settings > Contactless Signing.

- Switch on Enable Contactless Signature.
- Switch on Enable Attach QRCode Link In Driver’s App.
- Click Save when done.
- Navigate to Settings > Delivery / Collection > POD.
- Switch off Signature is required.
- Switch on Signature or Photo is required. (Optional)
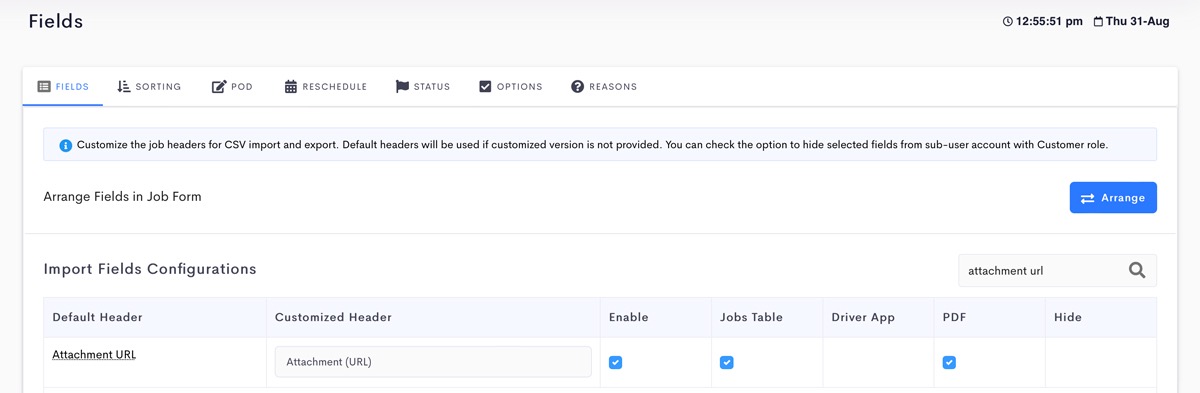
- Navigate to Settings > Job
- Enable the Attachment URL.
- Click Save when done.


Driver App
This section will guide you on how your driver will facilitate the contactless delivery.
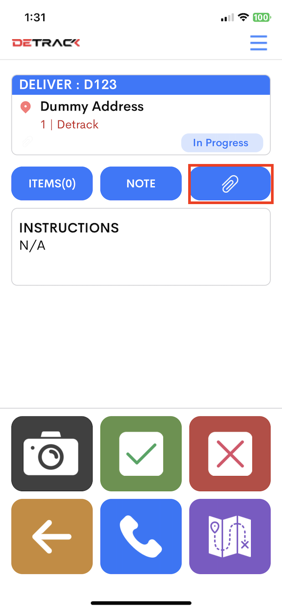
- In the Driver App, tap into the job.
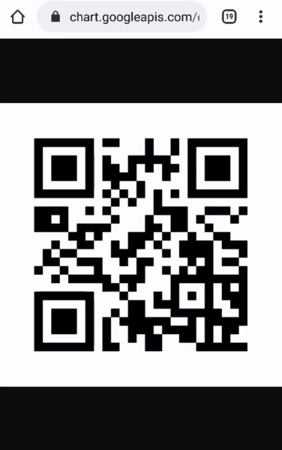
- Tap on the Paperclip to open the QR code.
- The recipient can then scan the generated QR code on the device.

- He / She may then enter their name and sign.
- Click Submit when done.

- If necessary, you may request your driver to capture a photo of it.
- Your driver may then tap on the Green Tick button to complete the job.


Customizing The Contactless Signature Screen
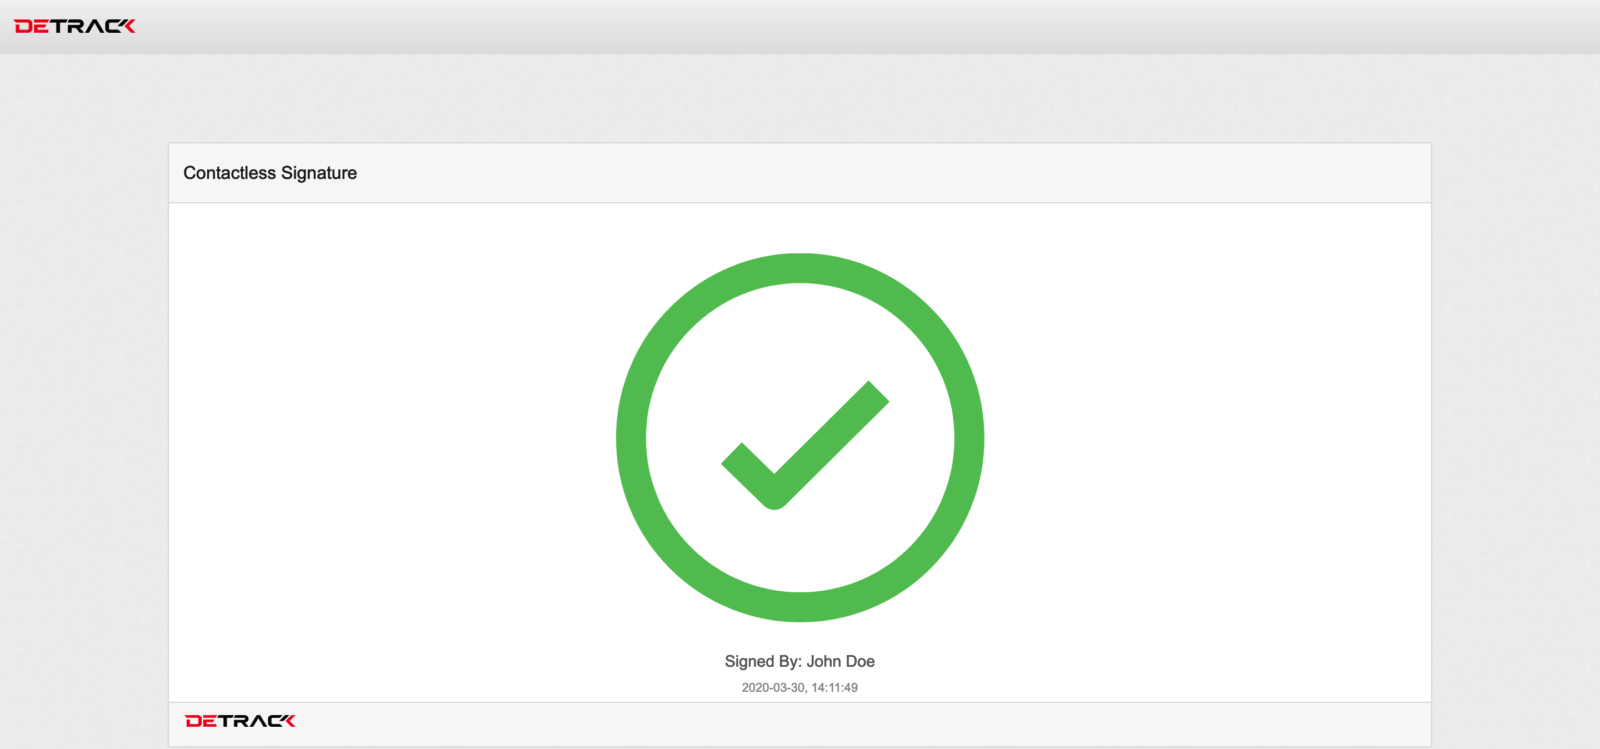
Default look of Contactless Signature Screen:

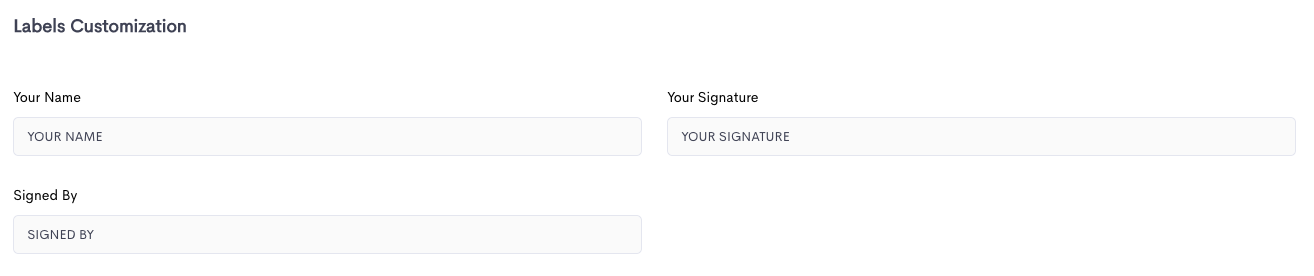
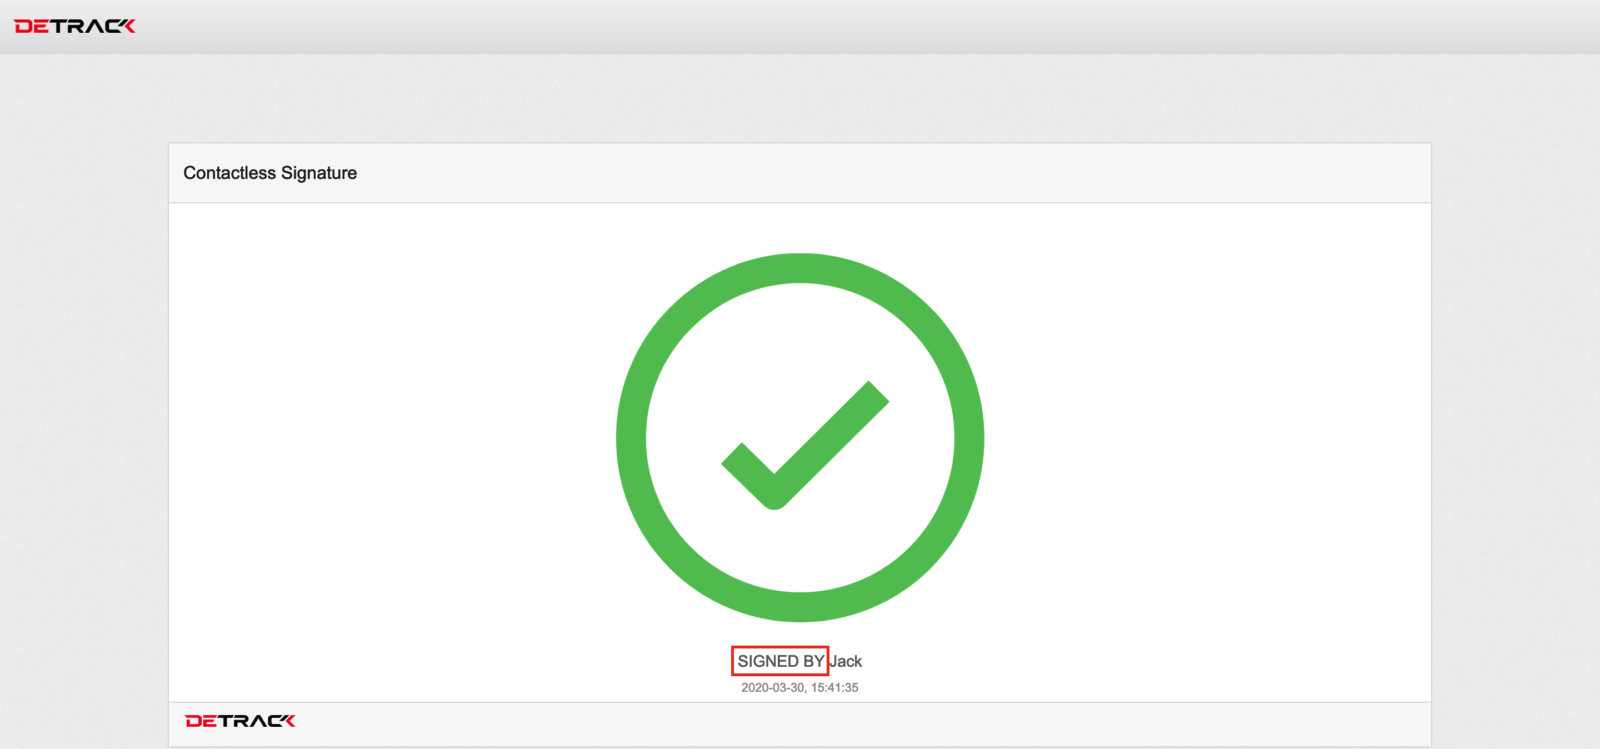
Label Customization
You may customize the text of the labels, for example:
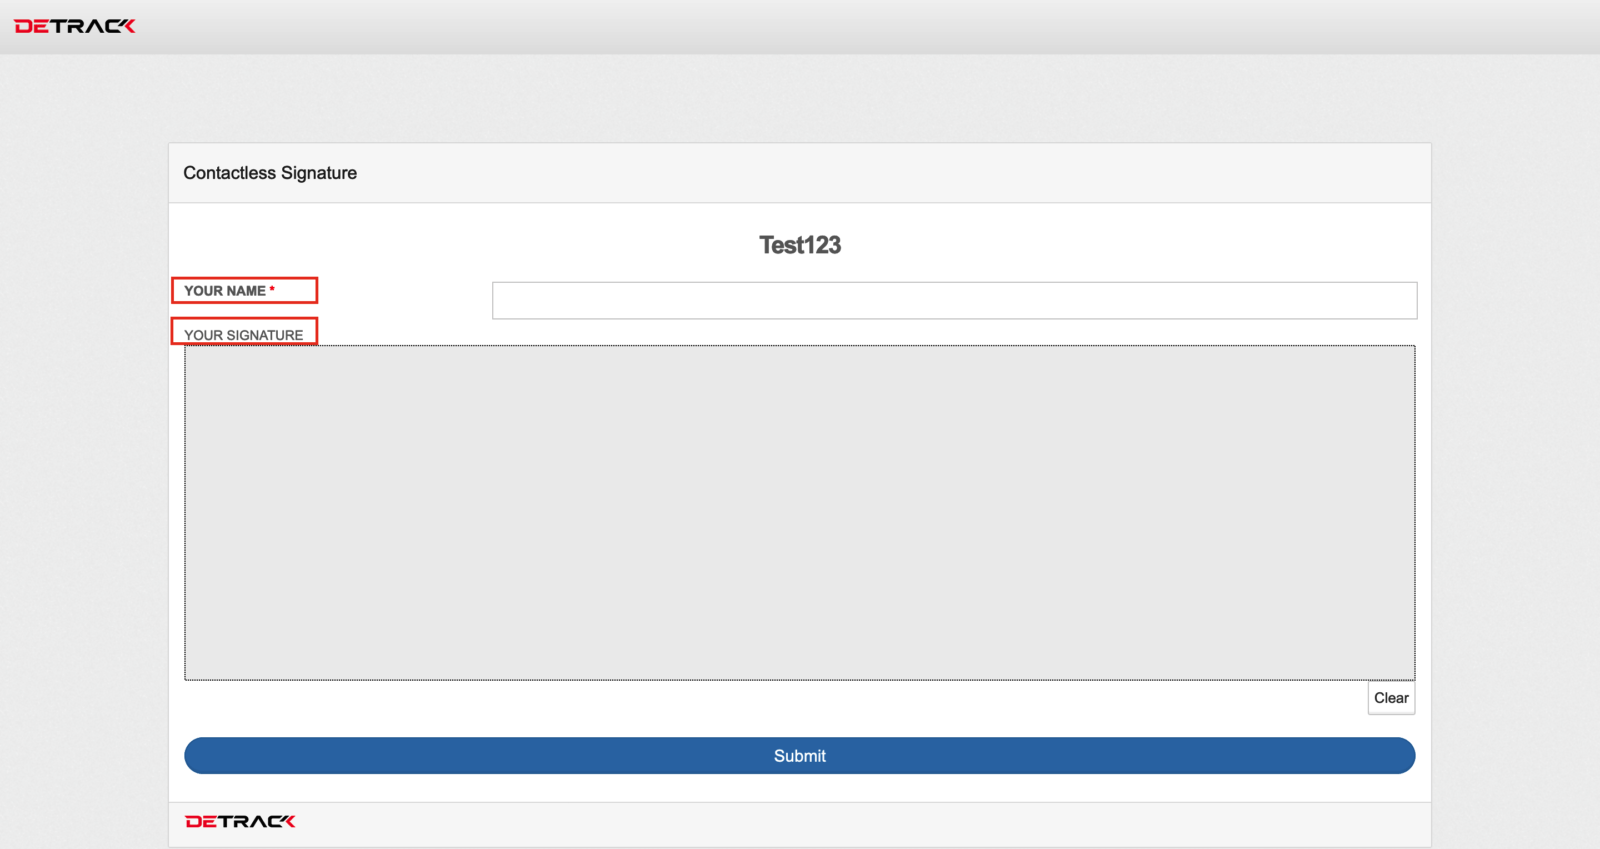
Note the change of the labels in the following screenshots. Main screen:
Confirmation screen:
Default confirmation screen after signing.
If you need any help in setting contactless delivery up on your Detrack account, please send in a support ticket to us.
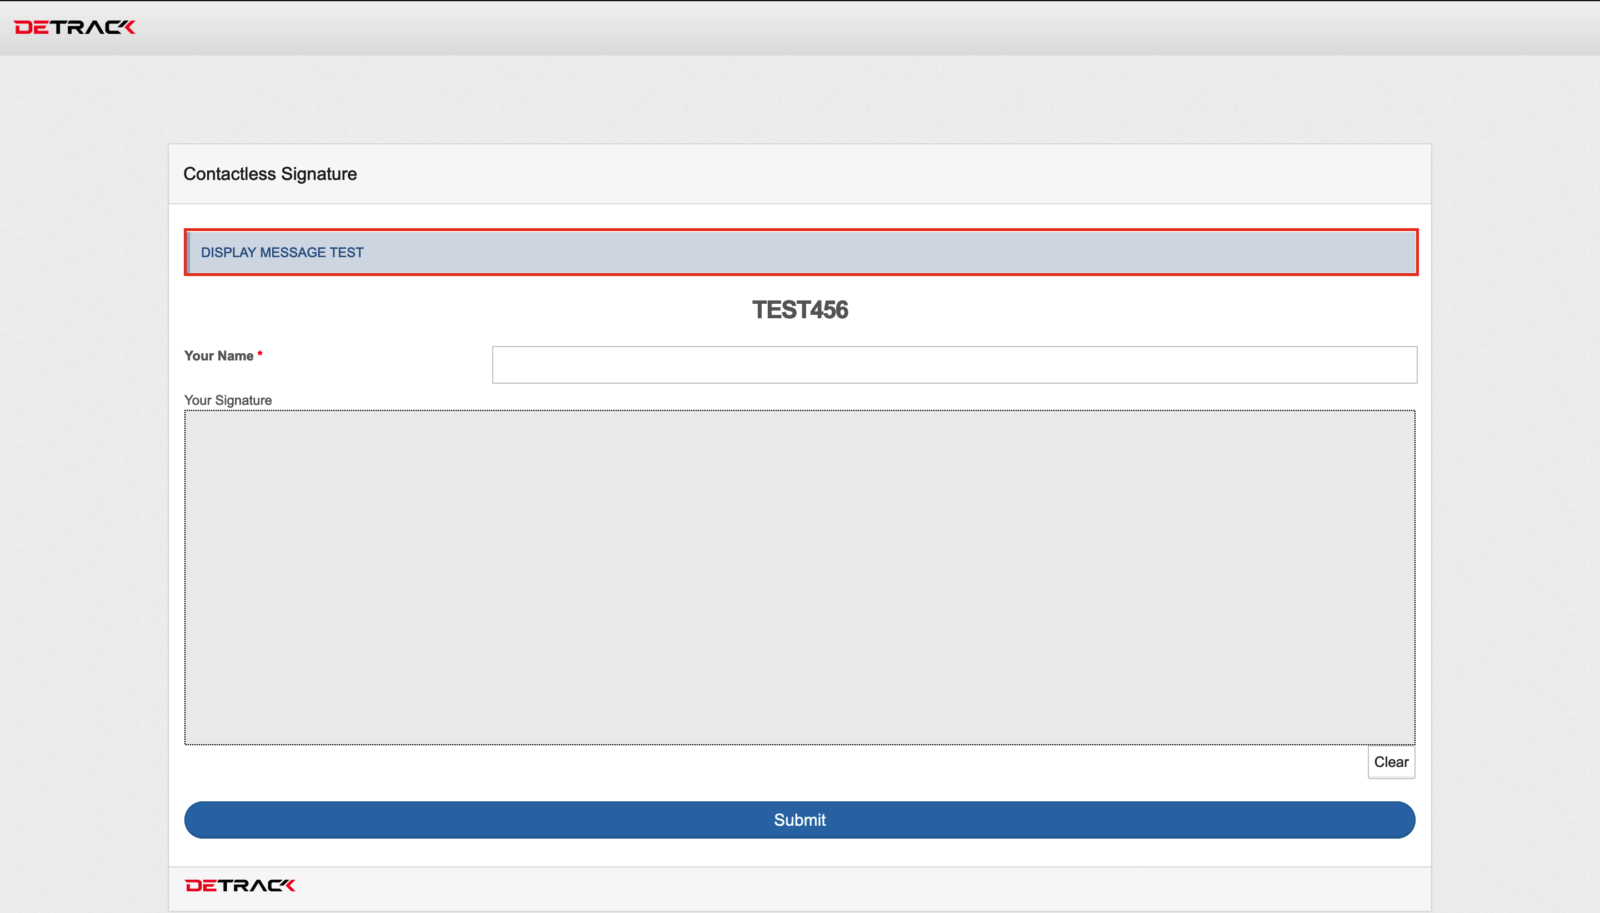
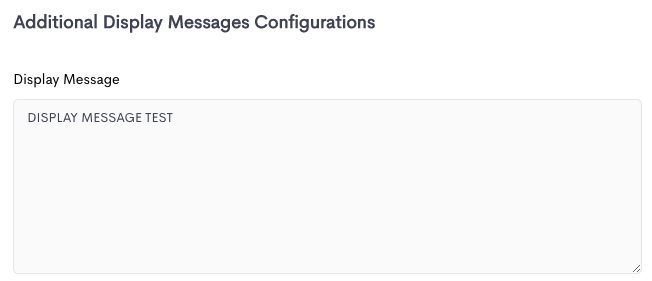
ADDITIONAL DISPLAY MESSAGES CONFIGURATIONS
If you need to display certain information to the recipient on the Contactless Signature Screen, you may enter the information into the Display Message field.
Similarly, if you wish to display certain information to the recipient after signing, you may enter the information into the Confirmation Message field.
After signing, the Confirmation Message will appear below the signature.