This article is regarding the creation of drop-down options for certain job fields through the job form.
This feature can assist to speed up job creation, and keep the data clean and consistent by reducing manual entry errors.
Setup
To access the feature, you can navigate to:
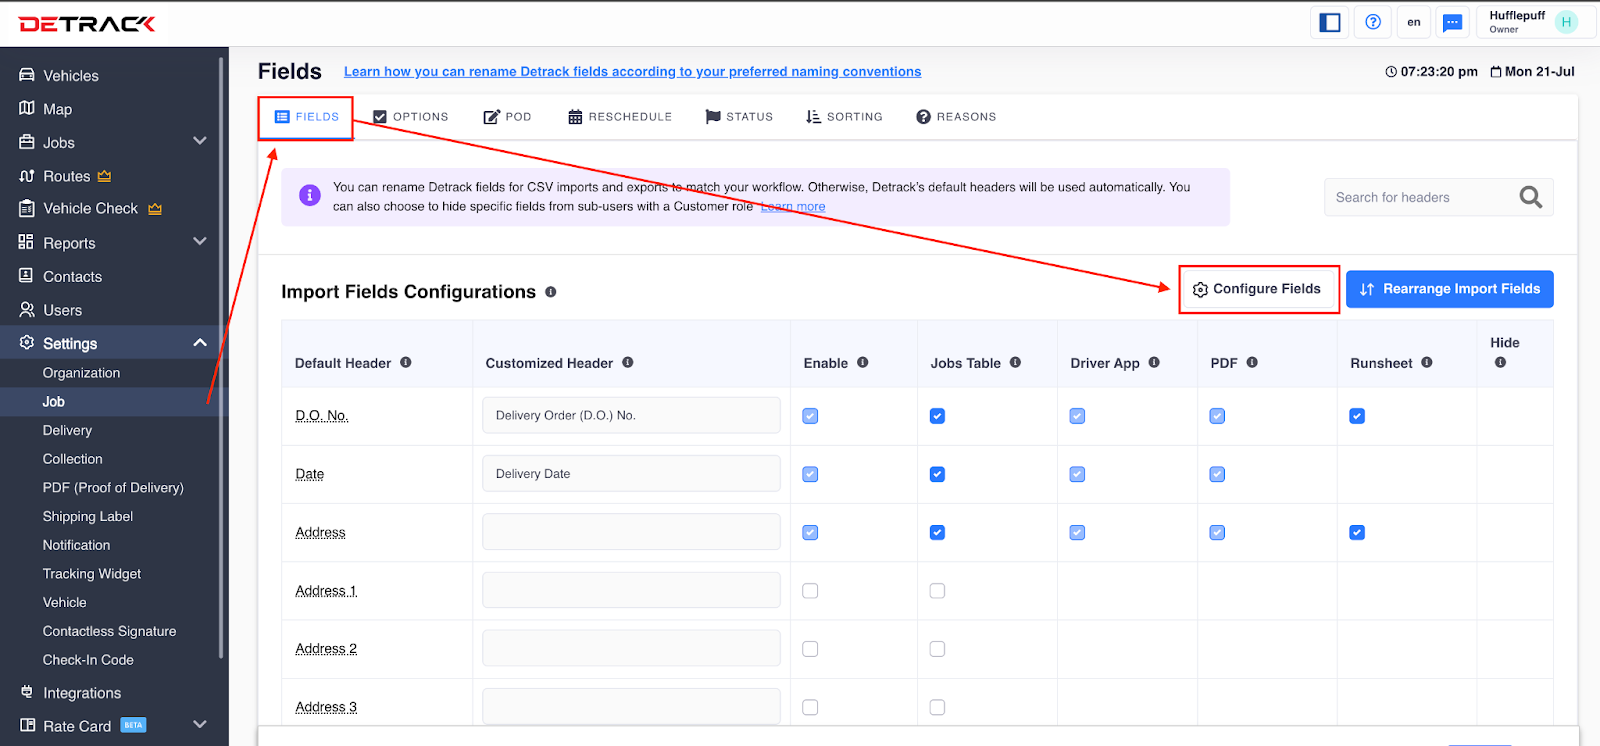
- Go to Settings > Fields
-
Click Configure Fields

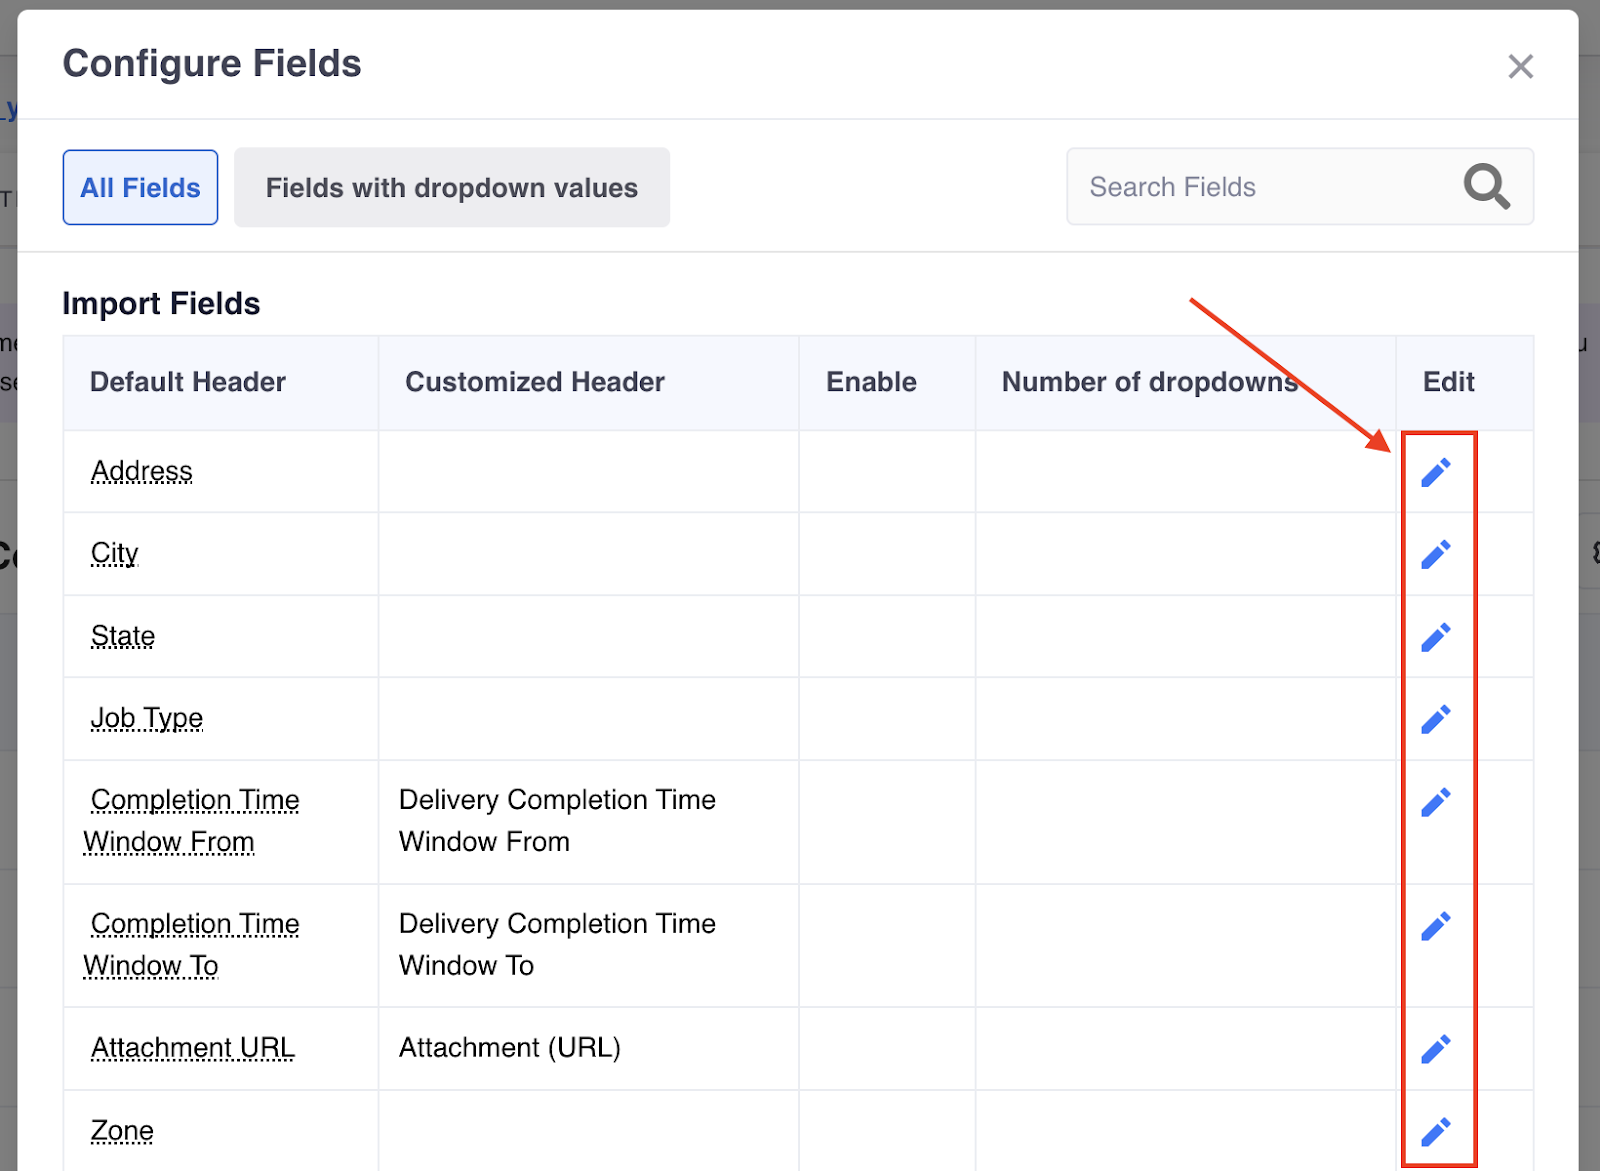
- Choose the field you want to customize.
-
Click Edit.
-
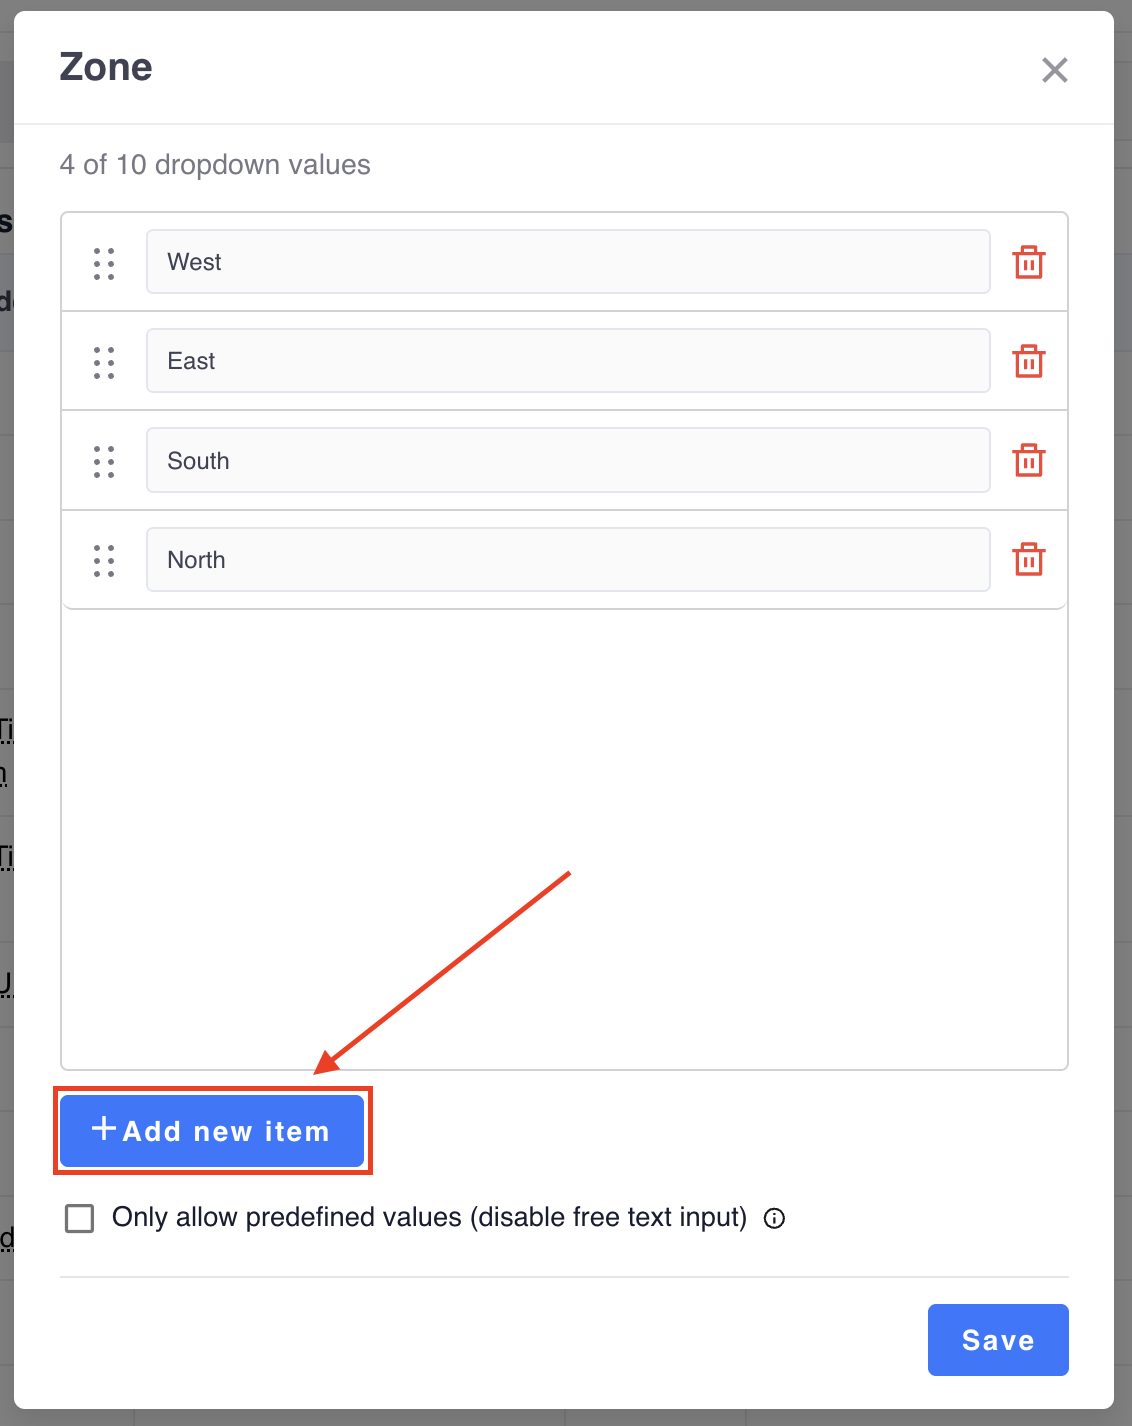
Click Add new item to add in your custom drop-down values.
-
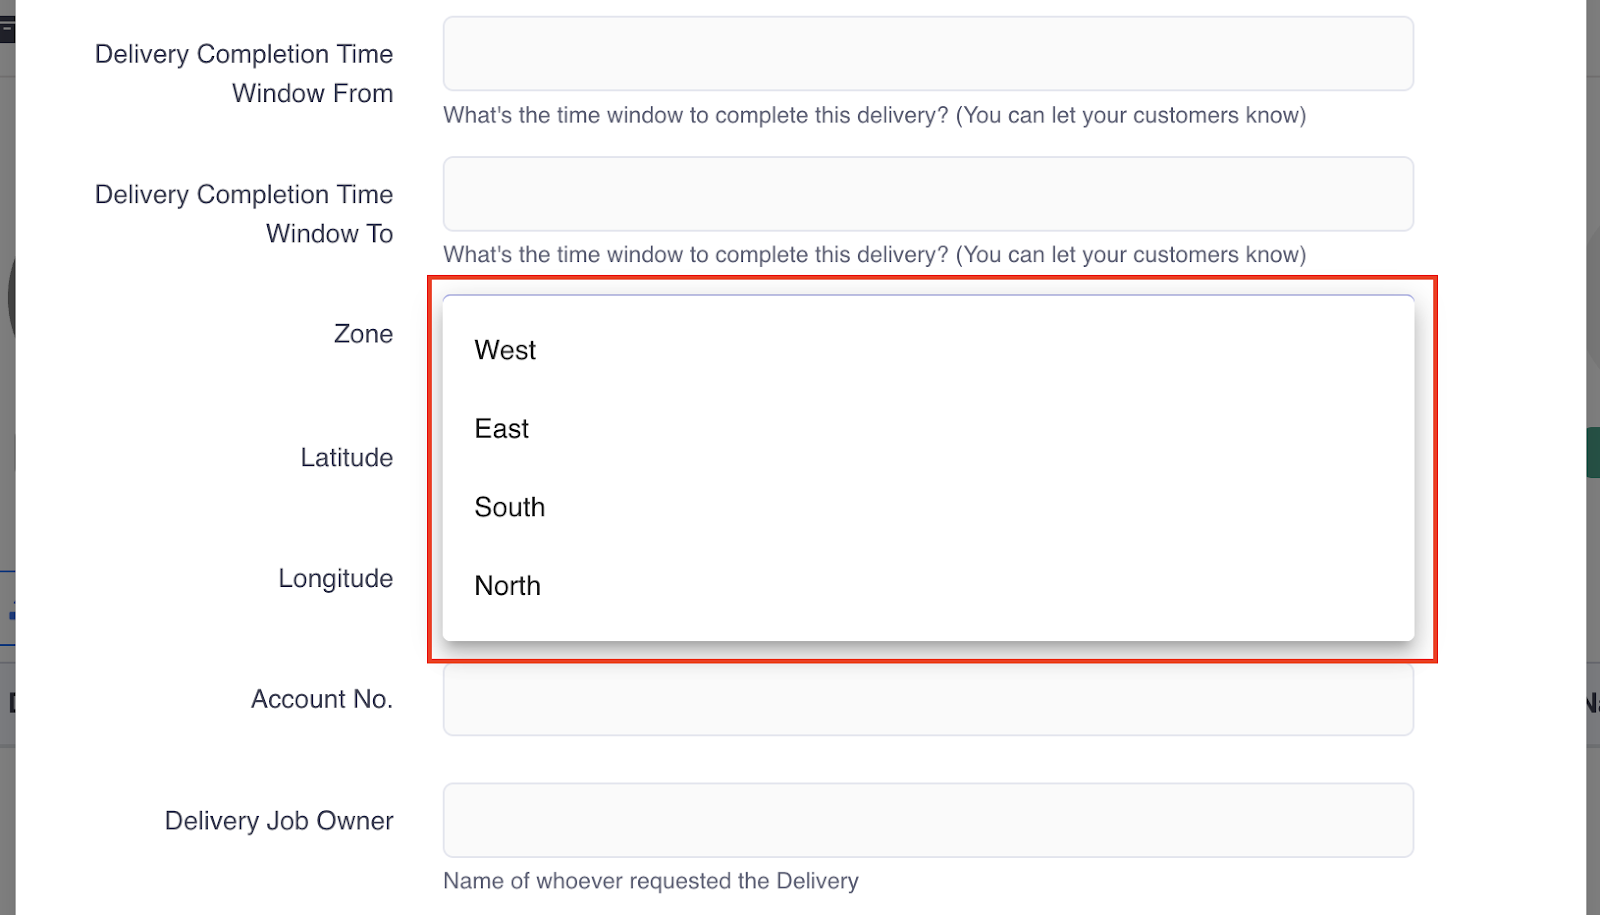
Once the customized drop-down has been created, you can try to create a job and choose based on the drop-down
option.
(Note: If you do not want users to freely input values and only stick to your predefined options, you can click on the Only allow predefined values checkbox).
-
The custom drop-down options appear in the job field that were configured.
(Quick Tip: You can disable or enable the customized drop-down by switching the enable toggle.)
Fields Available for Dropdown Values
- Address
- City
- State
- Job Type
- Completion Time Window From
- Completion Time Window To
- Attachment URL
- Zone
- Customer
- Payment Mode
- Depot
- Department
- Sales Person
- Service Type
- Service Time


