The Add Contact feature as a mini-database to store the details of your customers.
Thereafter, when creating a delivery / collection job through the dashboard, the respective information can be retrieved for auto completion, when either the Name of the contact is entered into the Deliver To field or when Company Name is entered into the forms
How To Add A Contact
There are 2 ways to add the contact:
- Manual addition
- Import using CSV / Excel
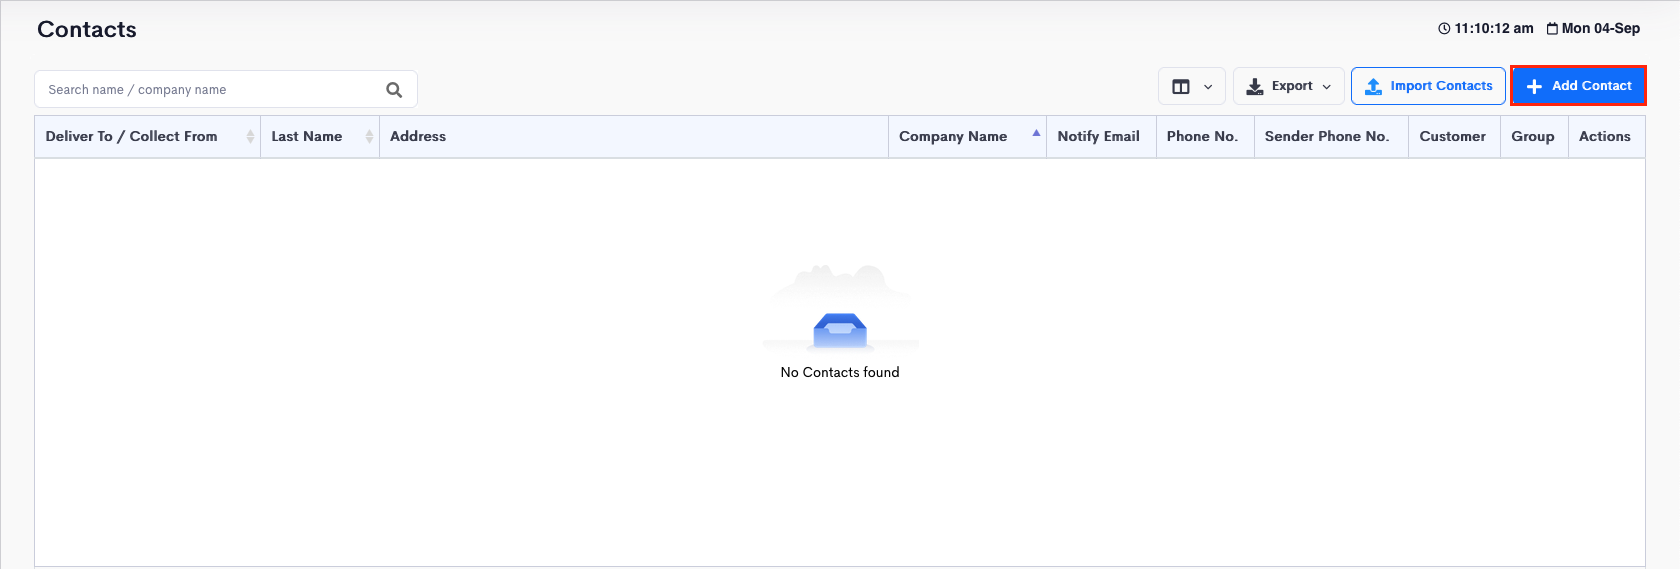
Manual Addition
-
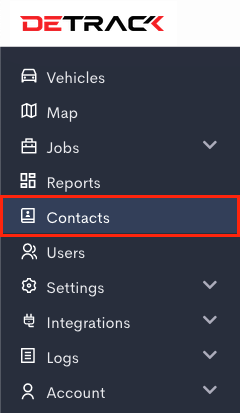
In the admin dashboard. Click on Contacts tab.

-
Click on Add Contact button.

-
Fill in the Contact Name, Company Name, Address, Email, Phone No., etc. > Save.


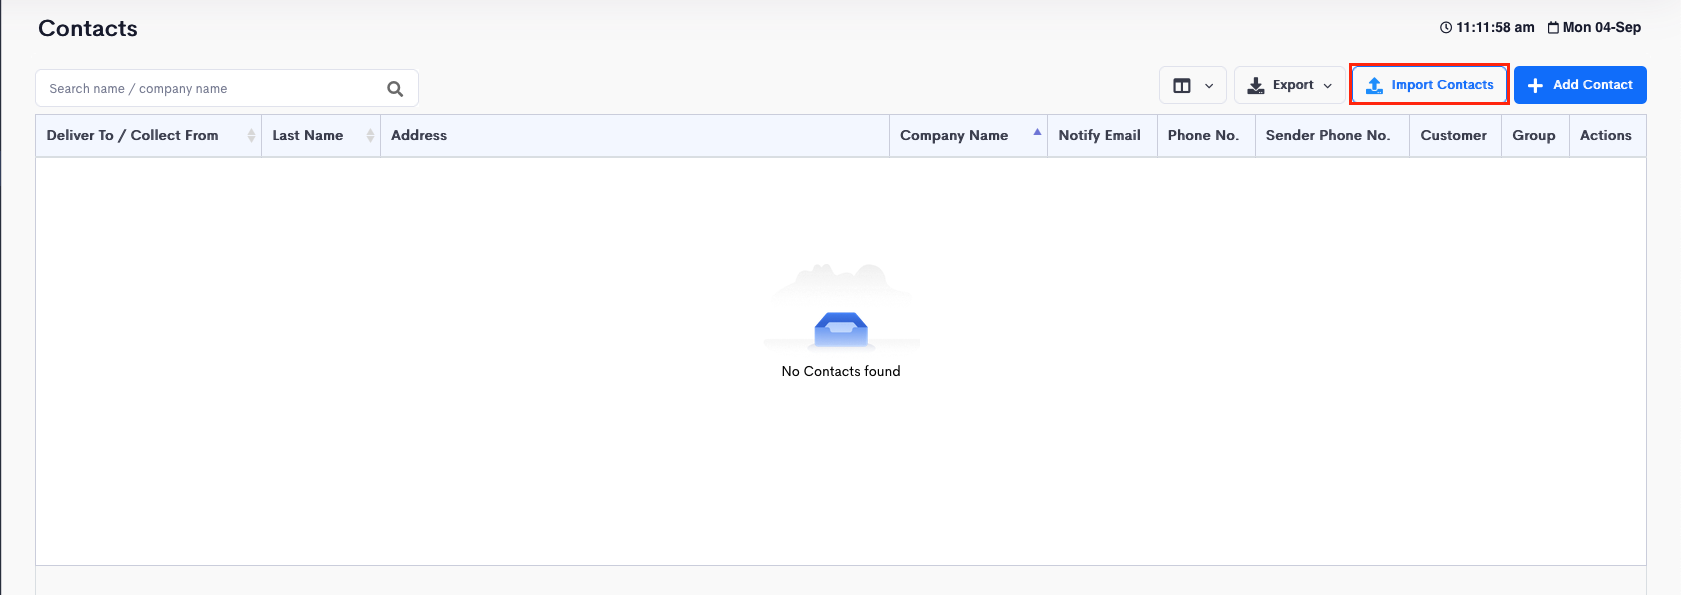
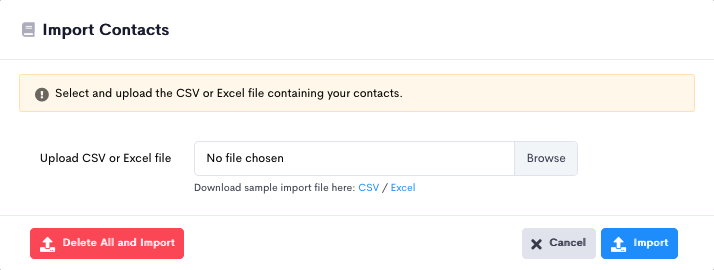
Import of Contacts via Excel / CSV Import
-
In the admin dashboard, click on Contacts.

-
Click on Import Contact button.

-
Upload your CSV / Excel file.

-
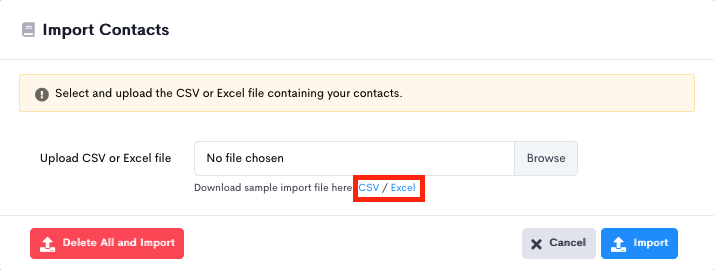
To obtain a sample CSV / Excel, you may click on the Download sample import file here: CSV / Excel.
- If the delivery or collection items are fixed for a particular customer, you can fill in the items in the contact list. This allows the SKU, Description and Quantity to be auto completed for this customer when you retrieve the contact to create delivery or collection jobs. Note that this import feature will only allow for 1 item per row of entry.
-
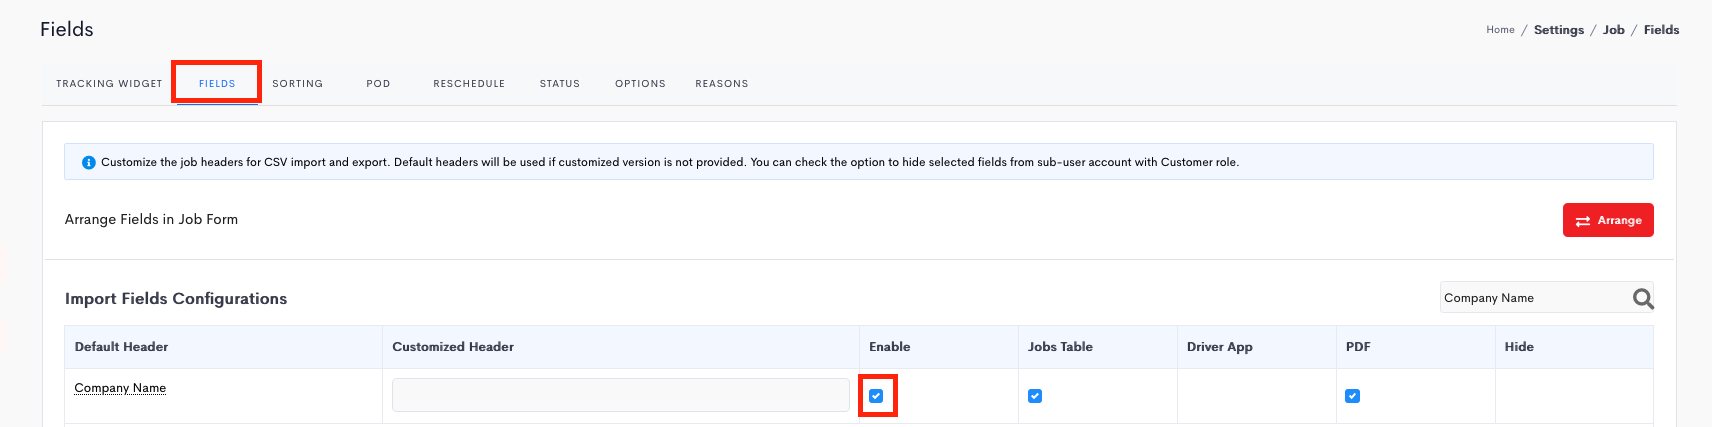
Tip: To add the Company Name, go to Settings > Job > Fields and check the Company Name box to enable the field. Then you can input the company name into the form.

How To Edit A Contact
-
Go to the admin dashboard and click on Contacts tab.
-
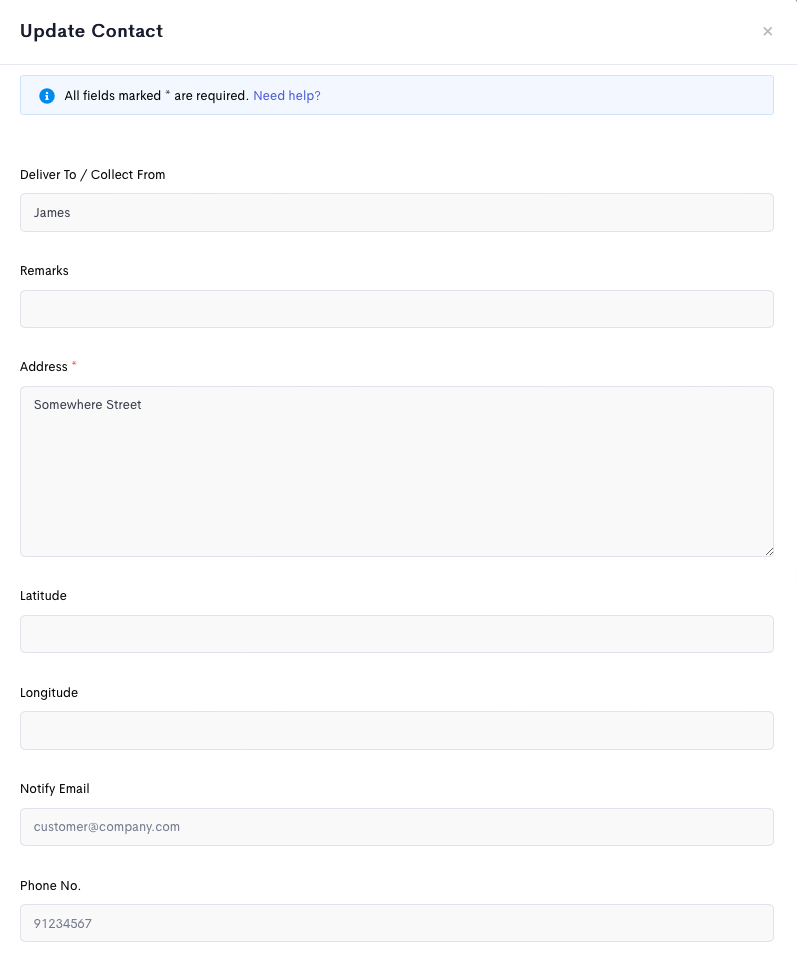
Click on the contact entry to be edited, and the Update Contact form will be shown.

-
Make the changes and click on Save.


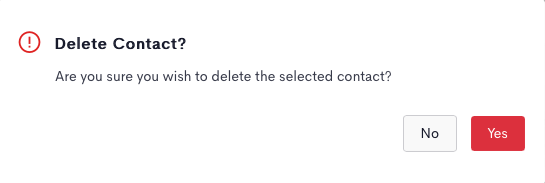
How To Remove A Contact
-
In the admin dashboard, click on Contacts.
-
Click on the Trash button corresponding to the entry.

-
In the ensuing pop-up, click Yes to delete the contact.