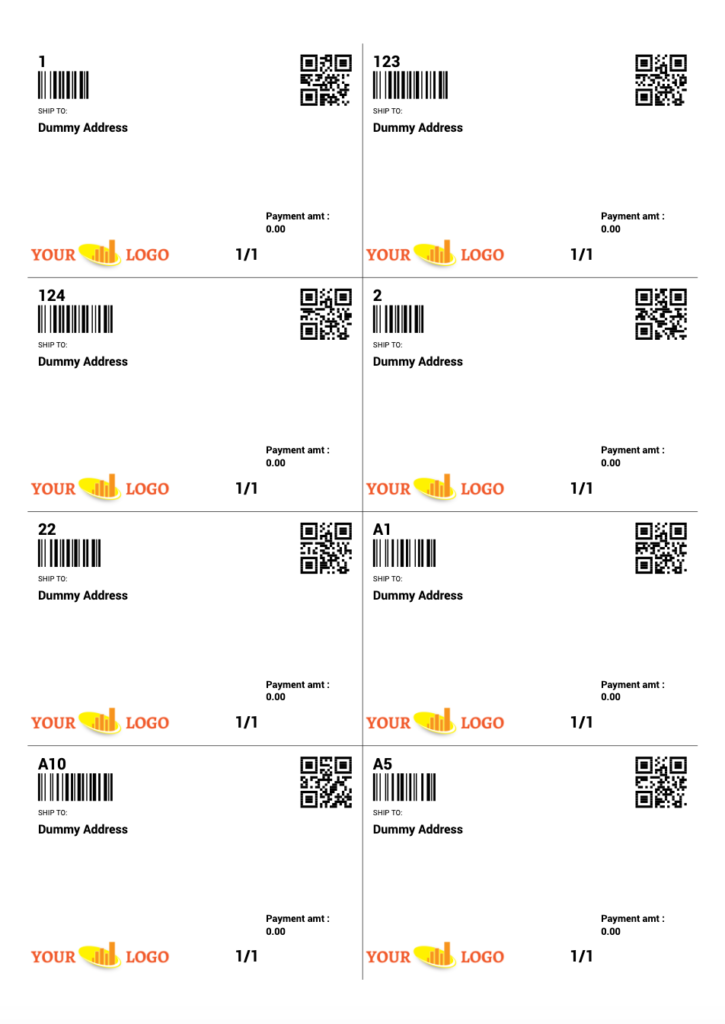
You can download and print shipping labels for your parcels.
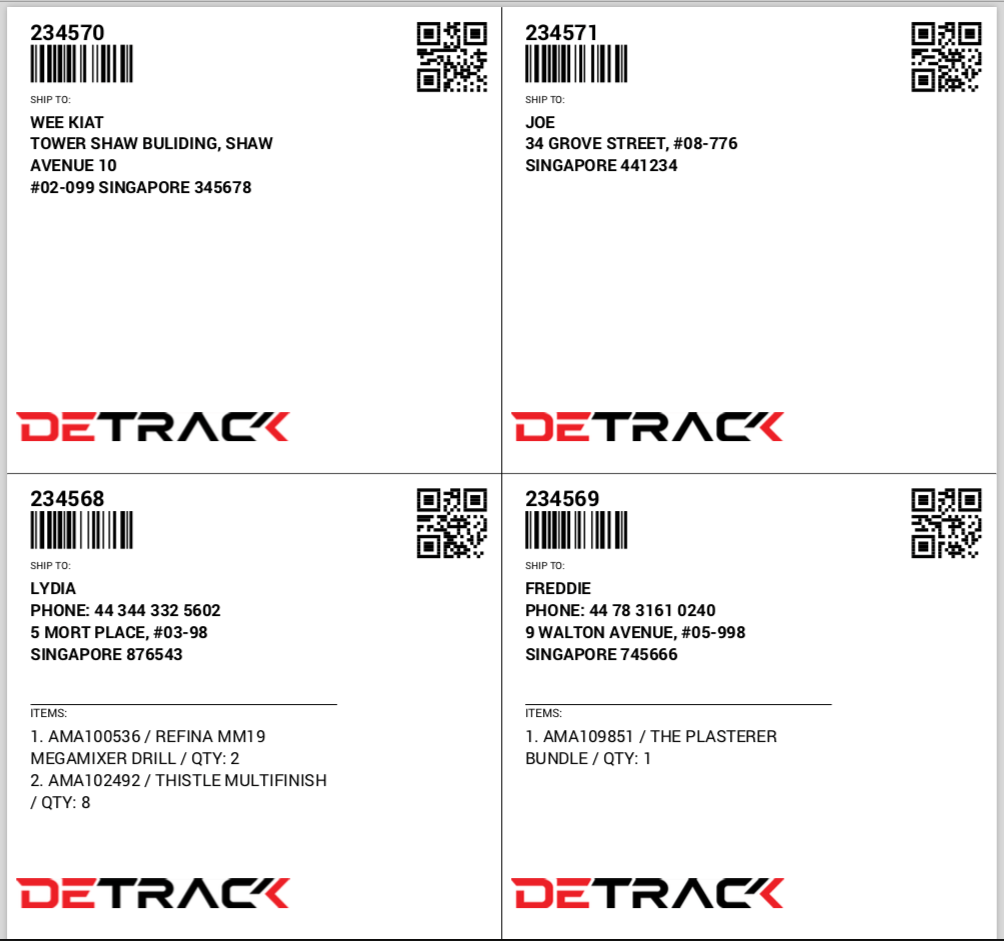
The shipping label generated will include the barcode and QR code for D.O. No. (both the barcode and QR code on the shipping label represents D.O. No.).
Other included information on the shipping labels are company name, address, contact name, item description, quantity, zone, company logo, instructions, tracking No., start date, ship date and payment amount.
The barcode and QR code can be used for mass updating of job status, to confirm the deliveries as well as scan to search for the job on the Driver’s app.
Below is a list of fields supported in the shipping label.
| Type | Fields |
|---|---|
| Mandatory |
|
| Optional |
|
SHIPPING LABEL SIZE
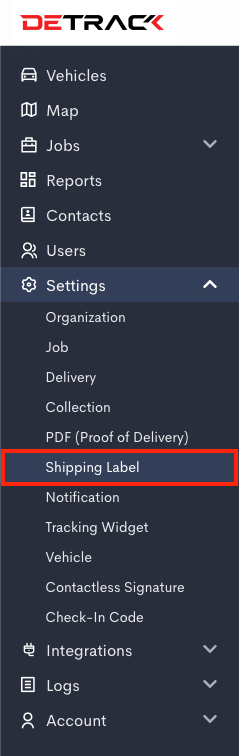
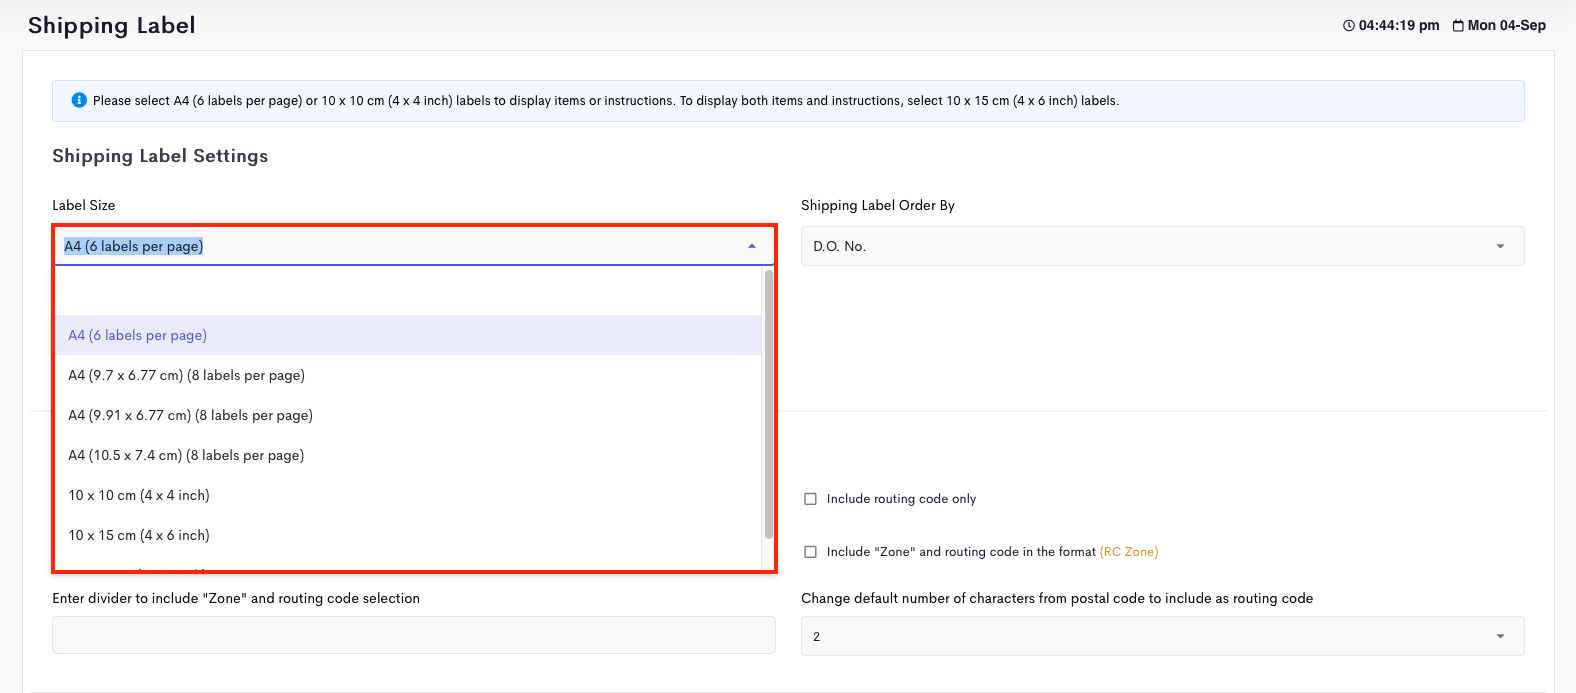
You can select the desired size for the shipping labels generated. To do so, go to admin dashboard > Settings > Shipping Label > Select the size > Save.
ORDER OF SHIPPING LABEL
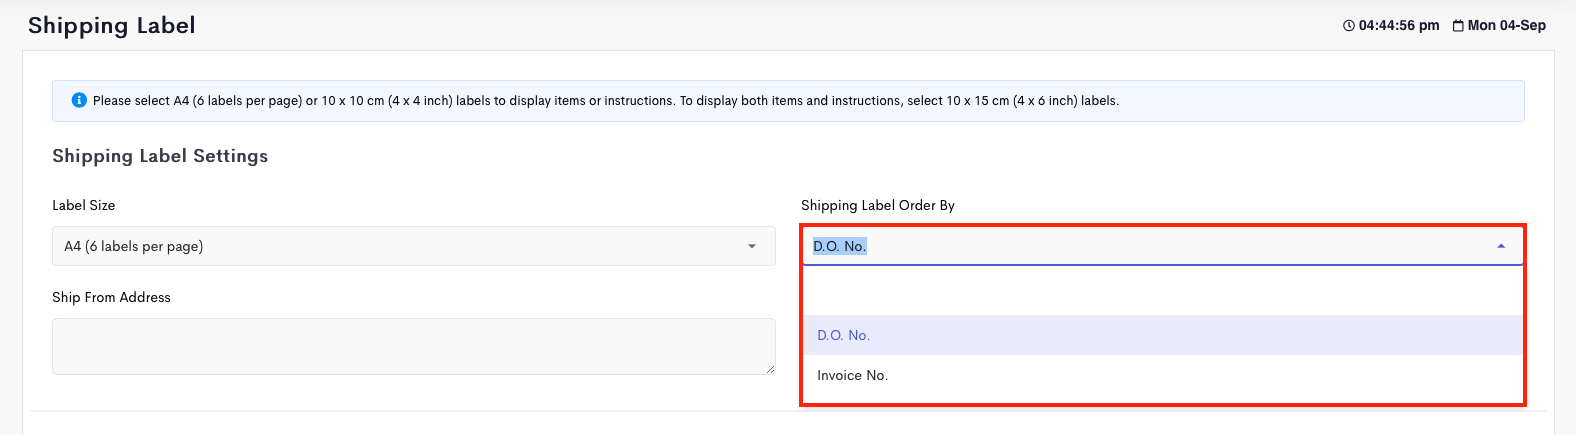
To print the order of the Shipping Label in sequence of D.O. No. or Invoice No., you can select either option for the Shipping By Order field.
Kindly note that the sorting algorithm is by string, i.e. the leftmost character will be used for sorting. For example, if you have the following D.O. No.s:
- A10
- A1
- A5
- 123
- 124
- 1
- 2
- 22
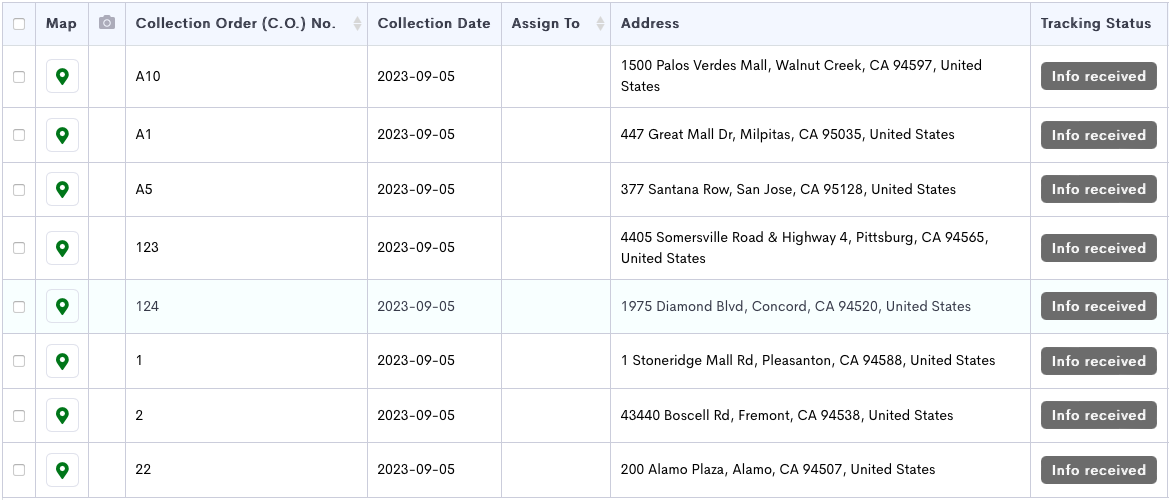
The resulting sequence of the sort will be in the following order:
- 1
- 2
- 22
- 123
- 124
- A1
- A5
- A10
Shipping Labels on a selected date
You can select the desired size for the shipping labels generated. To do so, go to admin dashboard > Settings > Shipping Label > Select the size > Save.
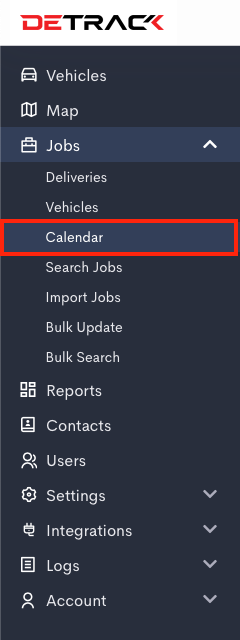
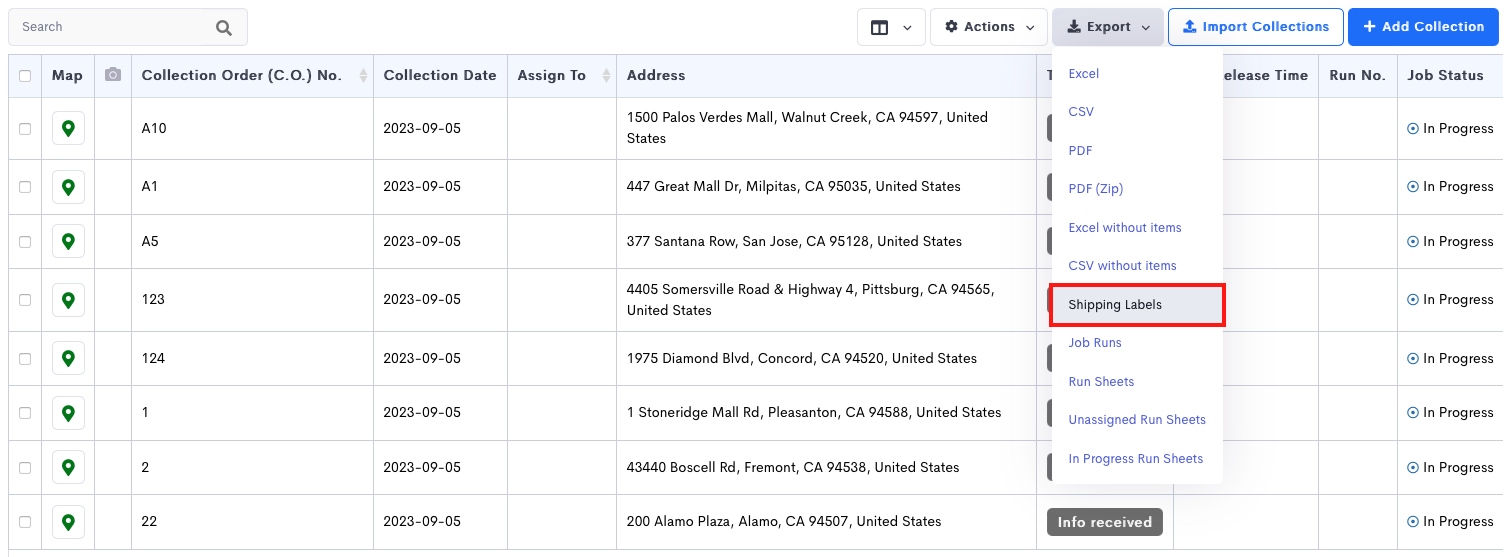
- To print shipping labels for all deliveries on a date, go to admin dashboard > Jobs > Calendar > Select date > Export to file > Shipping Labels.


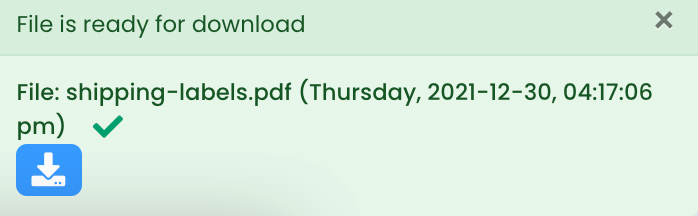
- Click on the download button in the pop-up to download the file.

- Next, open the PDF file and print the shipping labels.

Generating Shipping Labels
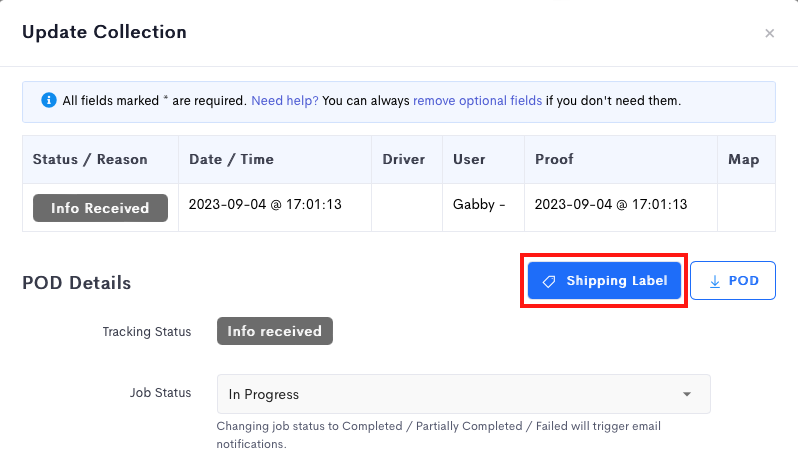
- To print shipping labels for a delivery on a date, go to admin dashboard > Jobs > Calendar > Select date > Select the job.

- Click on the Shipping label button to download the shipping label in PDF.

- Open the PDF and print the shipping label.

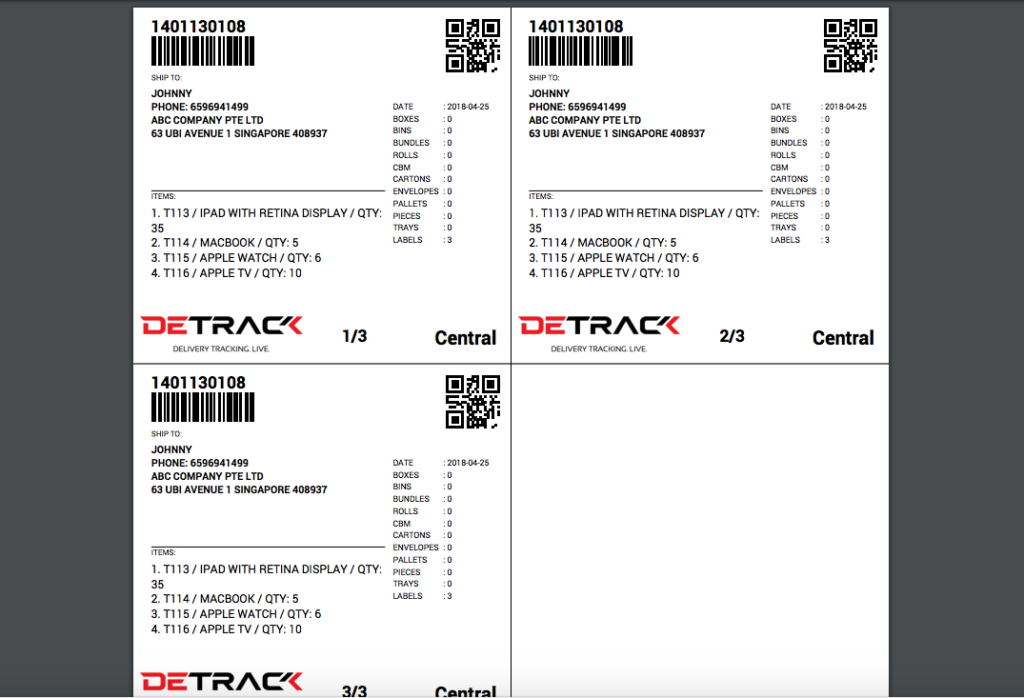
Multiple Shipping Labels
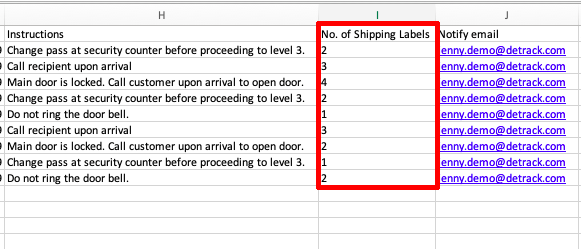
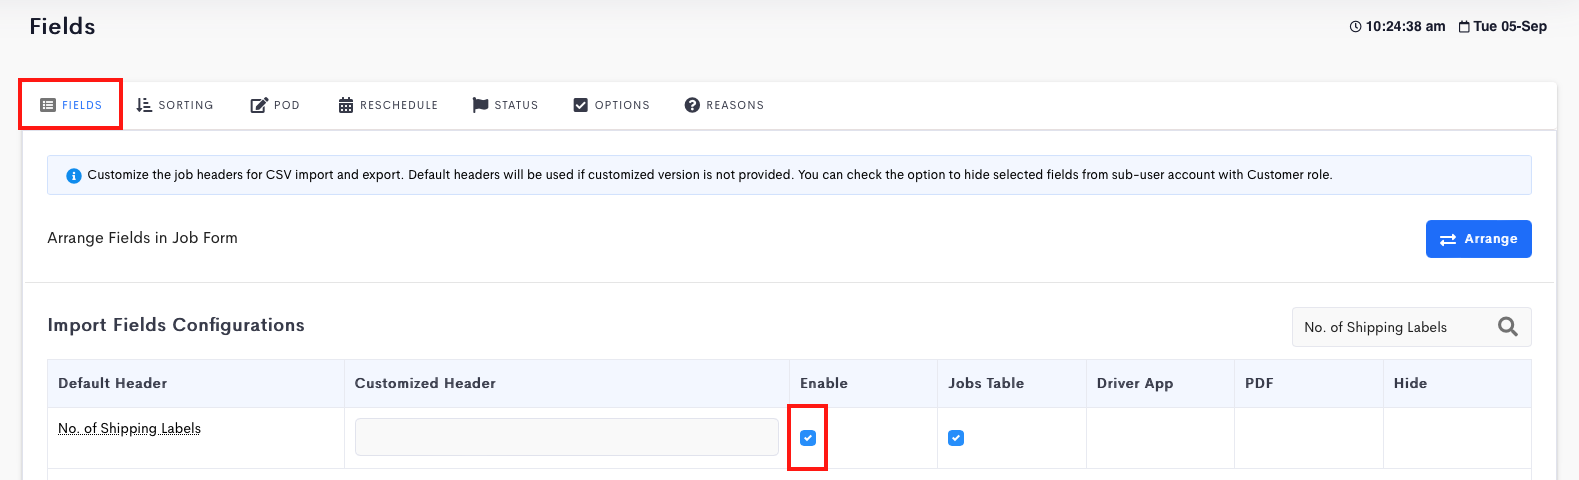
- Go to Settings > Job > Fields > check the option No. of Shipping Labels.

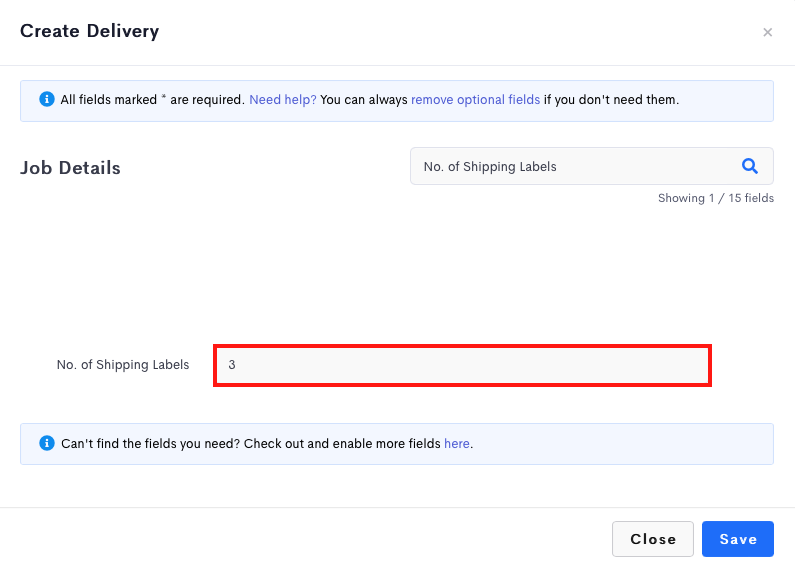
- Go to Calendar > select the date > select the job > enter the No. of Shipping Labels > Save.

- If you are using Excel to import the number of labels to print, you can create a new column with the header name No. of Shipping Labels and enter the number of labels in the column.
- Example Shipping Label
Note:
If the field is left blank, the default value of 1 will be used.