This tutorial is to help you integrate your Shopify E-commerce platform with Detrack using Detrack Connect.
With this integration, all selected orders from your Shopify storefront will be sent to Detrack for last mile tracking, capturing of real-time proof of delivery and more.
You can also choose to set up the integration for the order’s delivery completion status to be feedback to your Shopify storefront.
Here’s how you can get started with the Shopify integration. First, sign up for a Detrack Connect account.
Steps
- Sign up for a Detrack Connect account. If you already have a Detrack Connect account, continue with the next step.

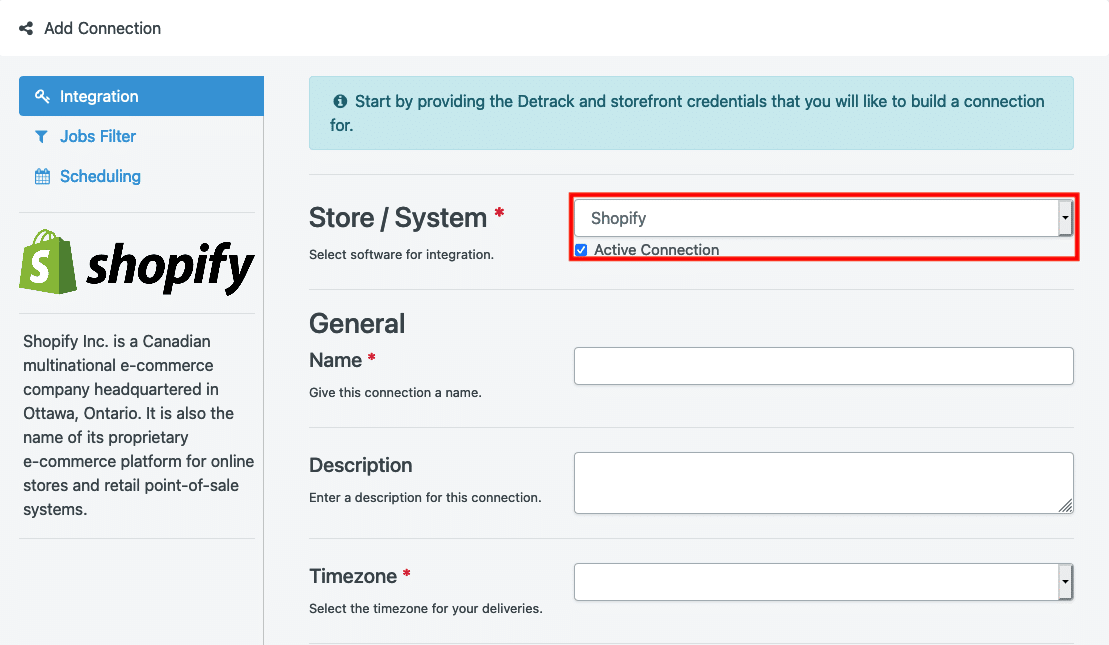
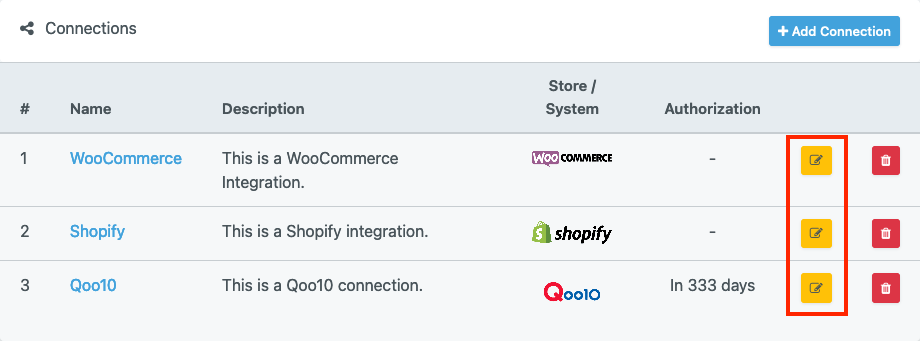
- Go to the Connections tab and add a connection.

- Select Shopify as the Store/System.

Integration
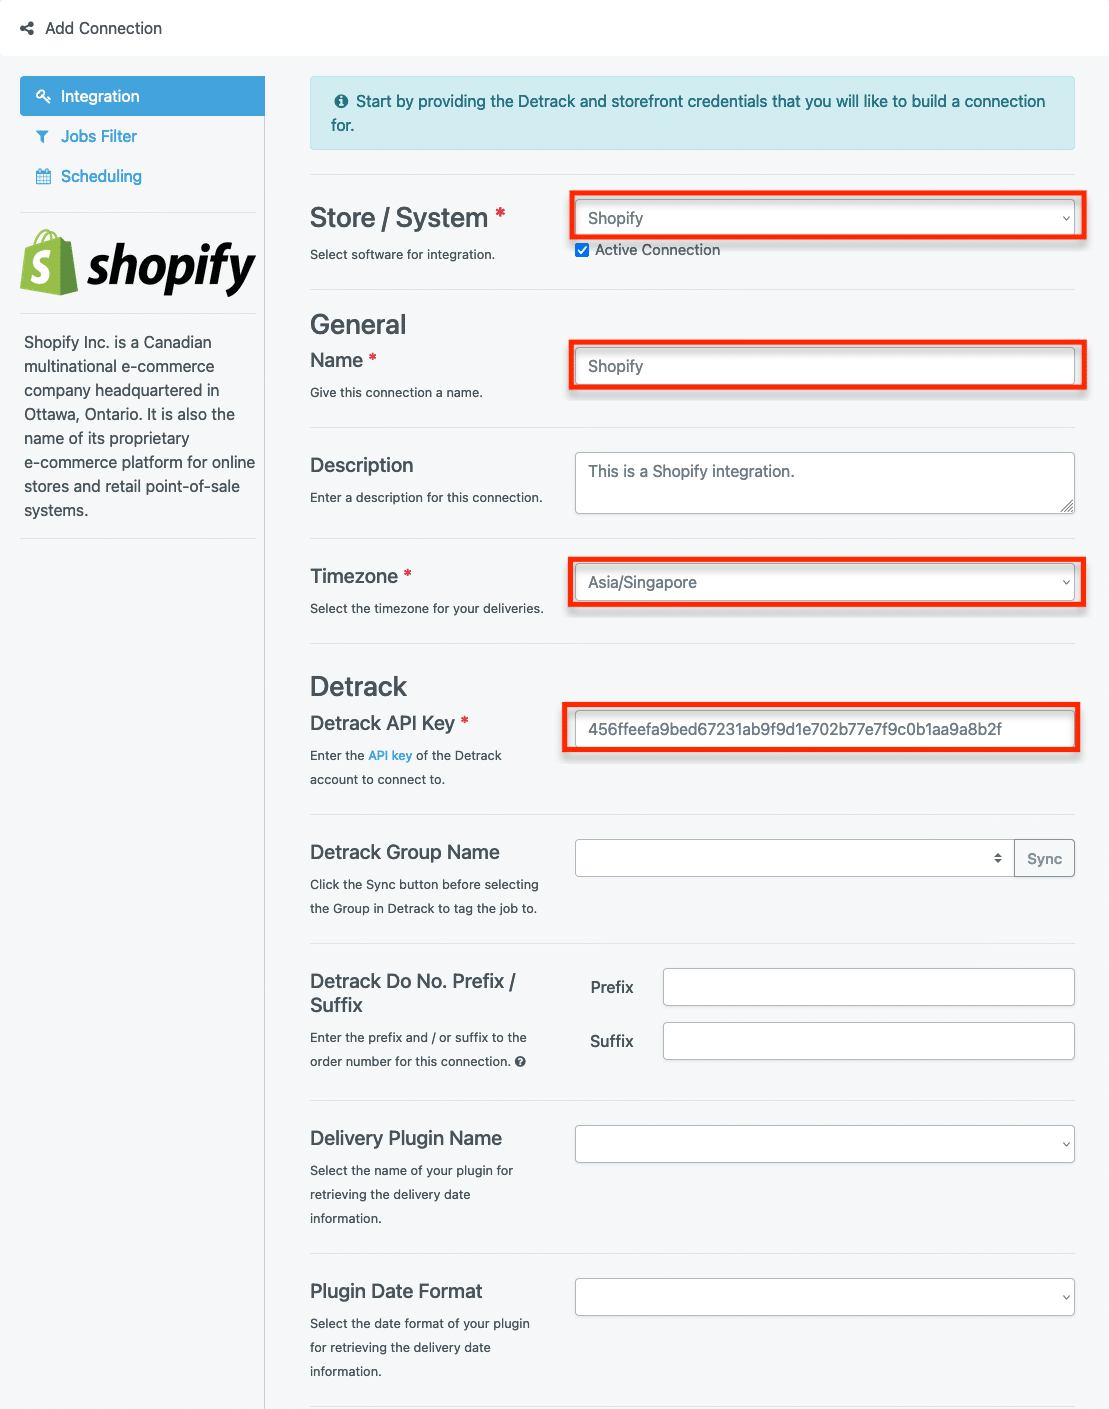
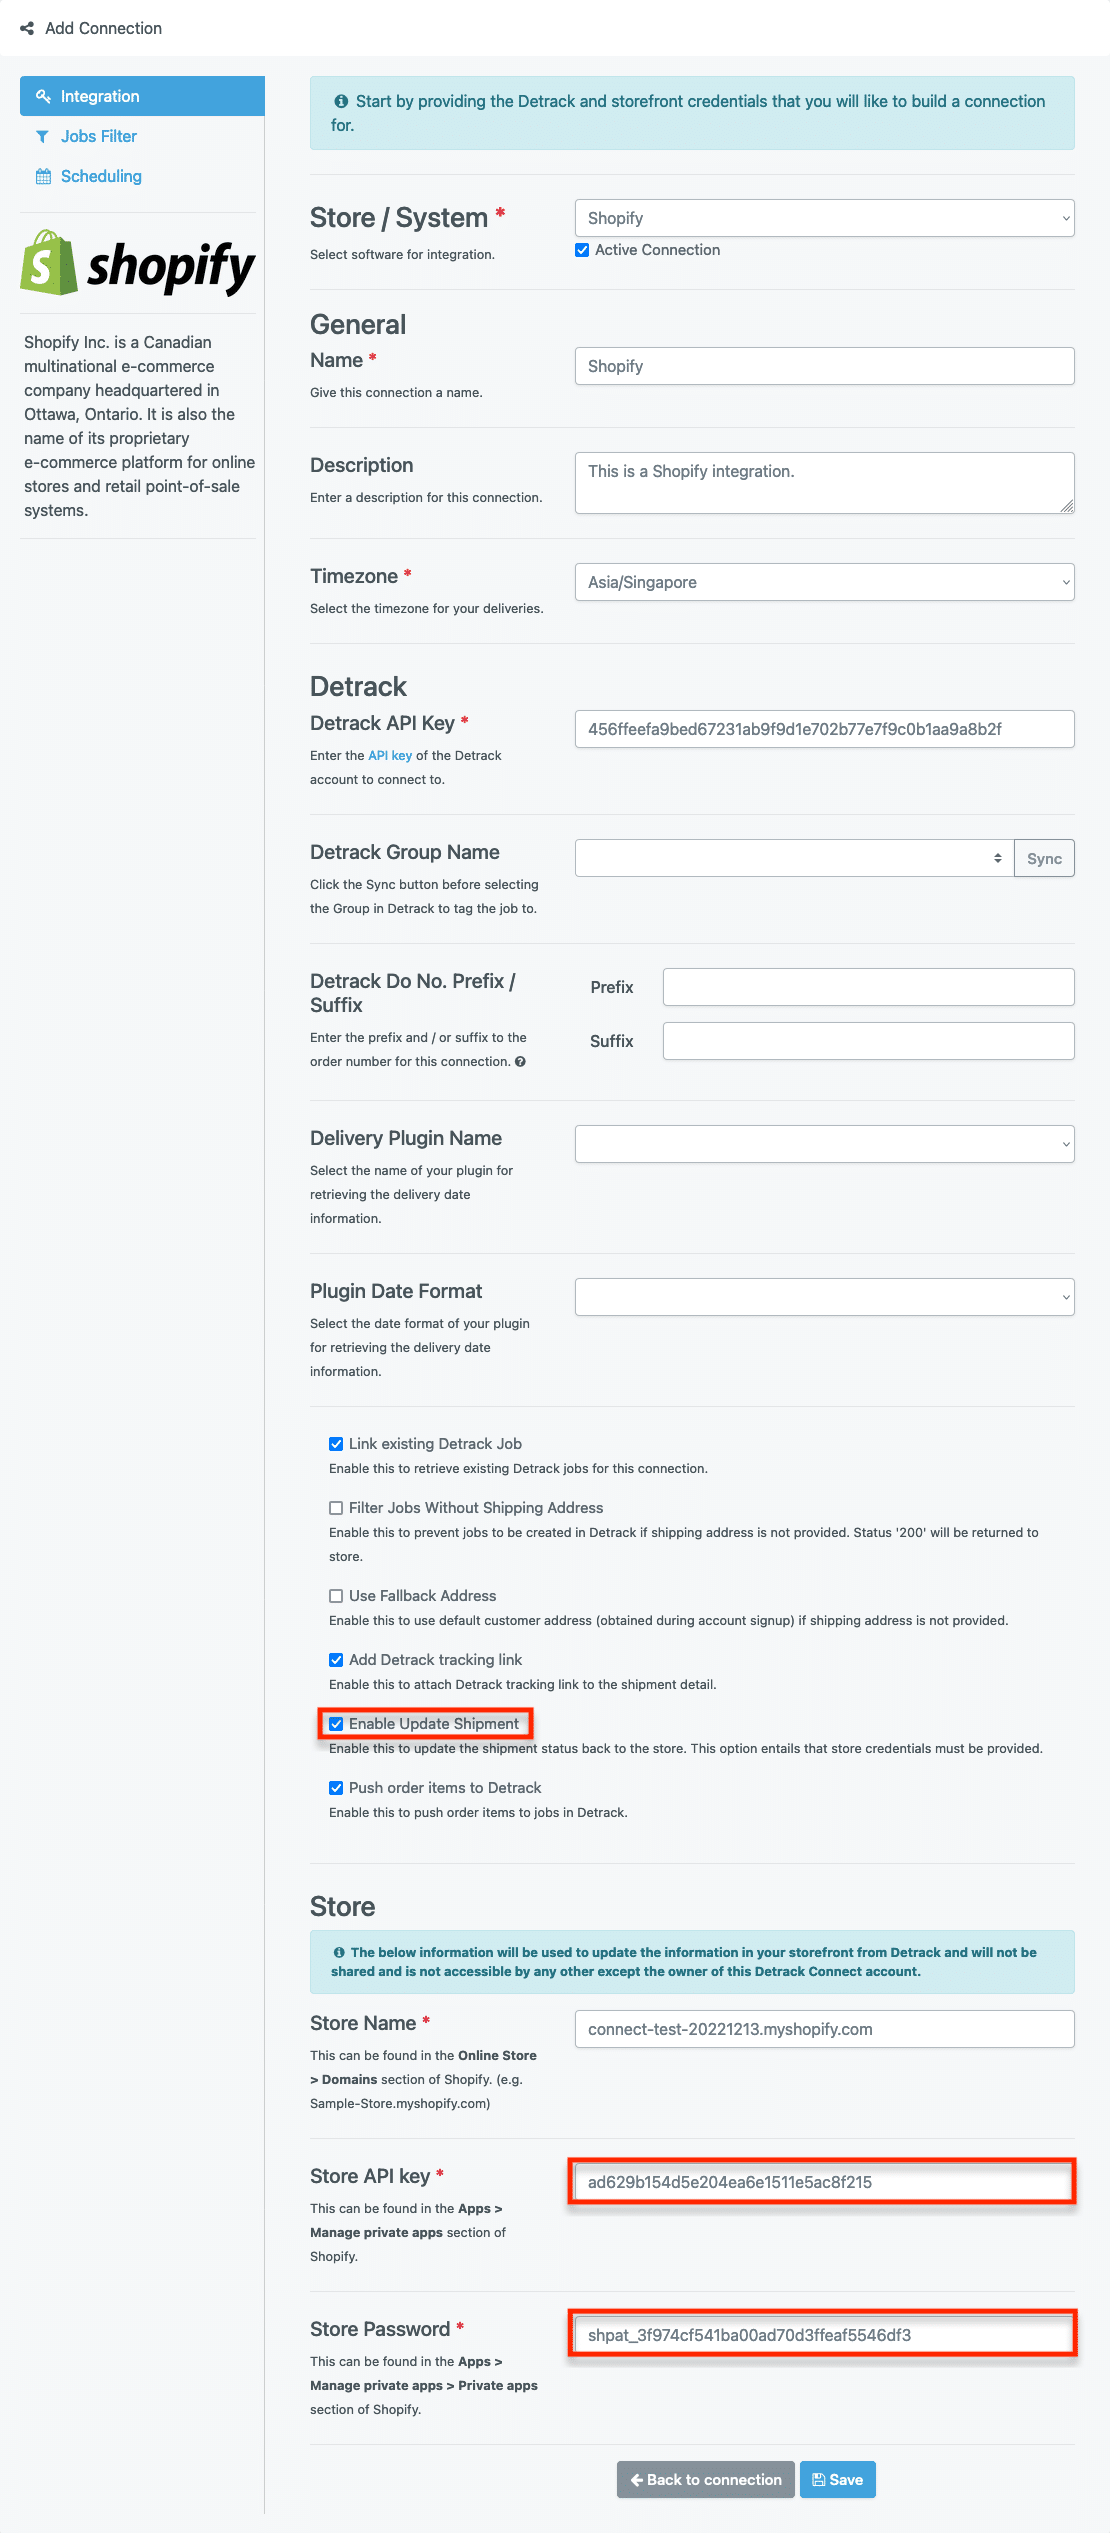
- Fill in the fields below, the red circled fields are mandatory. If you are doing this integration to pass orders to your 3PL’s Detrack account, ask your 3PL for the Detrack Group Name assigned to you as well as for the API key that belongs to your group. Refer to How To Generate The Detrack API Key For Detrack Connect.

- Next, go to your Shopify account to generate
- Store Name
- Shopify store API key
- Store Password
In Shopify
- Creation of custom app.
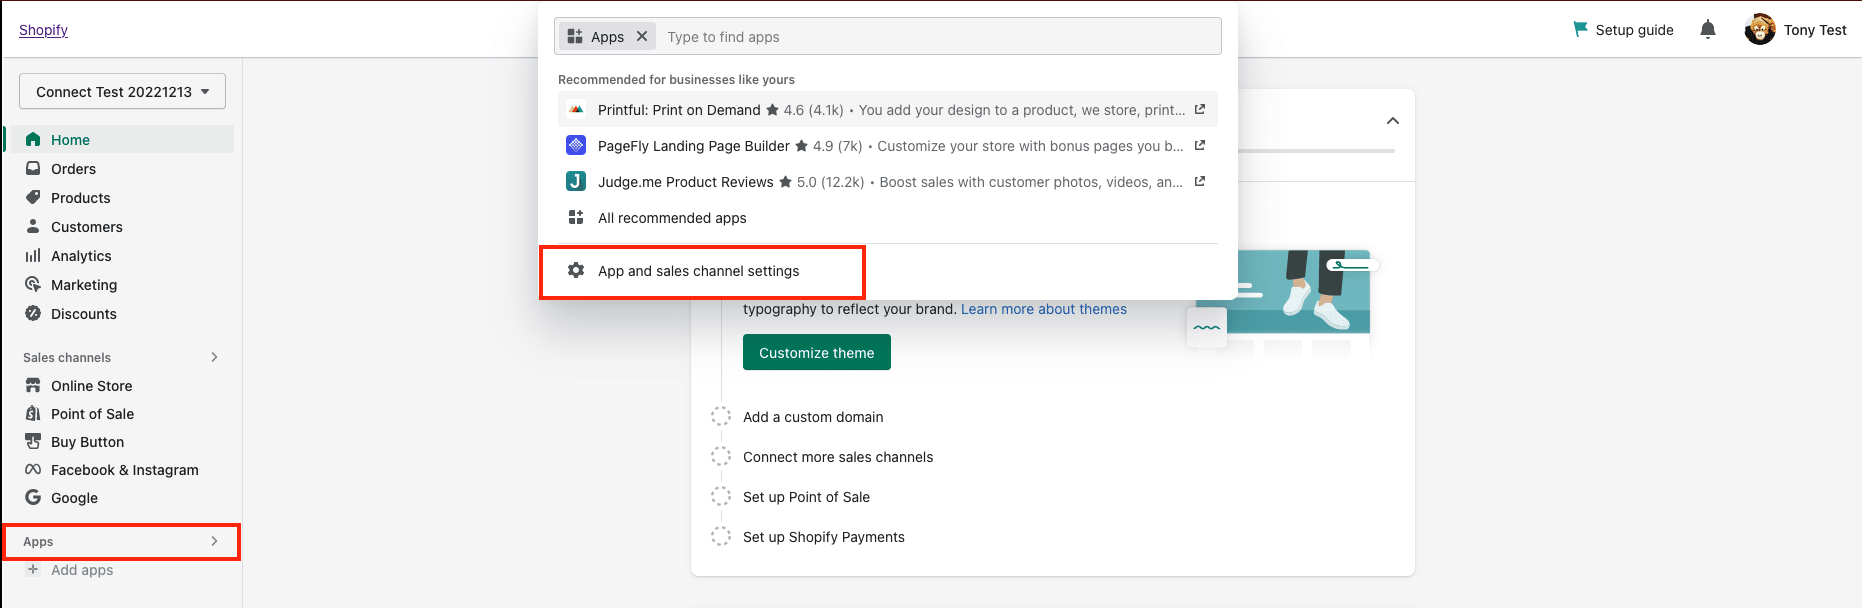
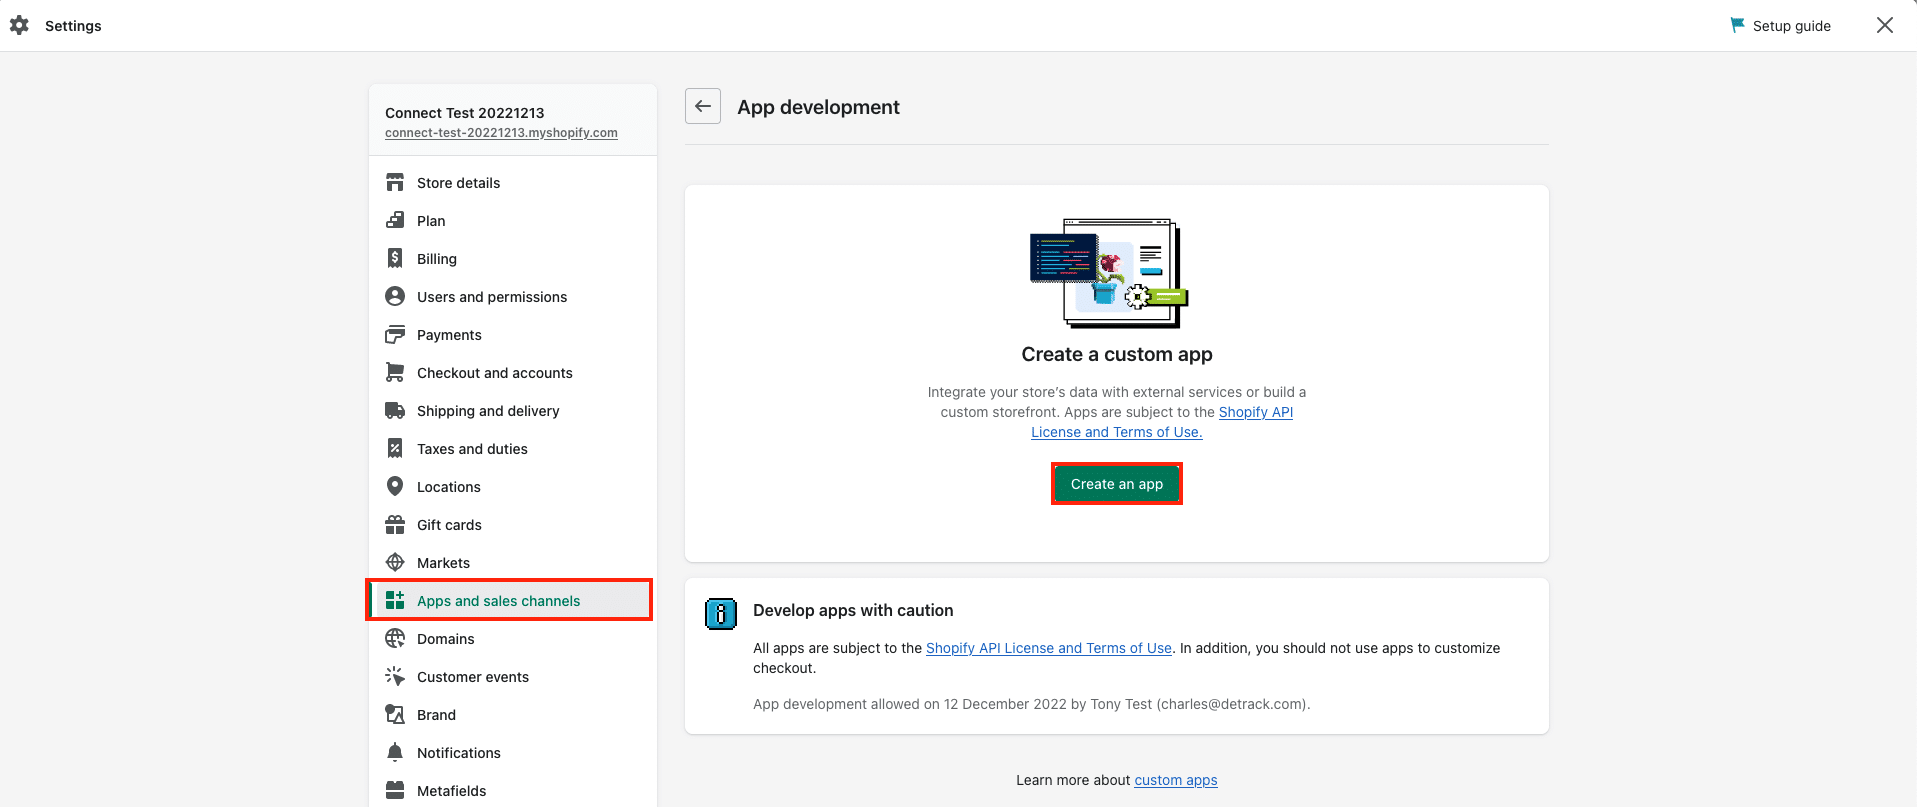
- From the side navigation bar, click Apps > App and sales channel settings.

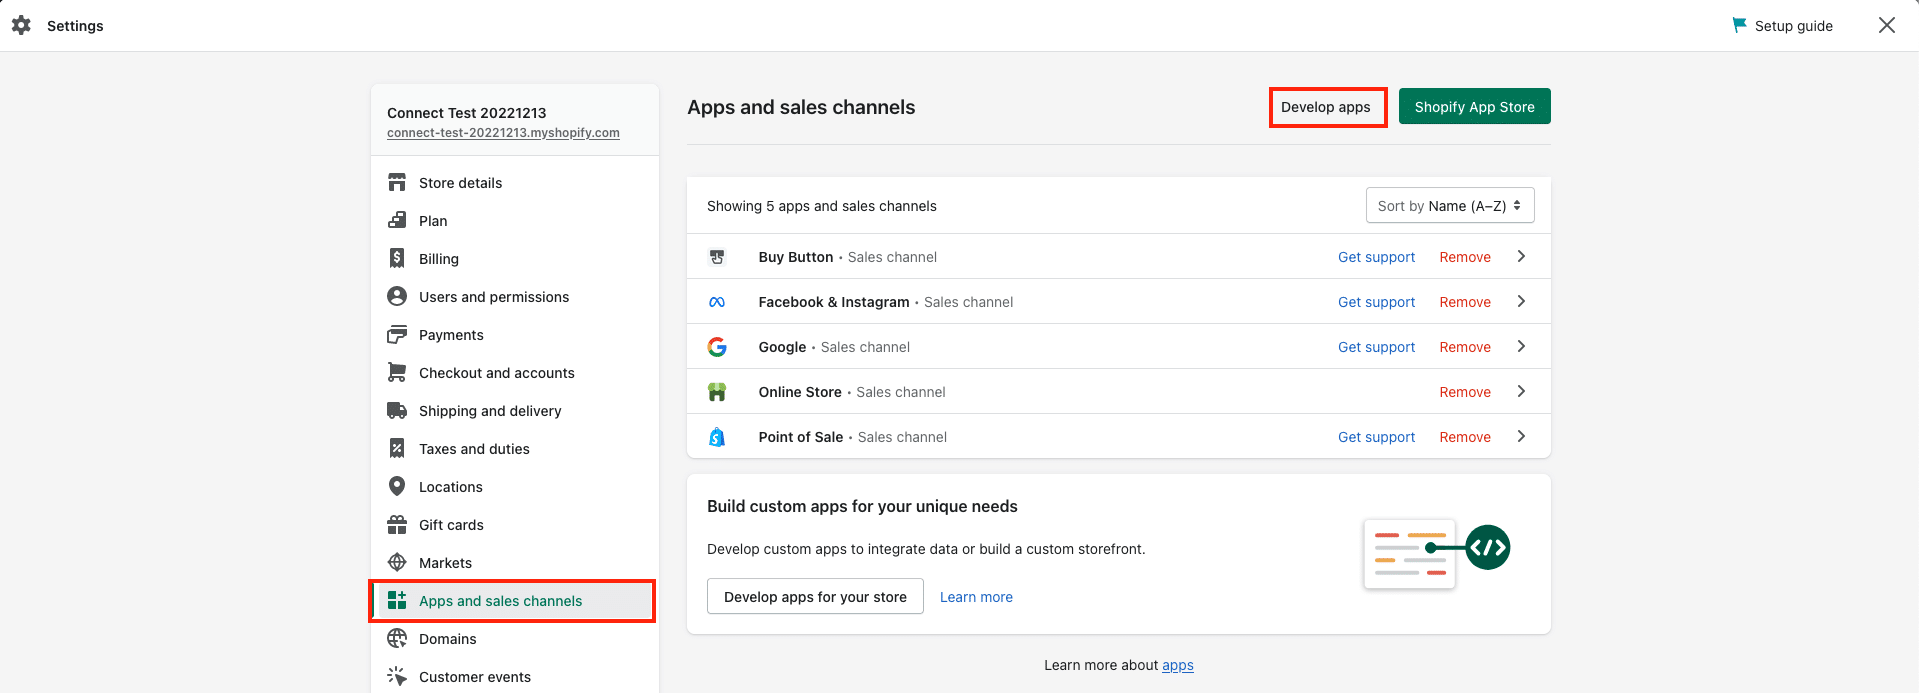
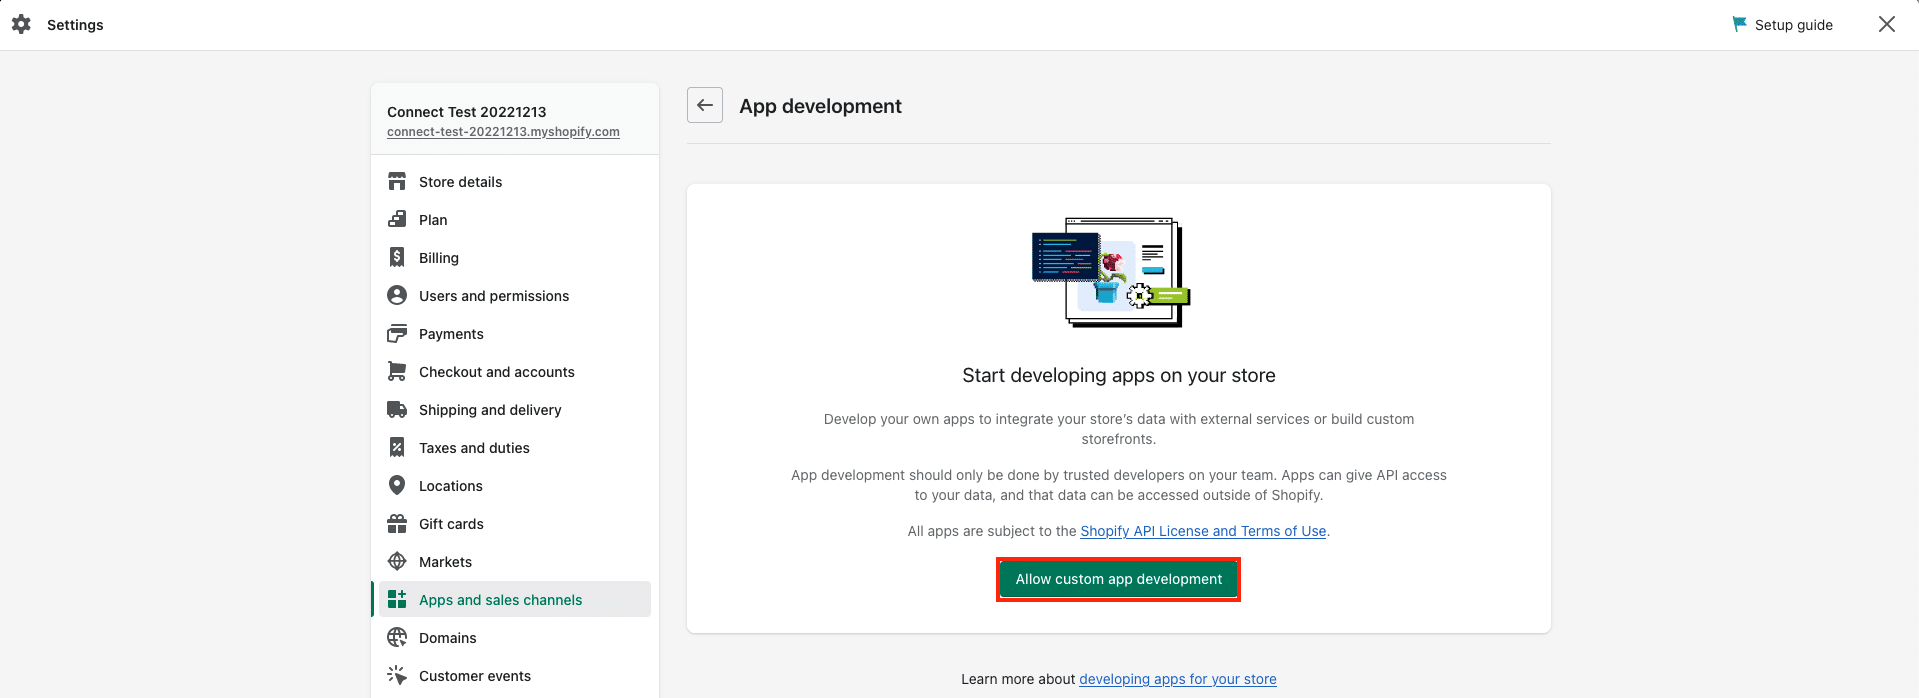
- Click Develop apps.

- Click Allow custom app development.

- Click Create an app.

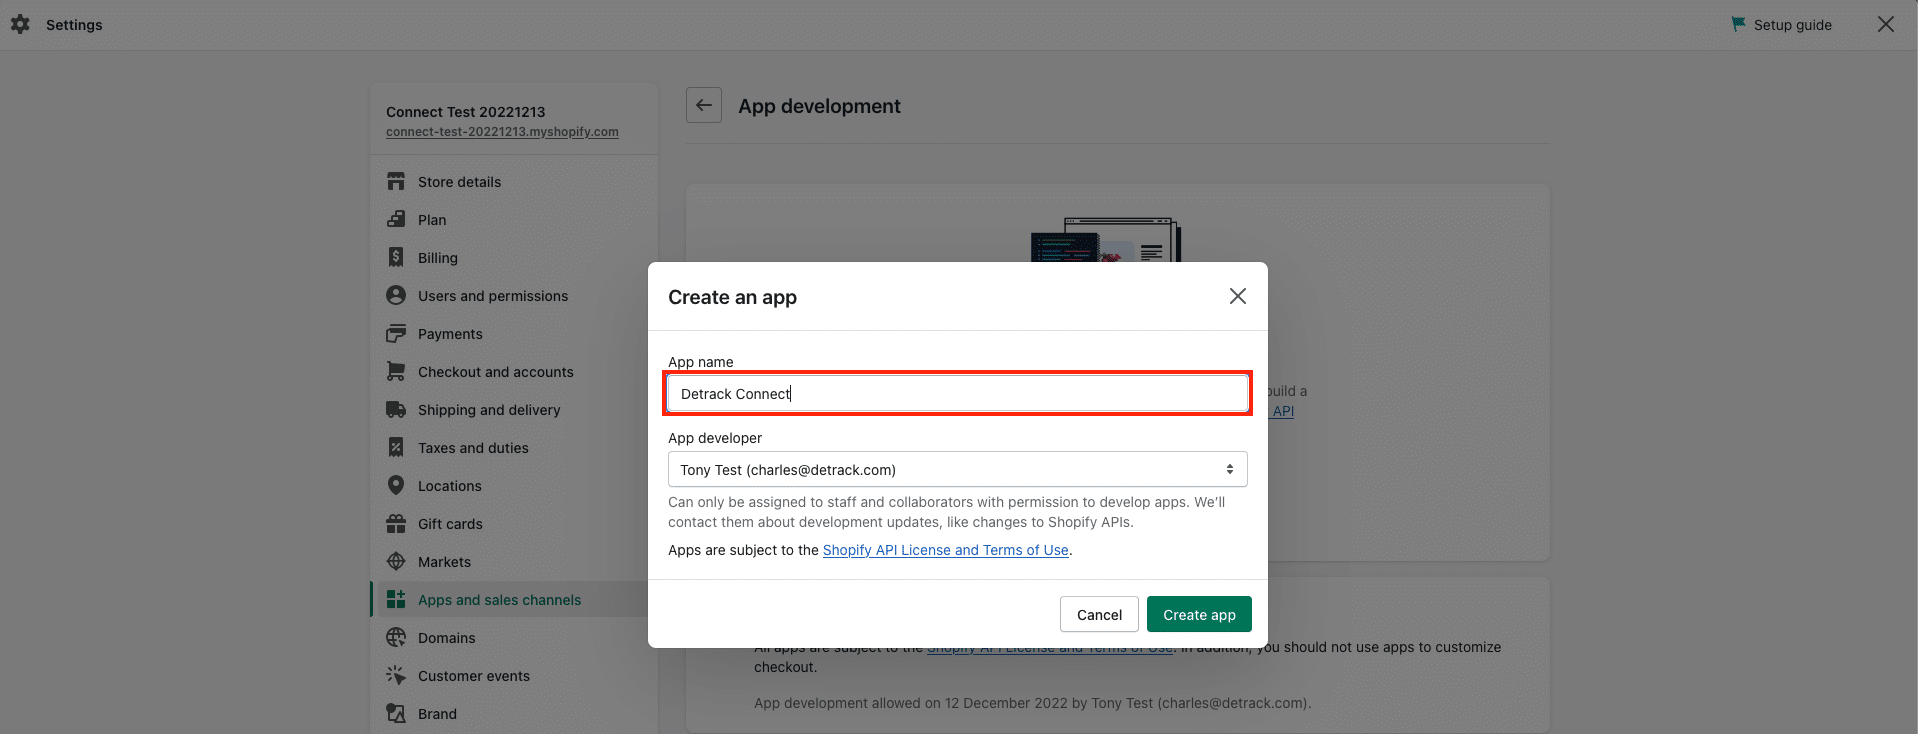
- Provide a name to the app > Save.

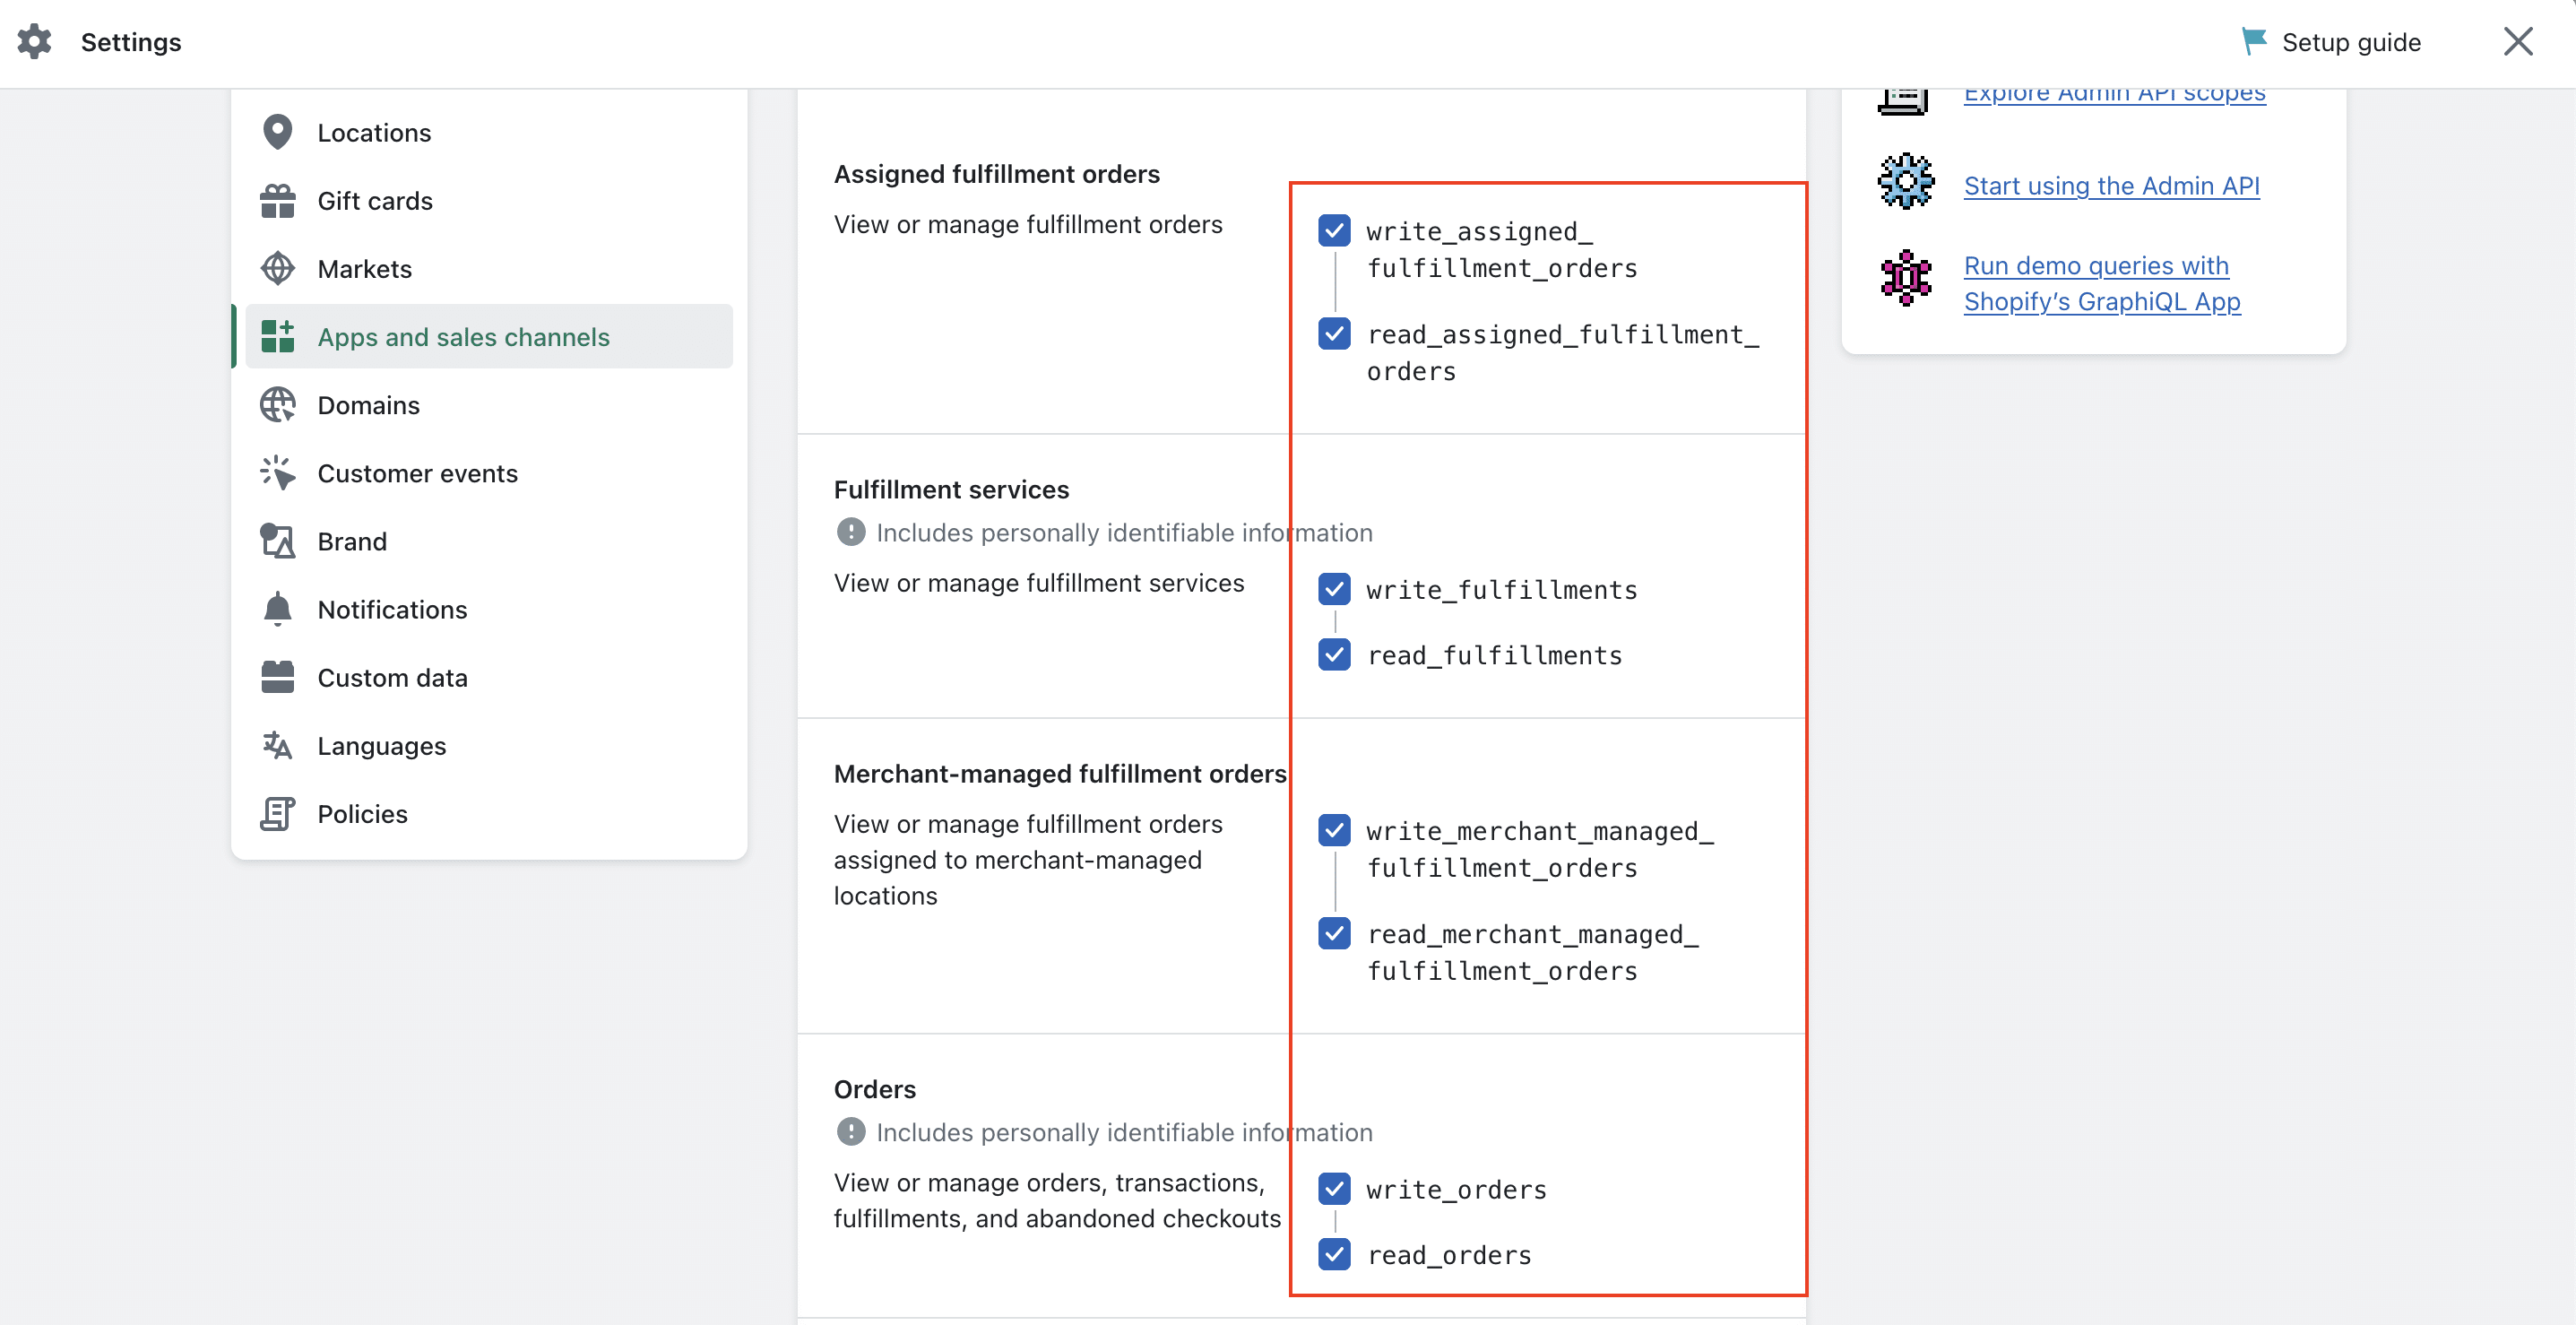
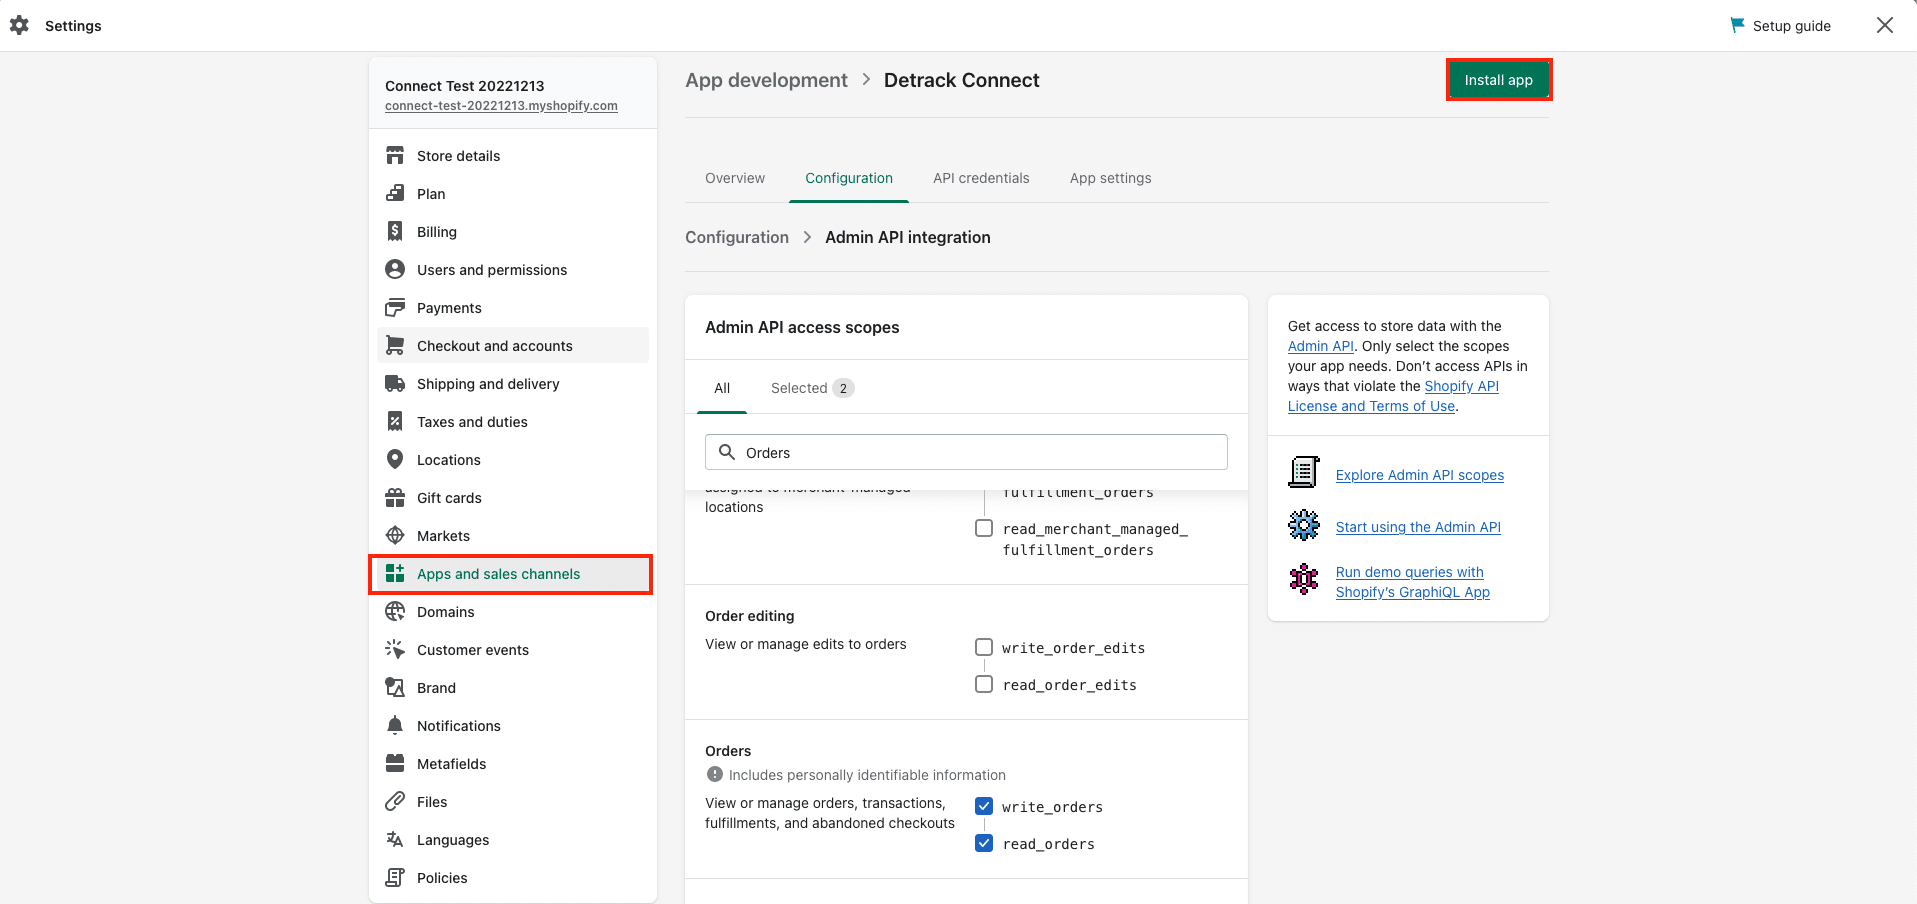
- Click the Configure Admin API scopes.

- Under the Configurations tab, grant the app the write_assigned_fulfillment orders, write_fulfillments, read_fulfillments, read_assigned_fulfillment_orders, read_orders, write_orders, write_merchant_managed_fulfillment_orders, read_merchant_managed_fulfillment_orders permissions > Save.
Note:
This permission is required if you wish for Detrack Connect to update the order information in your Shopify account, else there will be a 403 or 422 error.
The order must be in a fulfilled status for Detrack Connect to update the tracking information, otherwise it will return a “Fulfillment not found in Shopify.” error.

- Click Install App to install the app.


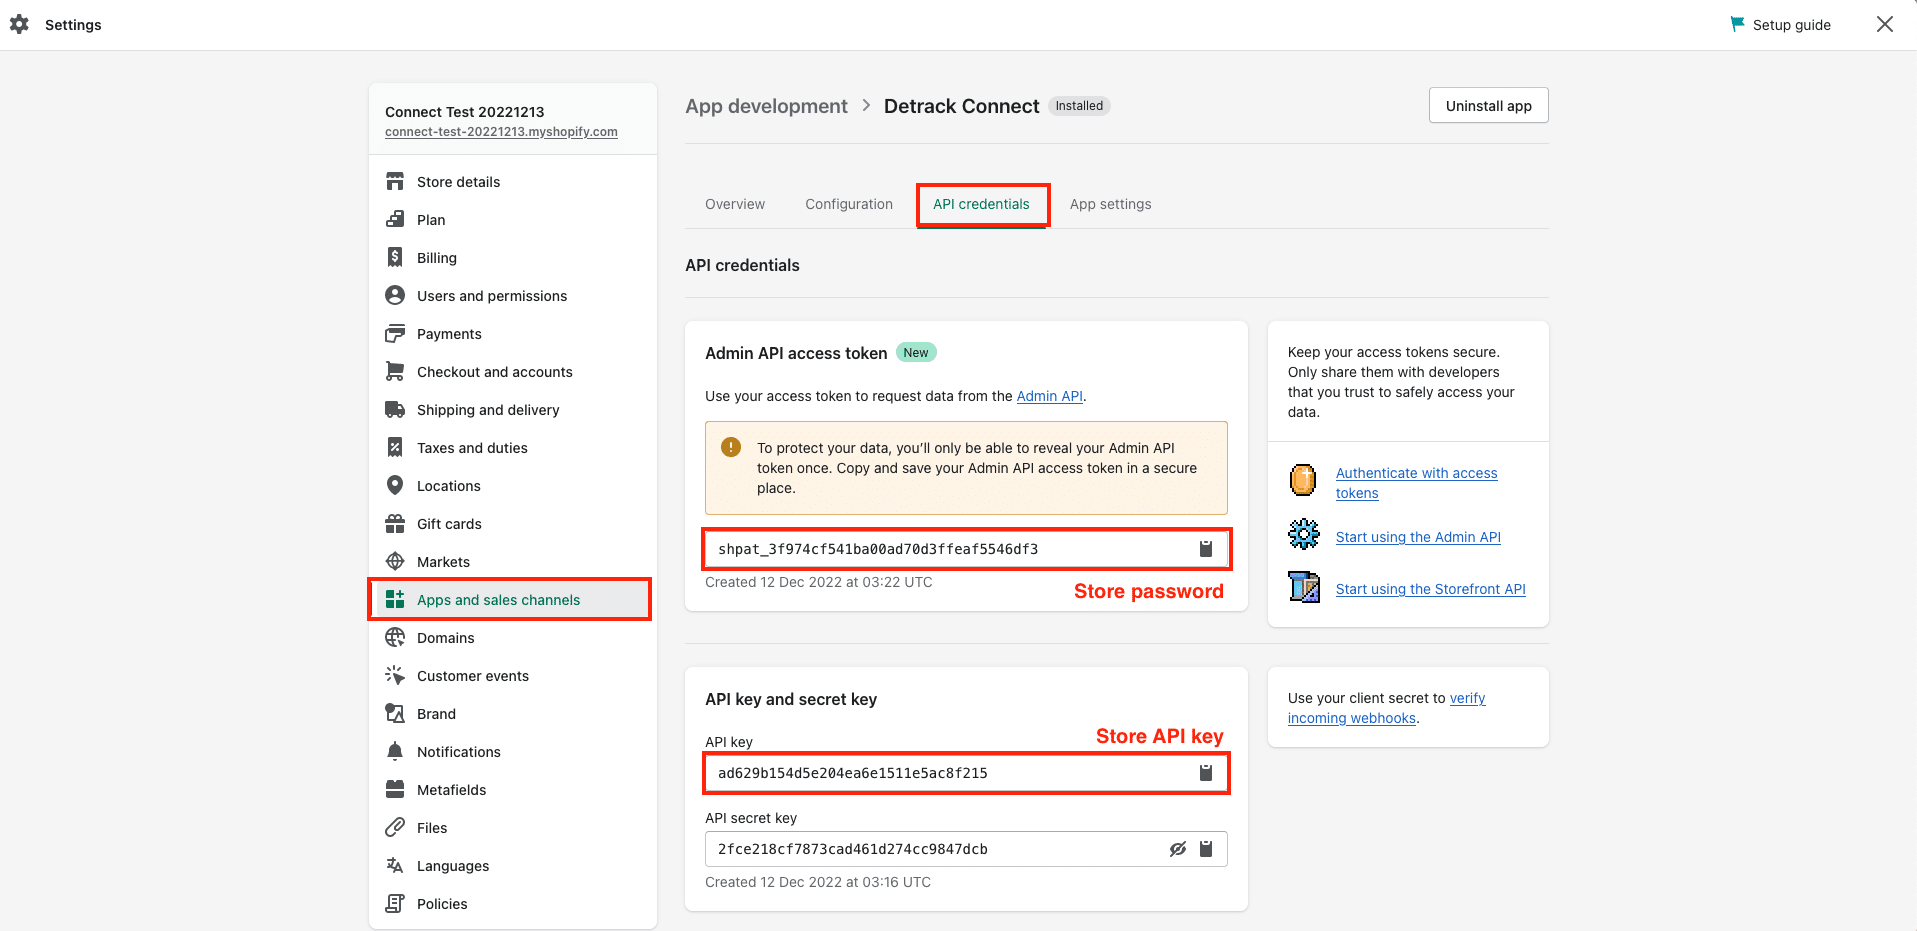
- Navigate to the API credentials tab to find the API access token and API key.
Copy them out for use in Detrack Connect.

- Paste both the Admin API access token and API Key into Detrack Connect.
Admin API access token => Store Password
API Key => Store API Key

Webhook
- From the side navigation bar, click Apps > App and sales channel settings.
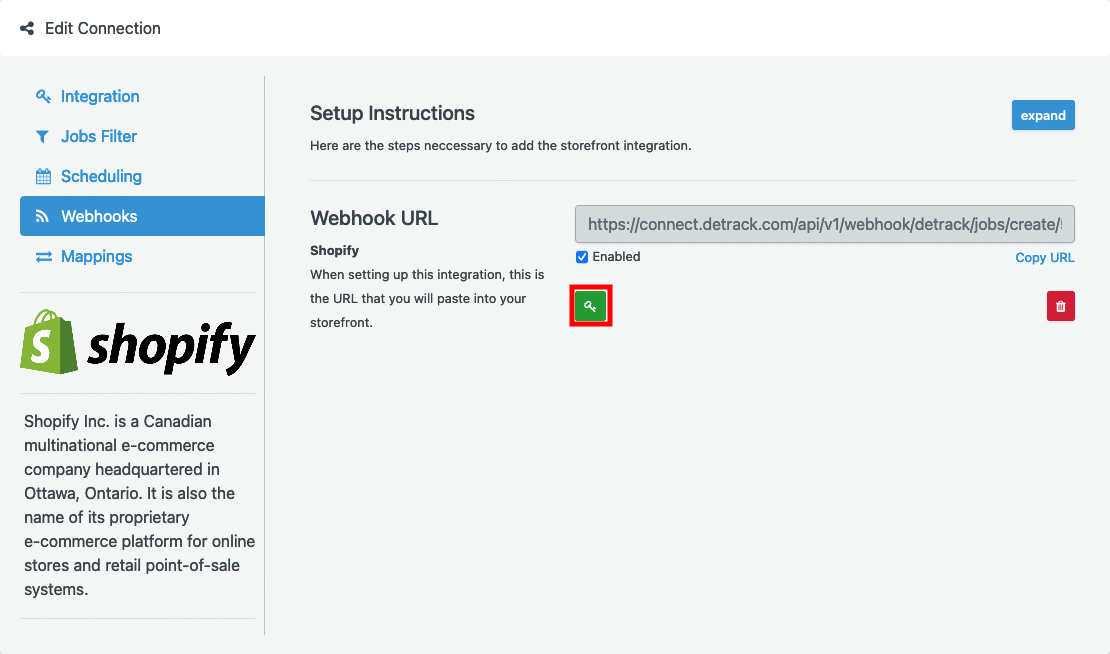
- This webhook is for your storefront to send information to Detrack Connect.
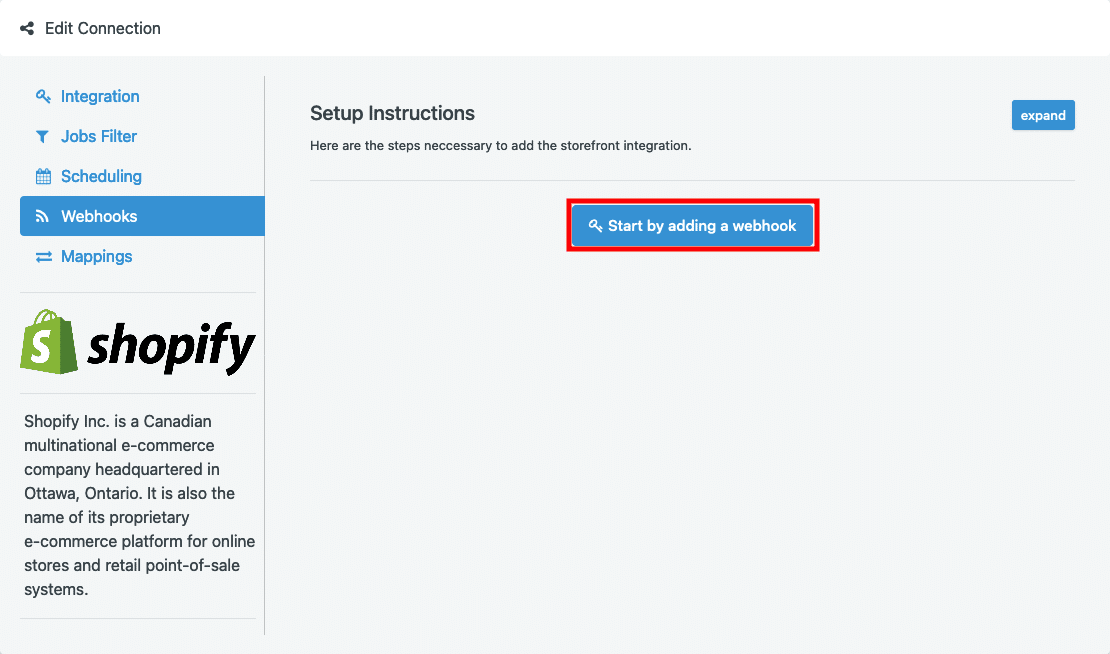
- Click Start by adding a webhook.

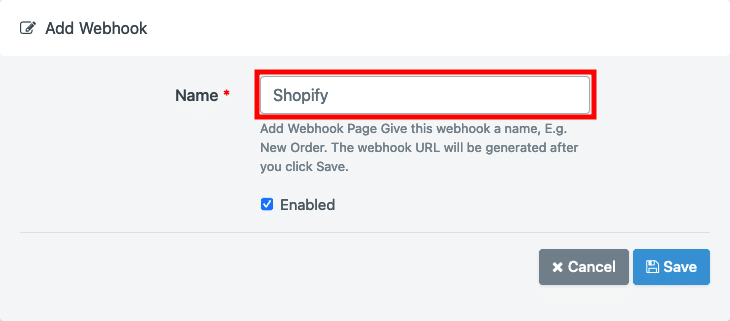
- Provide a name for your webhook and click Save.

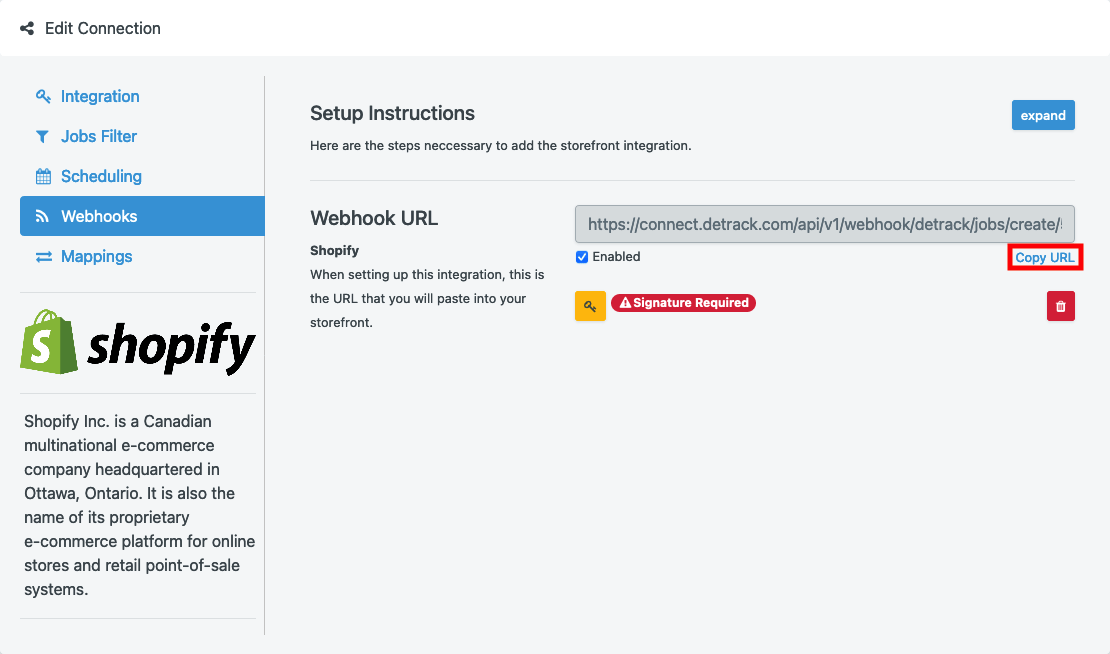
- This URL is the address for your storefront to send the information over via webhook. Copy the URL and head over to your Shopify account.
In Shopify
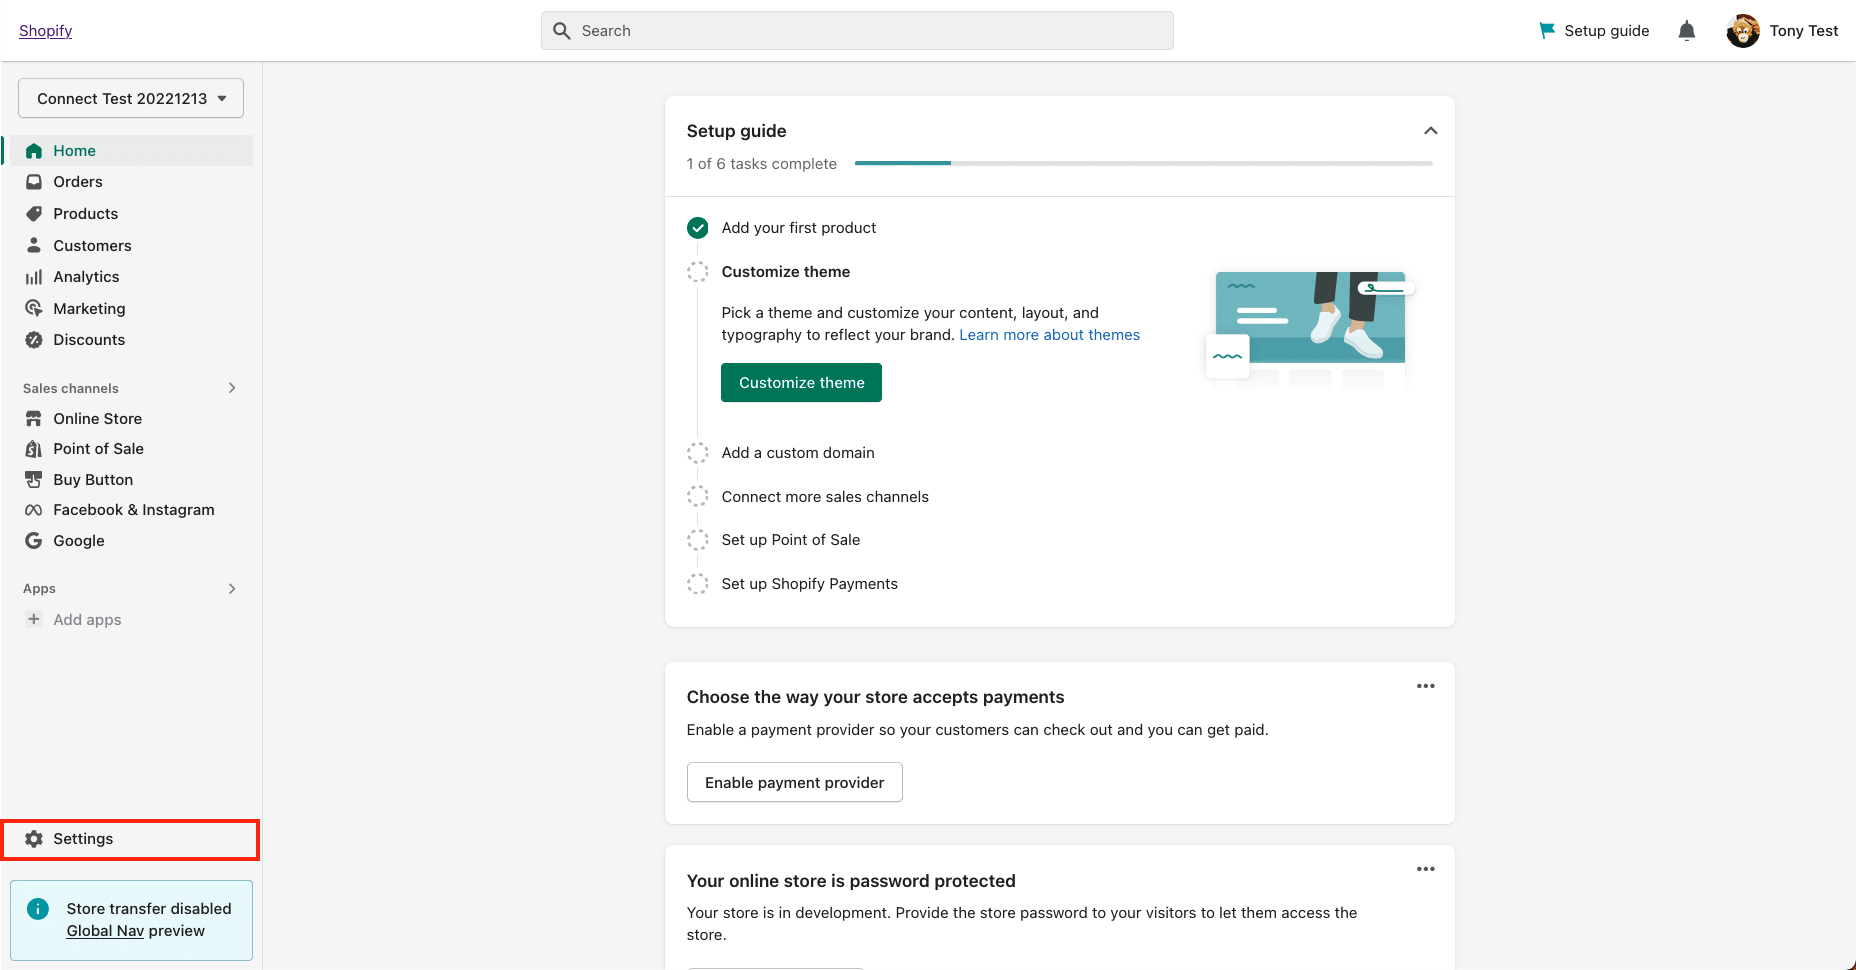
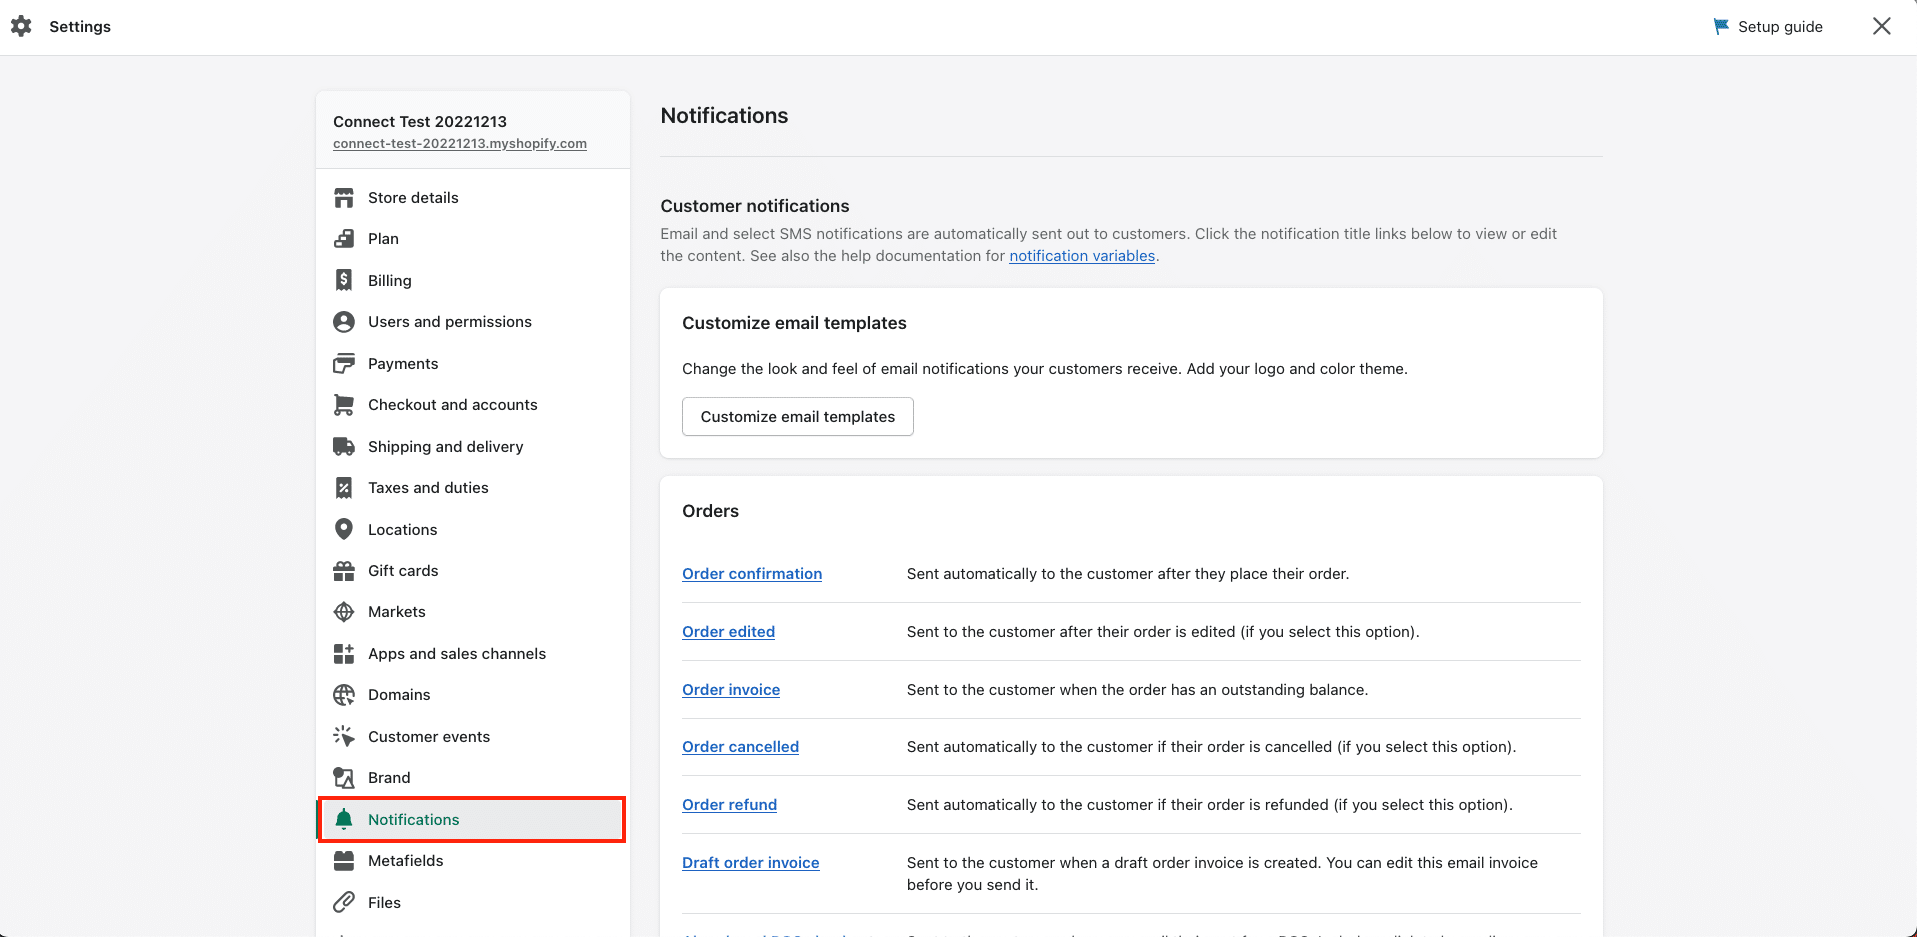
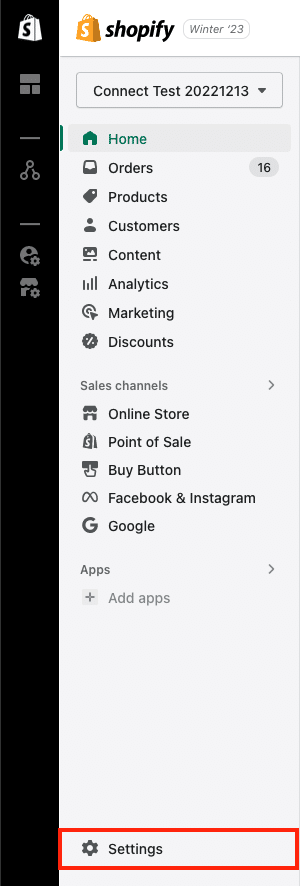
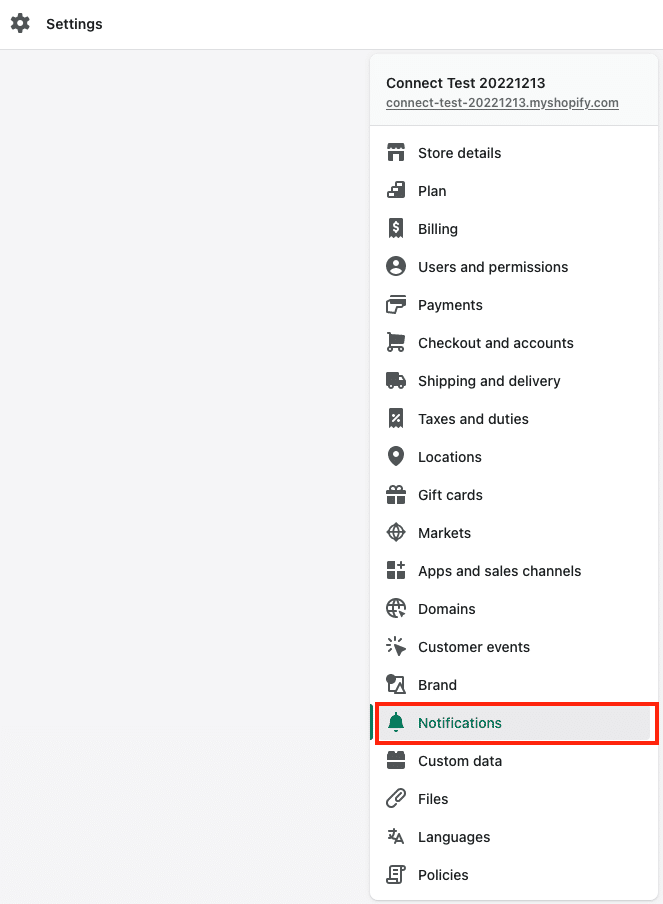
- In your Shopify account, click Settings at the bottom left corner > click Notifications.


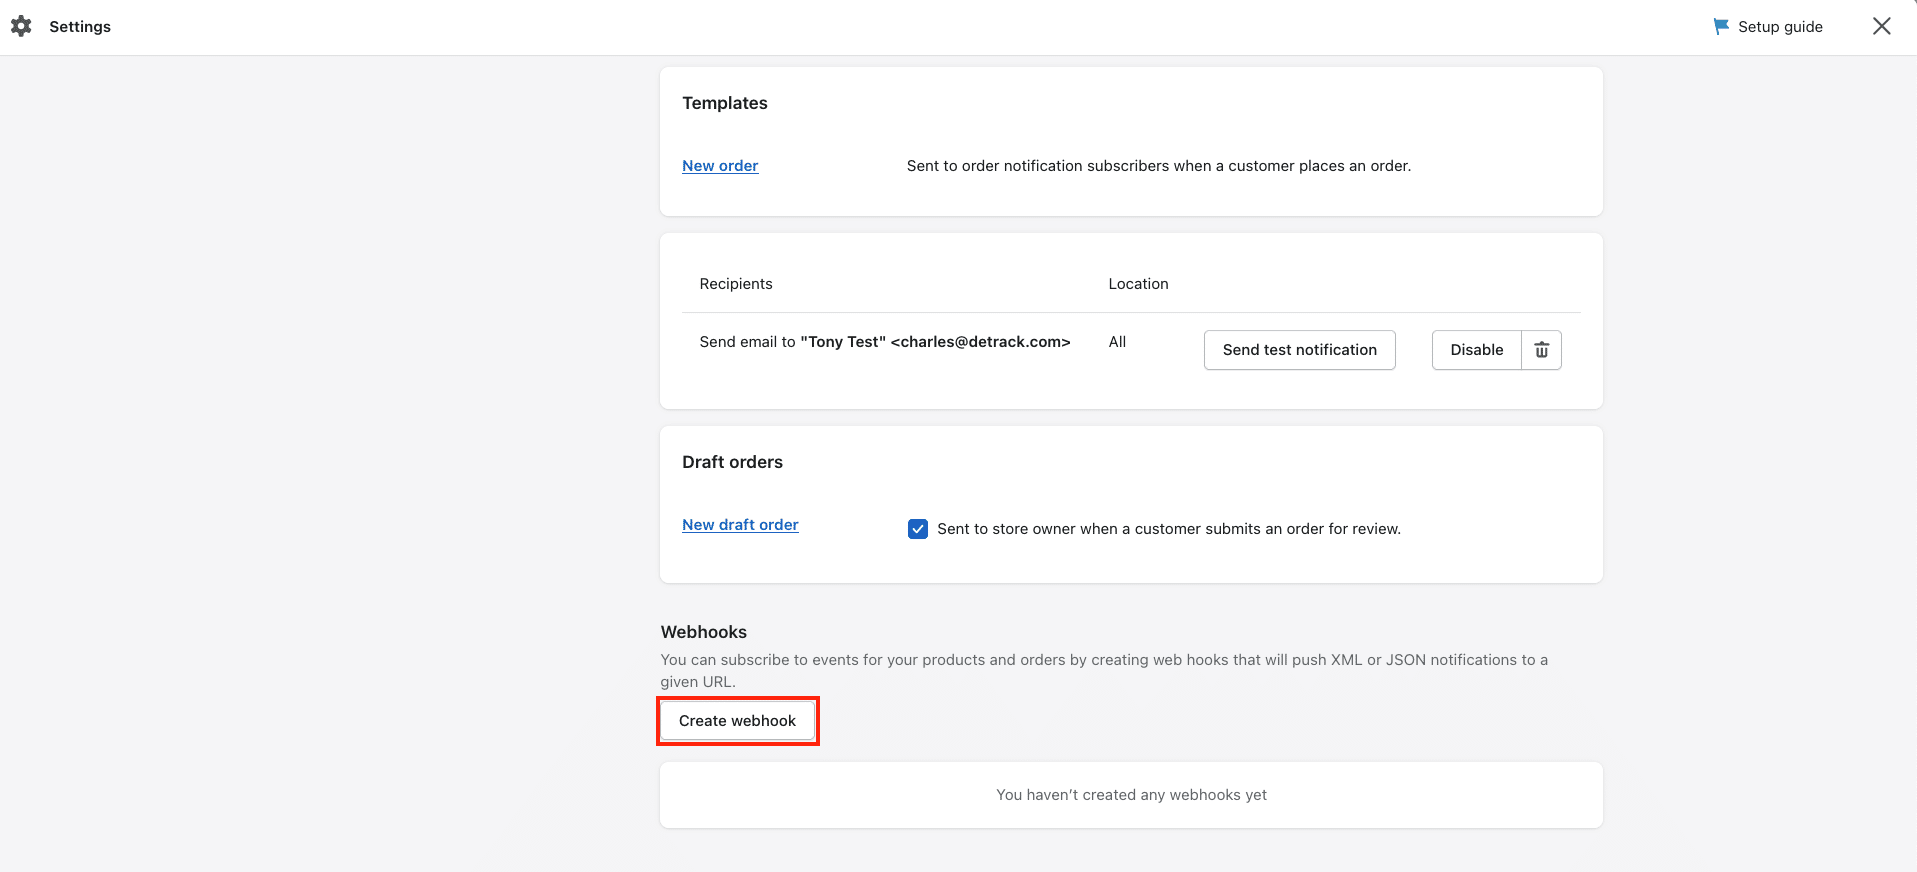
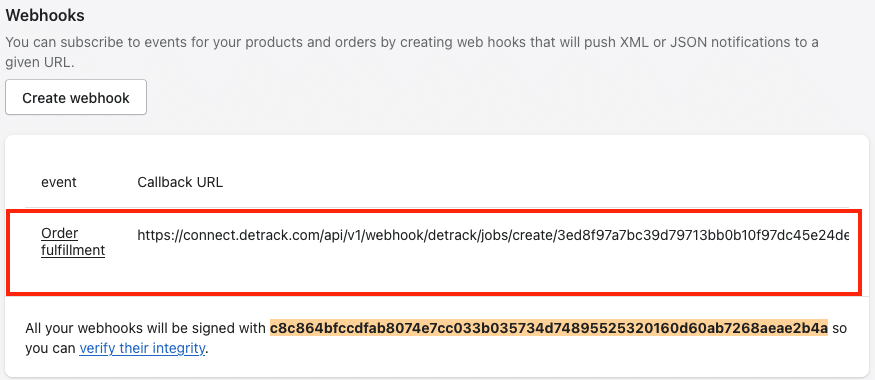
- Scroll down to bottom of the page to the Webhook section > click Create Webhook.

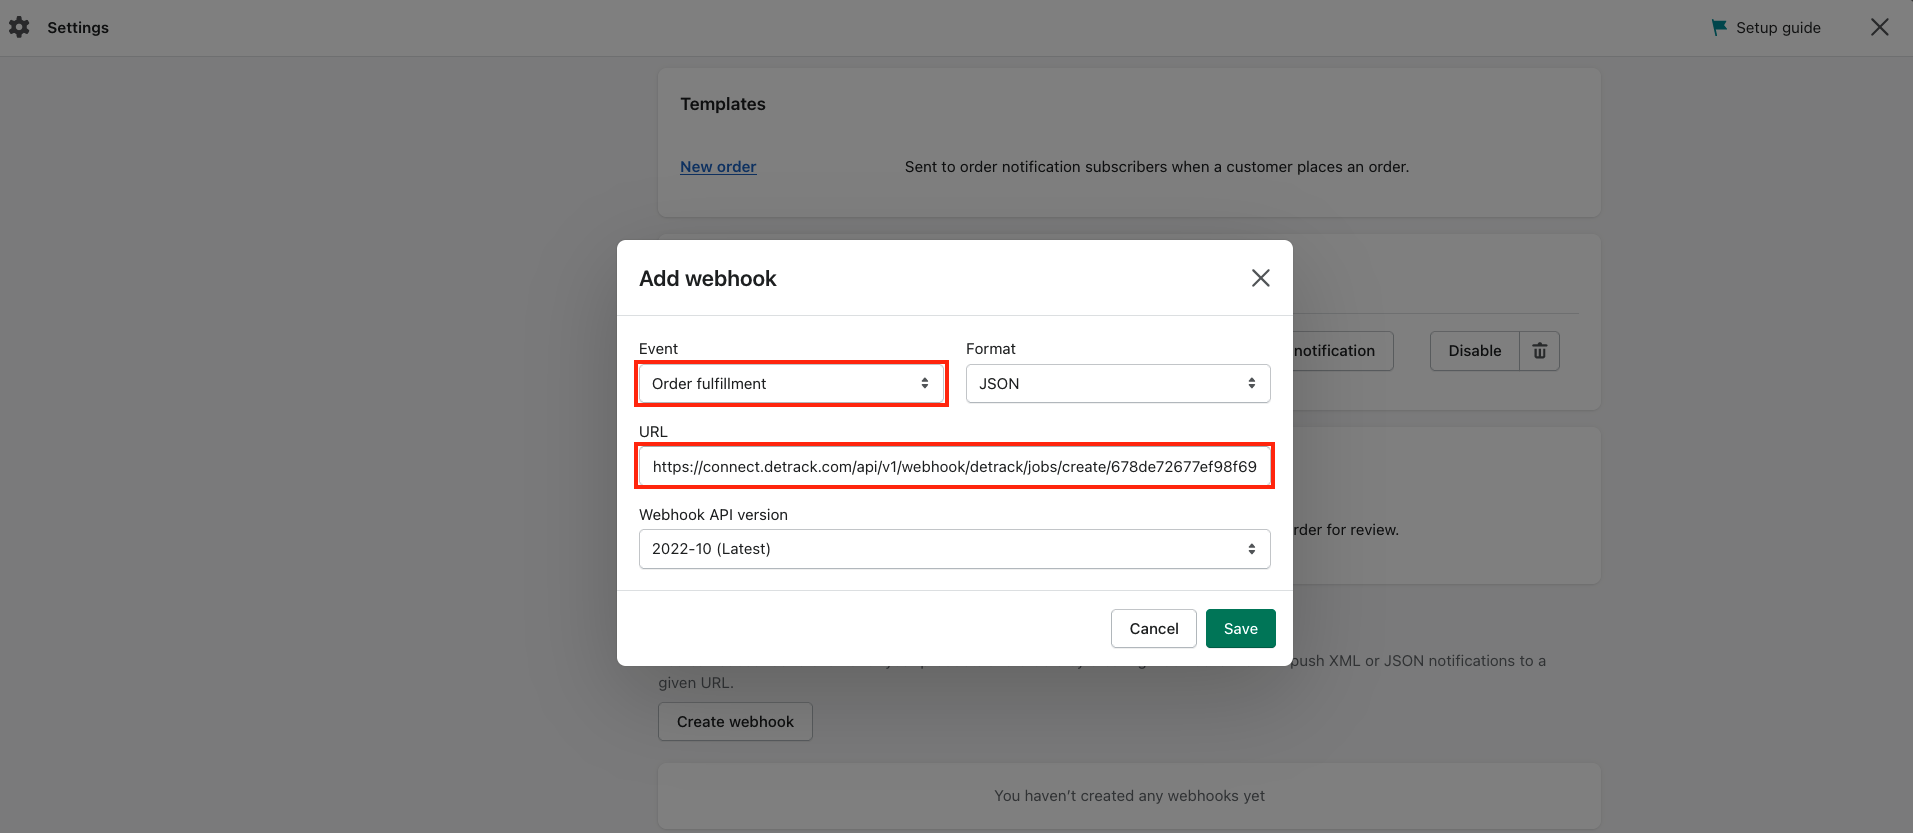
- Select the event (Shopify recommends using Order fulfillment) for triggering the webhook PUSH notification and paste the Detrack Connect URL into the URL section and click Save webhook.
When the order is marked as fulfilled or partially fulfilled in your Shopify admin and the shipment is in transit, this will trigger the Order fulfillment webhook for job creation in Detrack.
Refer to Shopify fulfillment documentation.

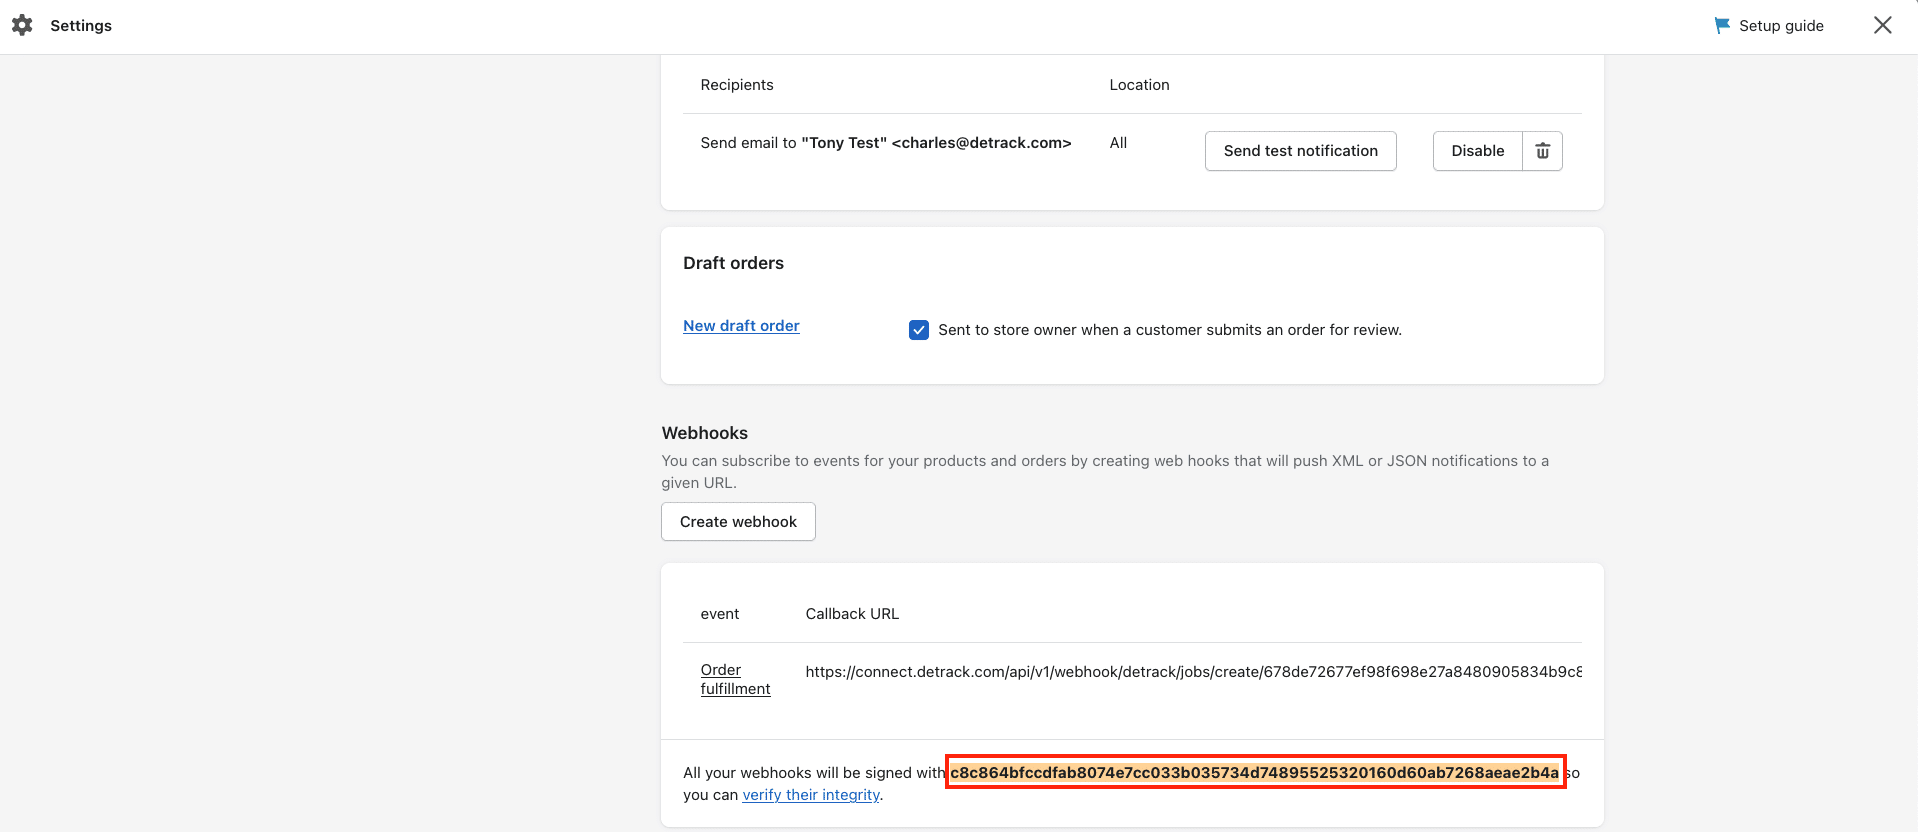
- At the webhook section, a special webhook signature from Shopify will be generated. Copy this signature from Shopify.

In Detrack Connect
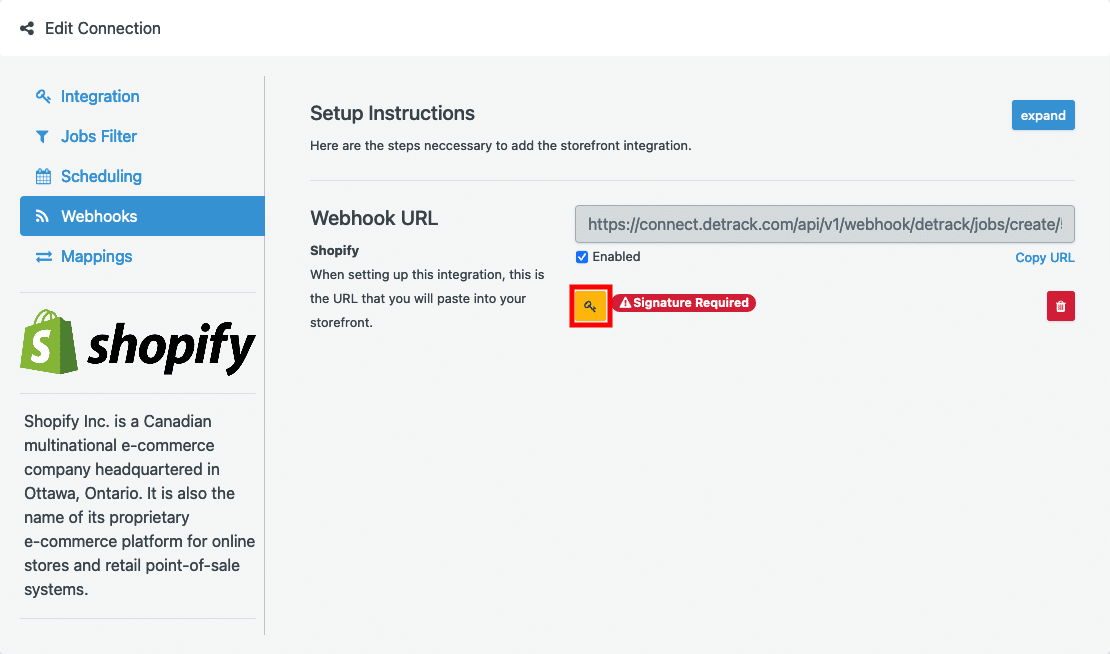
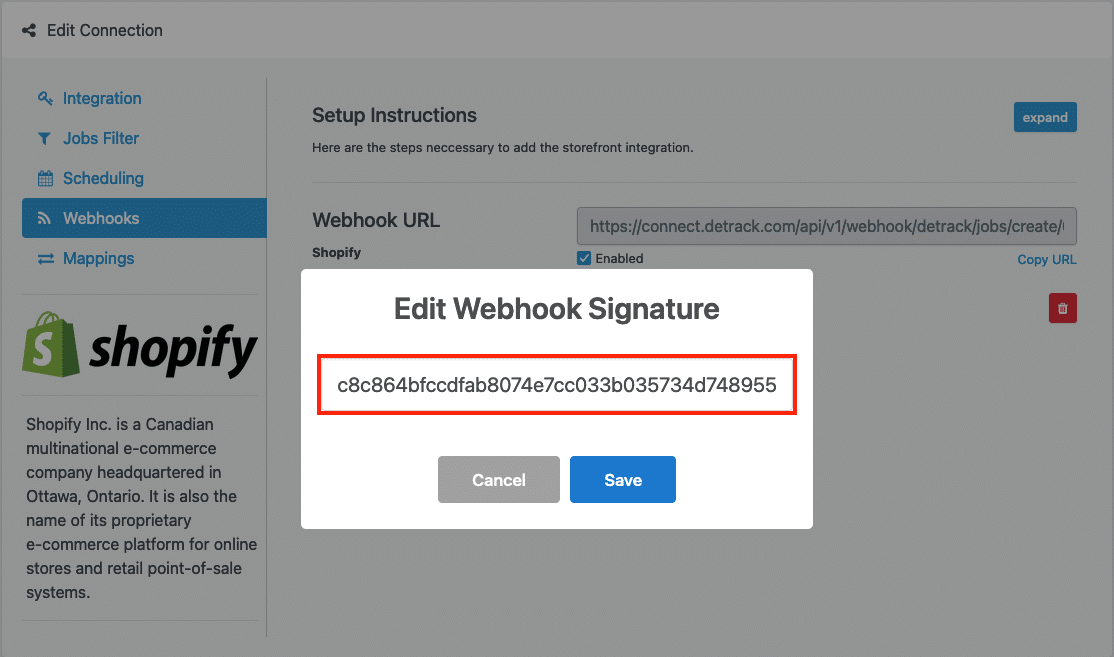
- Navigate back to Detrack Connect and click on the Key icon.
- Paste the copied Shopify Webhook Signature into the pop-up.

- Click Save when done, and the Key icon will turn green.
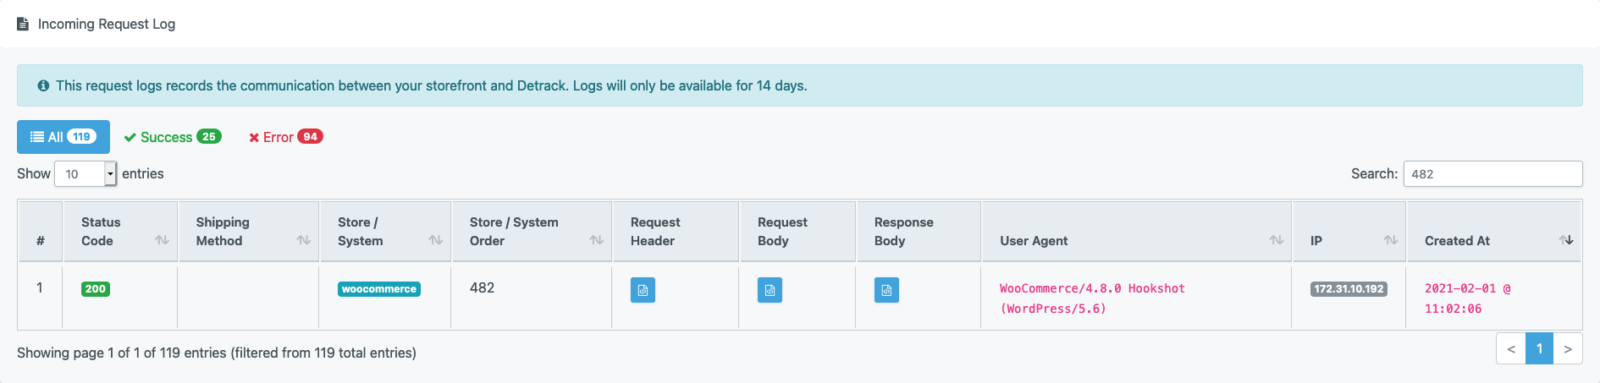
- You can check by creating a dummy order from your Shopify storefront, and fulfill it to test. If the setup is done correctly, it will be captured under Logs > Incoming Log.
Refer to Detrack Connect – Sending Shopify Orders to Create Jobs in Detrack.
- Click Start by adding a webhook.


Status Mapping
This section is regarding the mapping of the statuses between Detrack and Shopify.| Detrack | Shopify |
|---|---|
| Info received | On its way |
| Out for delivery | Out for delivery |
| Completed | Delivered |
| Partially Completed | In Transit |
| Failed | Failed |
Field Mapping
Below is the default field mapping between Detrack and Shopify. If you happen to be using other plug-ins, you may use the Mappings feature to perform custom mapping of data.- date
- address
- do_number
| Detrack | Shopify |
|---|---|
| do_number | order_number |
| date | updated_at |
| start_date | updated_at |
| job_received_date | updated_at |
| address_1 | address1 |
| address_2 | address2 |
| city | city |
| state | province |
| postal_code | zip |
| country | country |
| last_name | last_name |
| deliver_to_collect_from | first_name |
| notify_email | |
| total_price | total_price |
| address_lat | latitude |
| address_lng | longitude |
| phone_number | phone |
| tracking_number | id |
|
|
Mappings
This section is for use if you wish to retrieve certain field information from plug-ins to override the default field mapping. Most of the plug-ins will be adding the information in the note_attributes key in the request payload.- Create a dummy order from your storefront to Detrack Connect.

- There will be an entry under Logs > Incoming from your storefront.

-
Edit the required Connection.

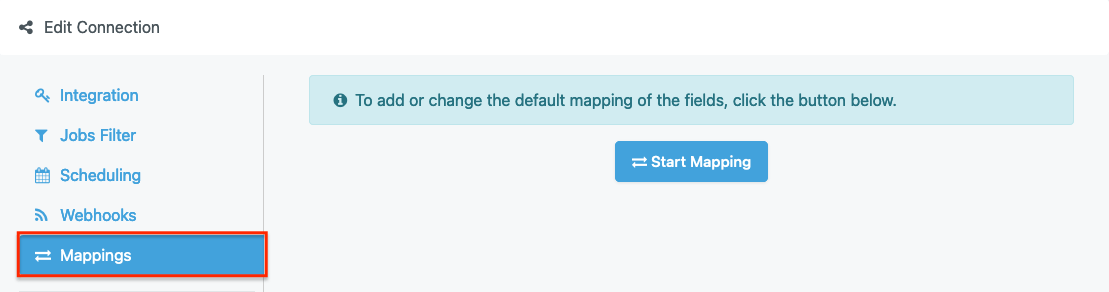
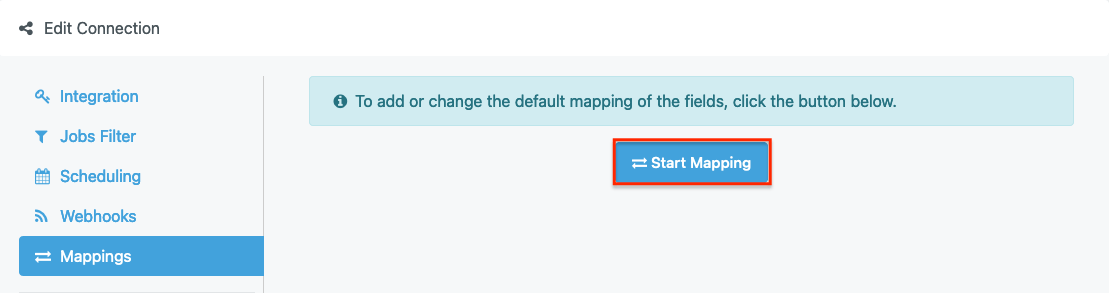
- Click on the Mappings tab.

- Click the Start by adding a mapping button.

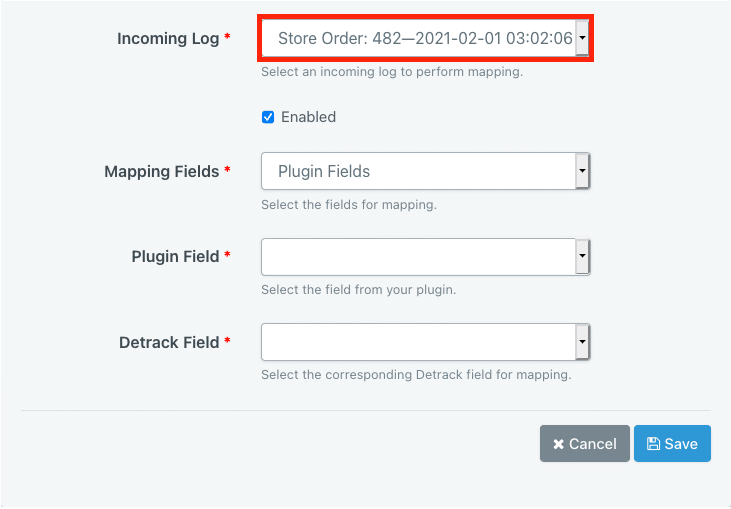
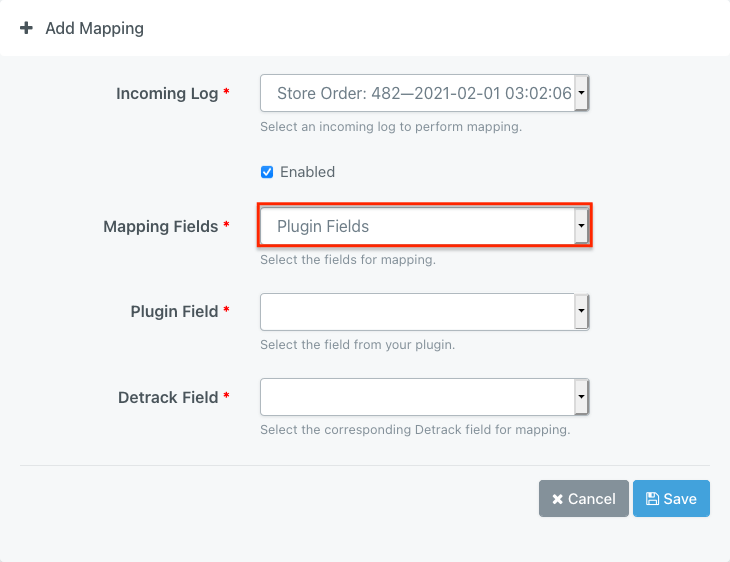
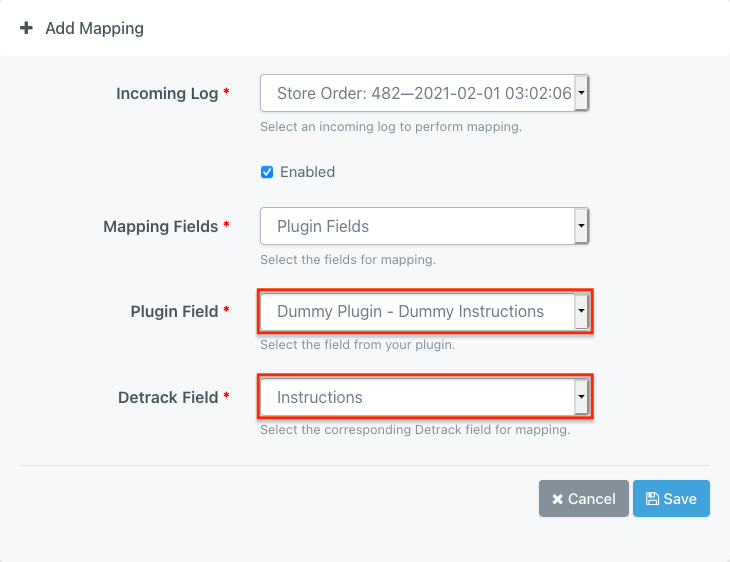
- For Plugin
- Select the Order No. of the incoming log.

- Select the plugin name.

- Select the Detrack field for mapping the information.
- Select the Order No. of the incoming log.
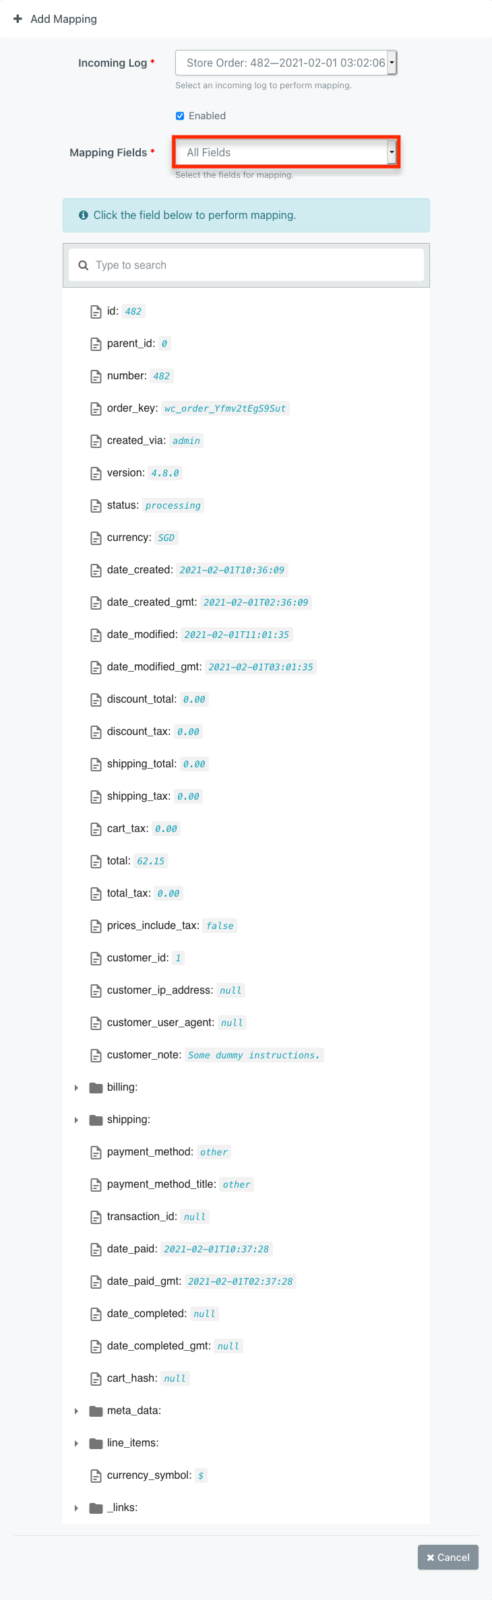
- For All Fields
- Select All Fields for Mapping Fields; and a list of fields will appear according to the information sent over from your storefront.

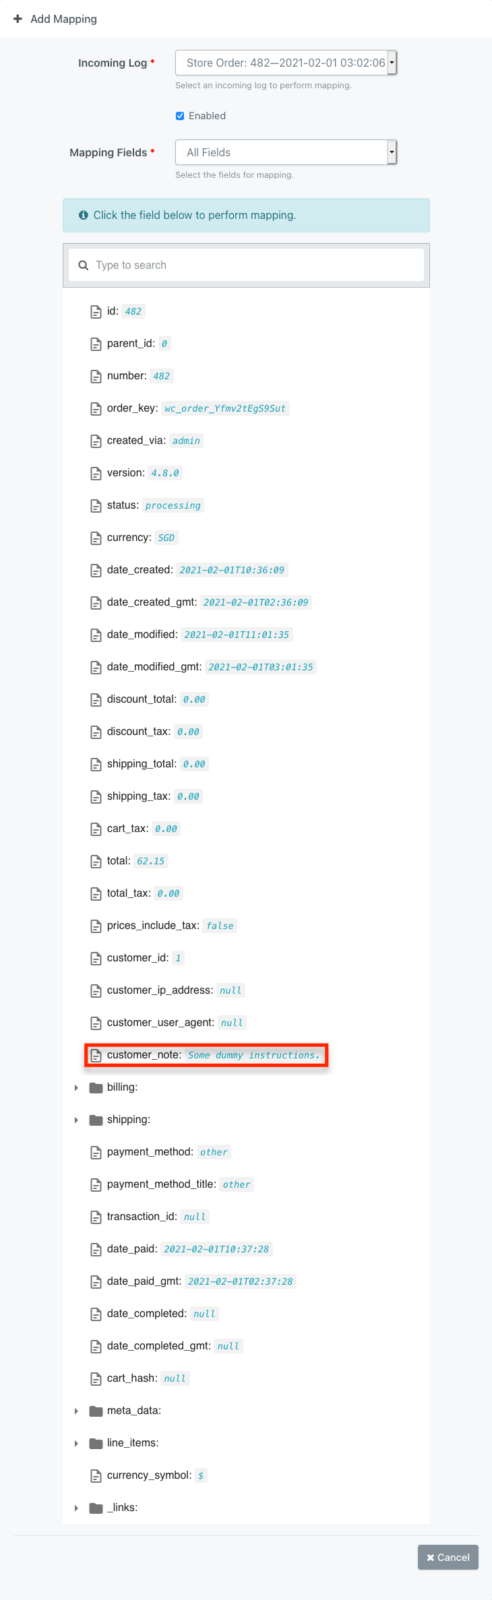
- Click on the required field to open a pop-up, e.g. the customer_note is being used to map over to the Instructions field in Detrack.
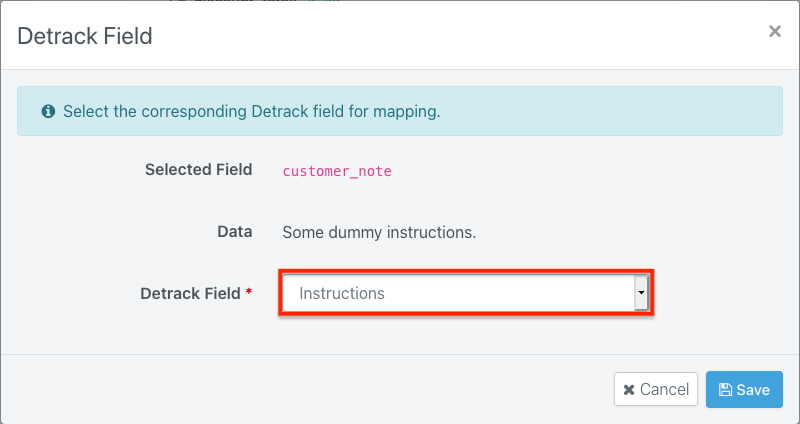
- A pop-up will appear for the selection of the Detrack field for mapping the information.

- Click Save when done.
- Select All Fields for Mapping Fields; and a list of fields will appear according to the information sent over from your storefront.
- Click Save when done.
- If necessary, repeat the above to perform more mappings.

| Detrack Field | Description |
|---|---|
| Date | Date of delivery. The date that the delivery job will be performed by the courier. |
| Address | The location of the job to perform the delivery. |
| Address 1 | The location of the job to perform the delivery. For use when the address is split up. Part of Line Address. |
| Address 2 | The location of the job to perform the delivery. For use when the address is split up. Part of Line Address. |
| Address 3 | The location of the job to perform the delivery. For use when the address is split up. Part of Line Address. |
| Postal Code | The location of the job to perform the delivery. For use when the address is split up. Part of Line Address. |
| City | The location of the job to perform the delivery. For use when the address is split up. Part of Line Address. |
| State | The location of the job to perform the delivery. For use when the address is split up. Part of Line Address. |
| Country | The location of the job to perform the delivery. For use when the address is split up. Part of Line Address. |
| Company Name | Recipient or Sender’s company name. |
| Deliver To / Collect From | The name of Recipient. |
| Last Name | The last name of Recipient. |
| Phone No. | Recipient’s phone number. |
| Notify Email | Email of recipient. |
| Sender Phone No. | Sender’s phone number. |
| Fax No. | Recipient’s fax number. |
| Address Latitude | The latitude of the address. To be used with Address Longitude. |
| Address Longitude | The longitude of the address. To be used with Address Latitude. |
| Job Time | The time of delivery that the driver is supposed to be performed. |
| Time Window | The time window for performing the job. |
| Zone | An area having a particular characteristic, purpose, or use, or subject to particular restrictions. |
| Instructions | Special information for your courier. |
| Service Type | Service type of the job. |
| Payment Mode | Mode of payment for the job. |
Plugin
This section is regarding the mapping of the fields between Detrack and Shopify plugins.| Plugin Name | Detrack | Field |
|---|---|---|
| Default Date | date | date |
Switching API version in Shopify
This section is regarding the re-setup / switching of API version in Shopify. Refer to: https://shopify.dev/docs/apps/webhooks/versioning For the webhook PUSH notifications in Shopify.- Navigate to Settings

- Click on Notifications

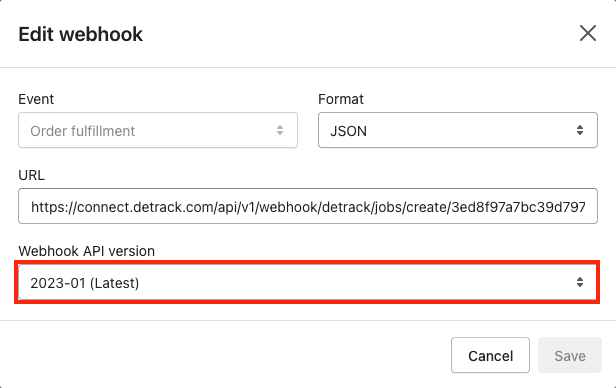
- Scroll down to the Webhooks section > Edit the existing entry.

- Select and choose the latest stable version > Save.


